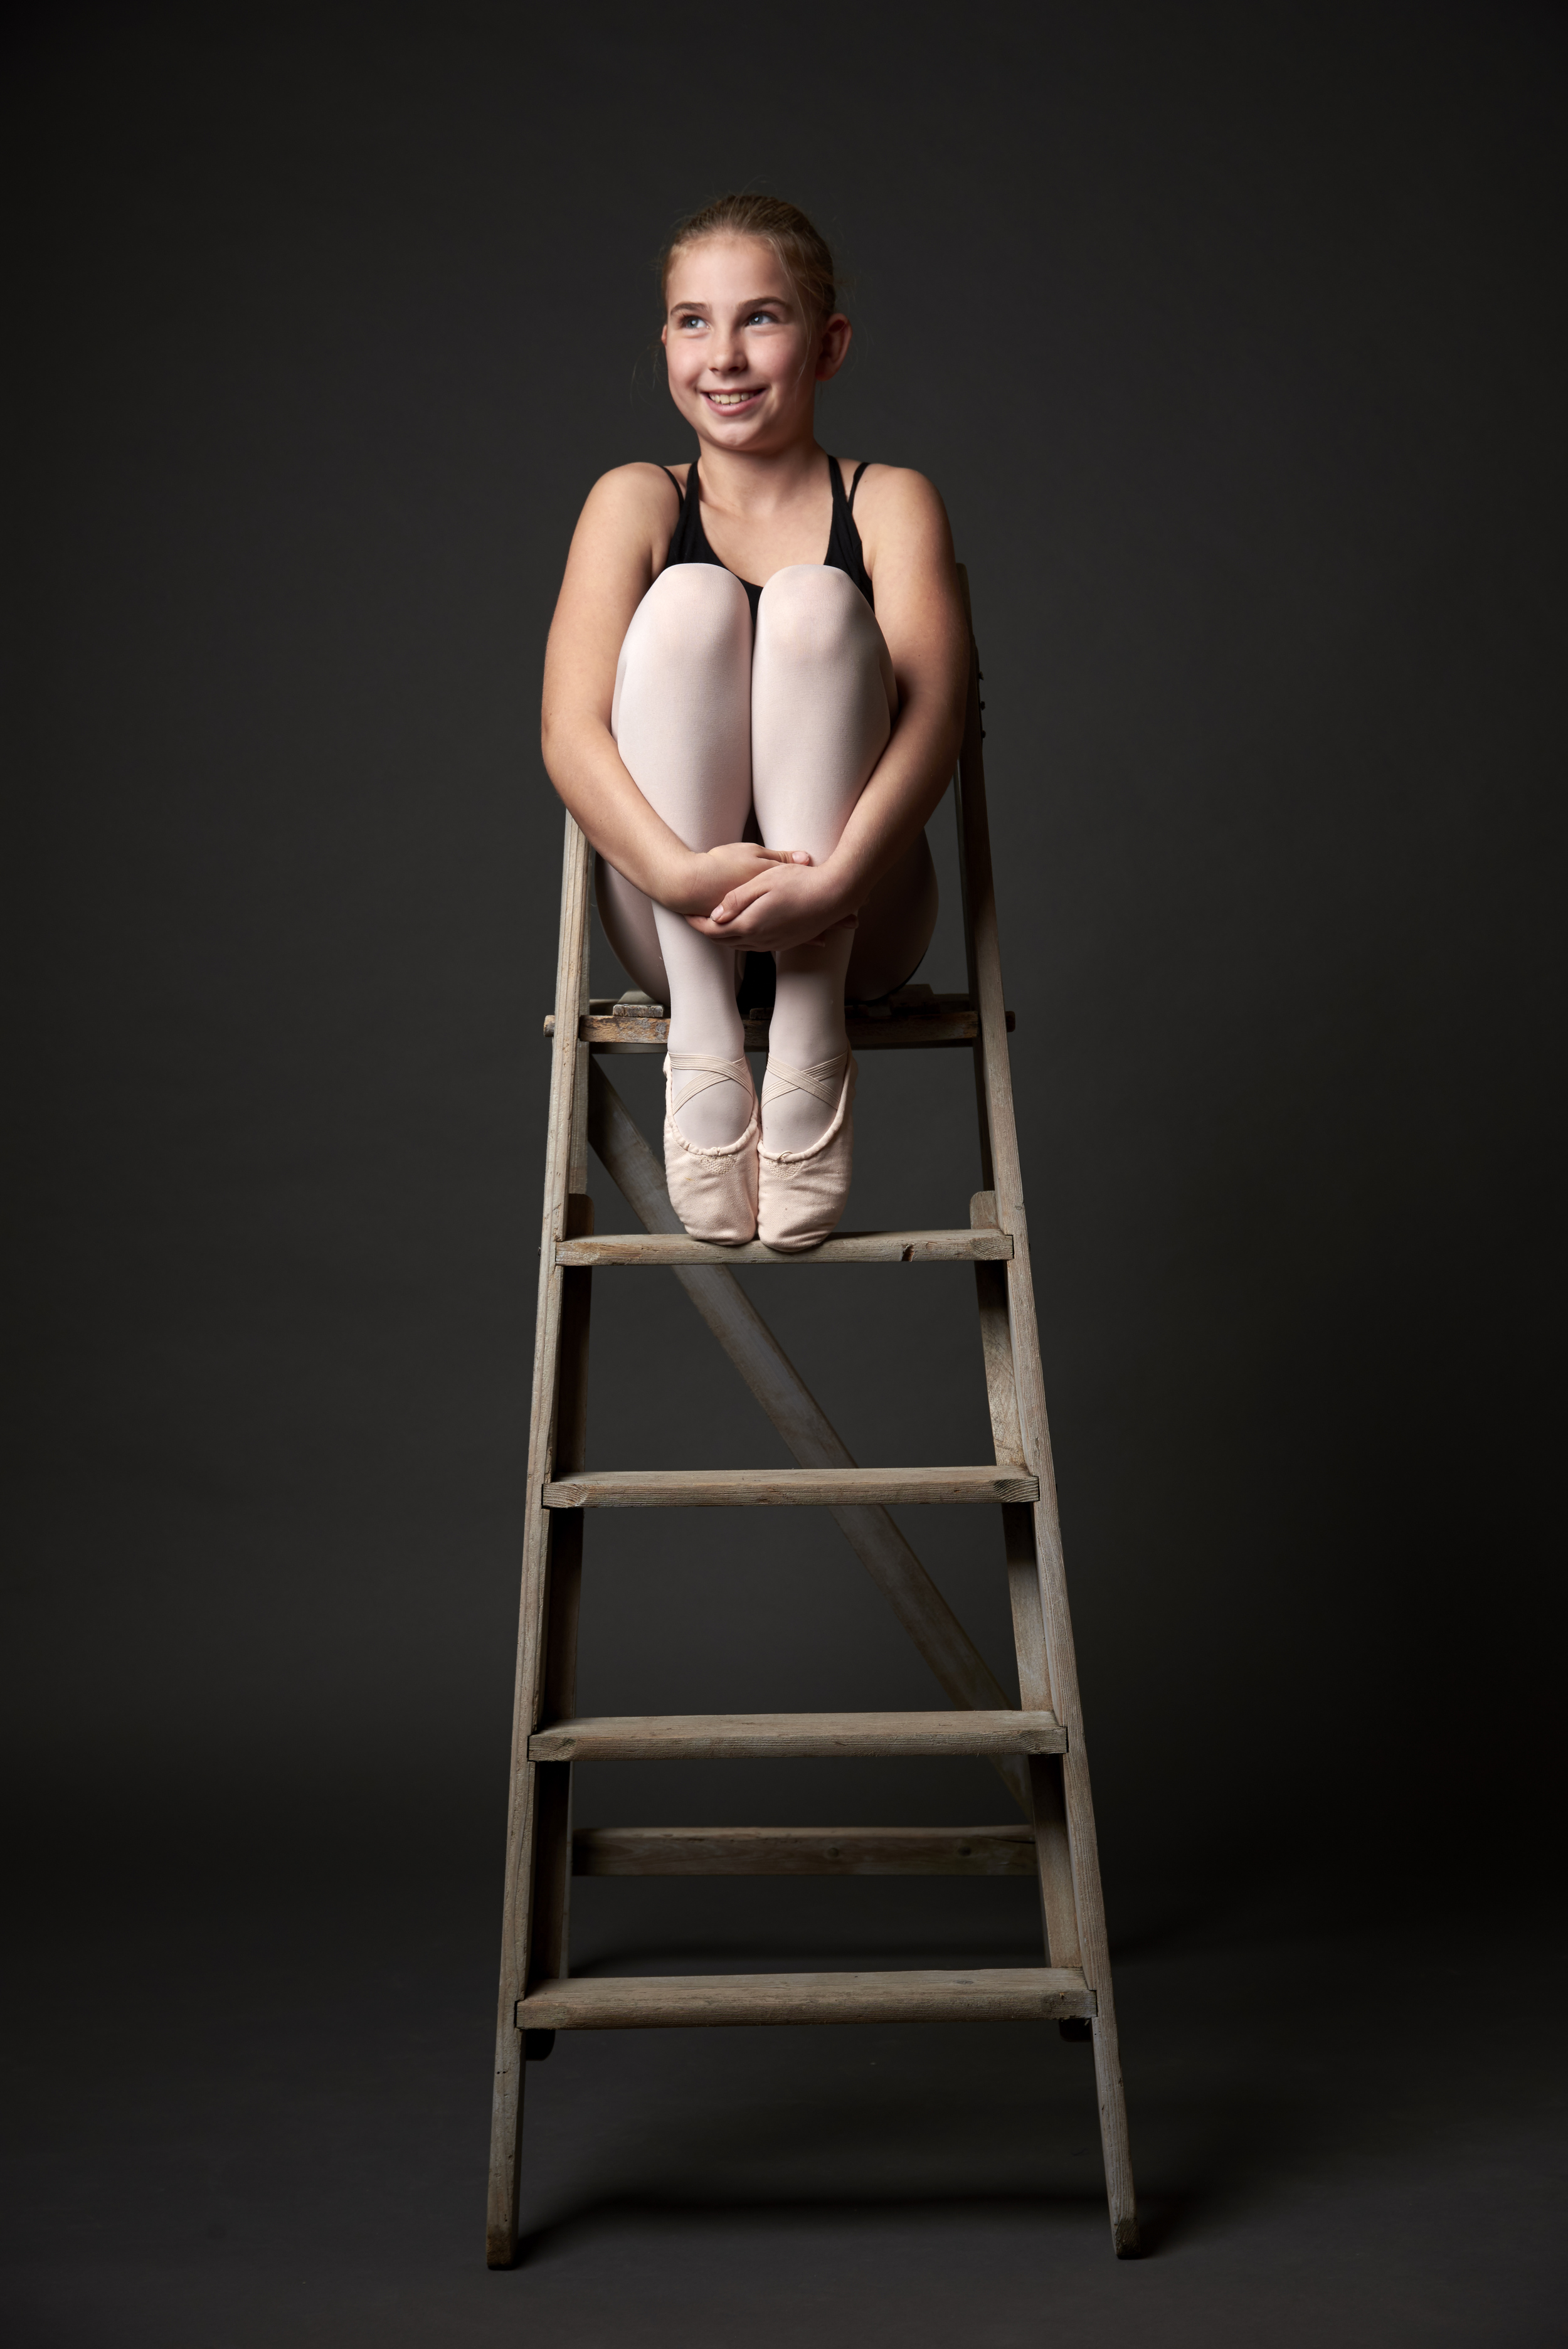
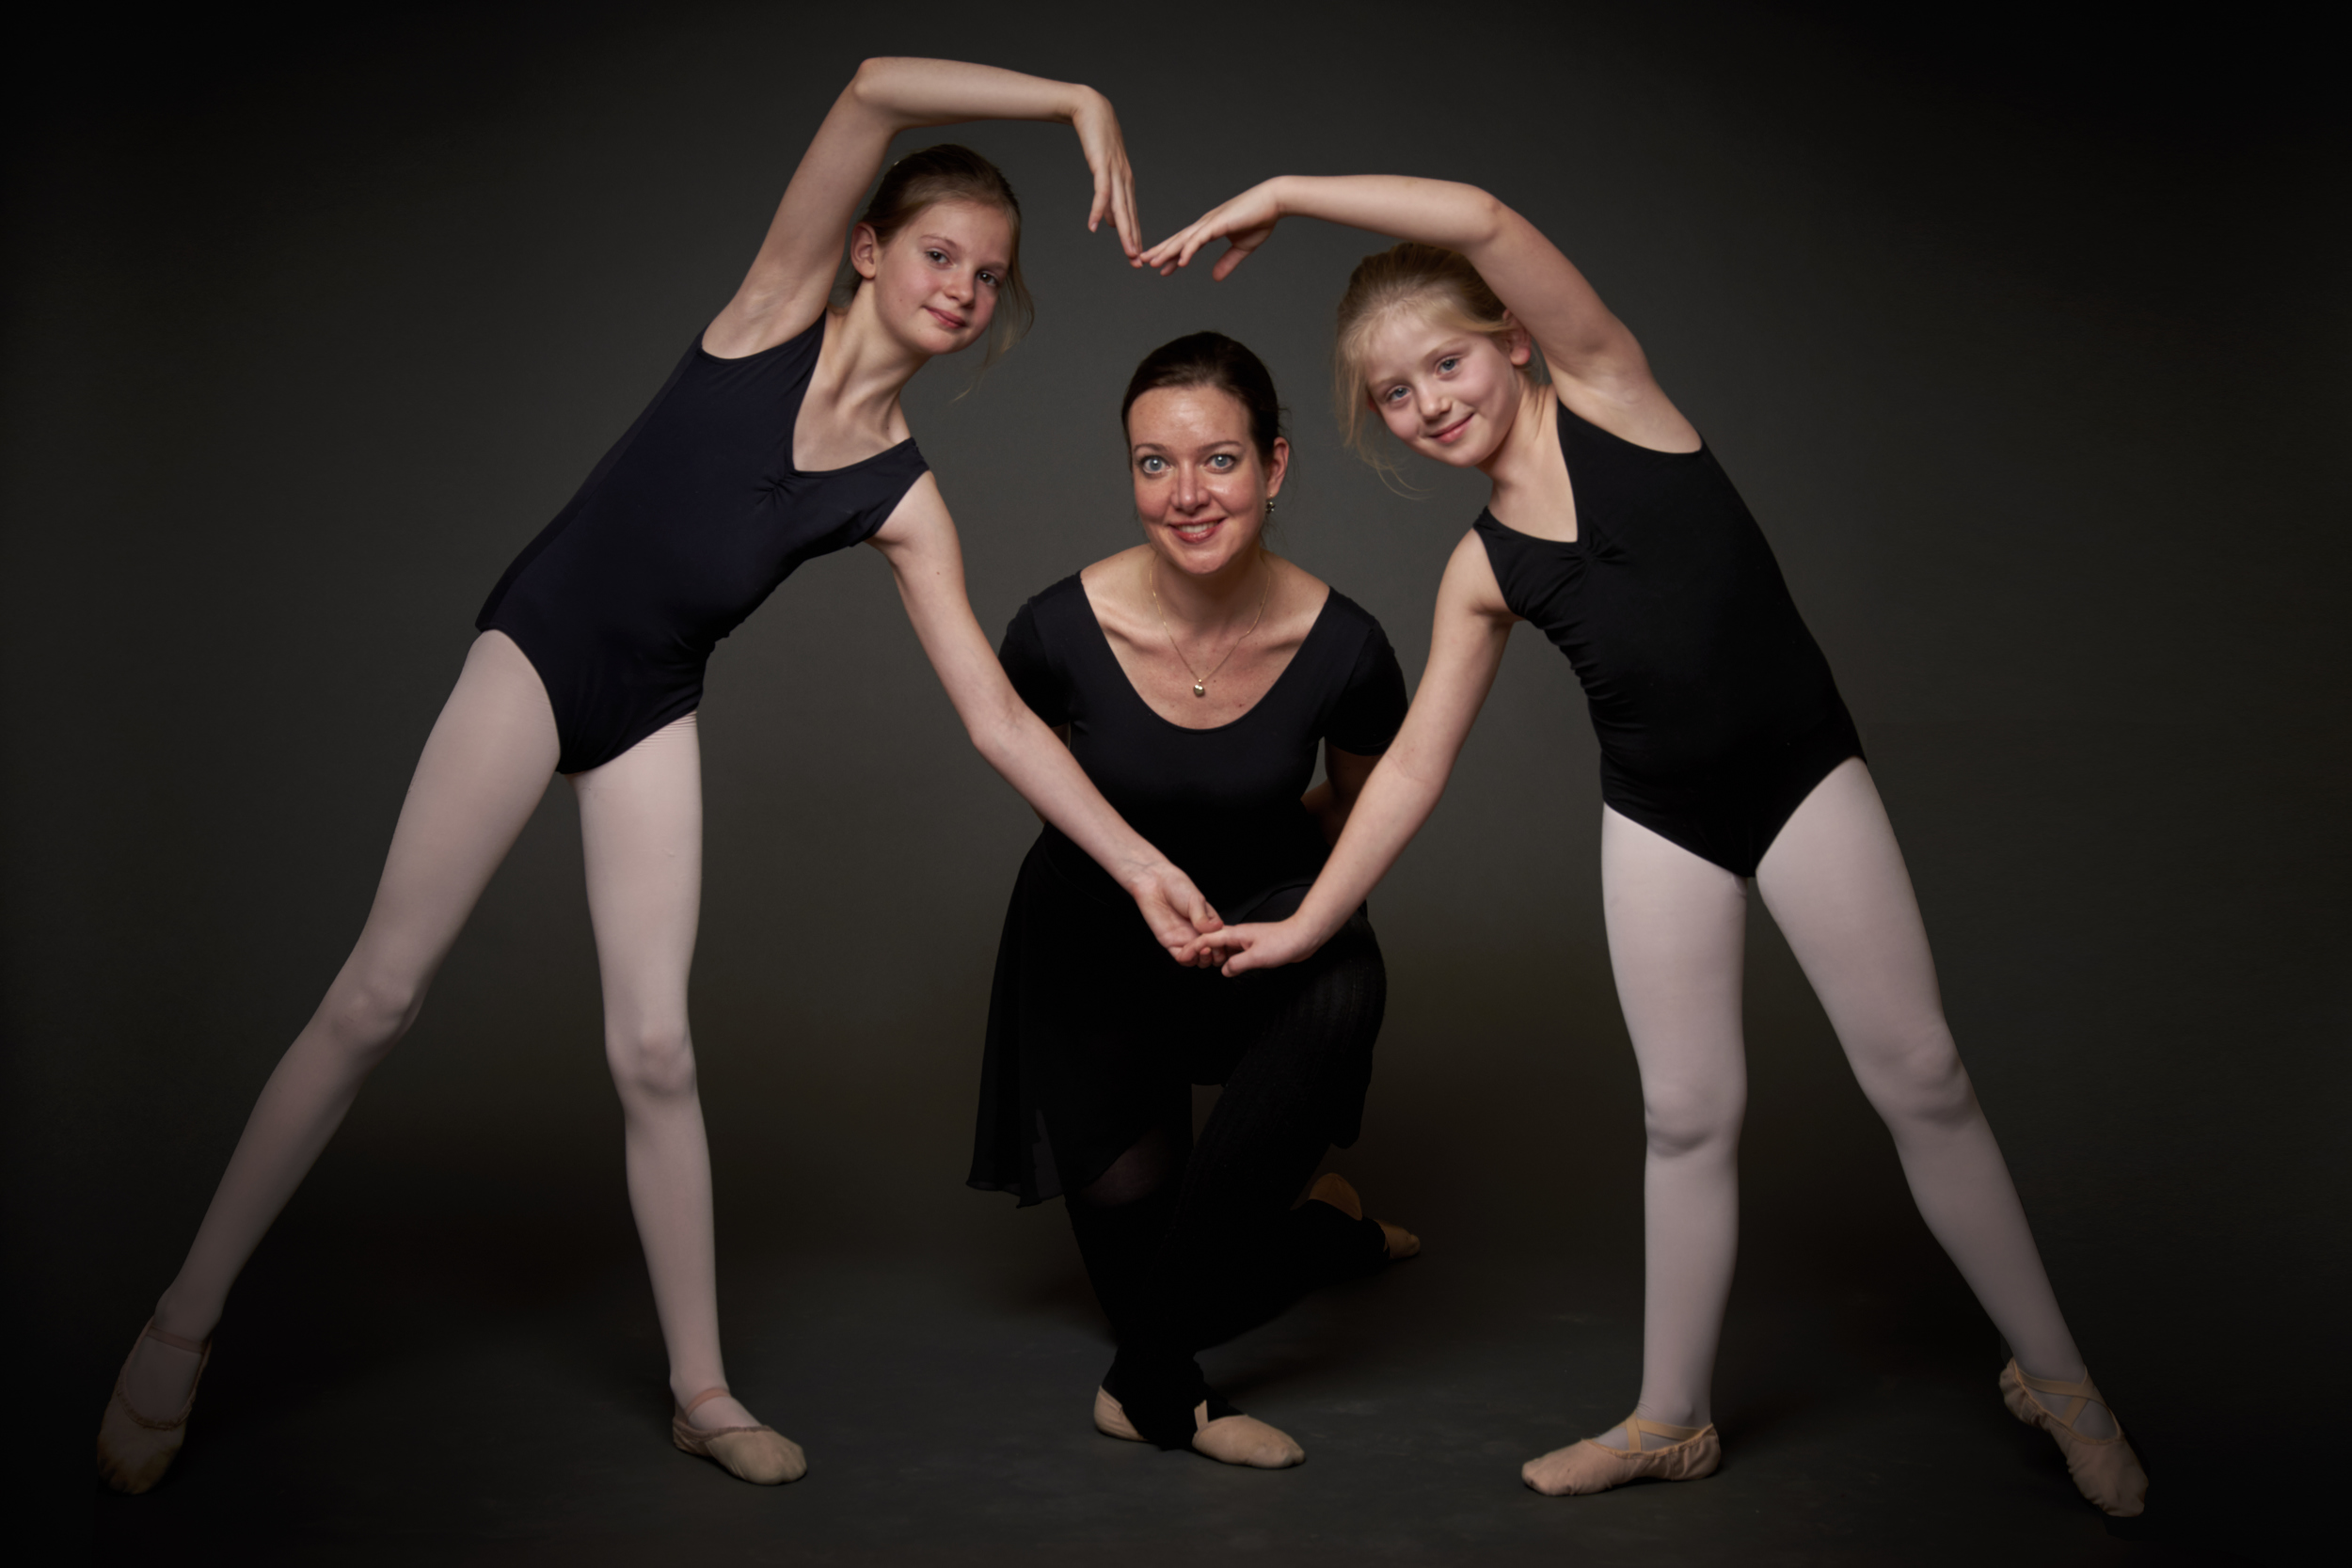
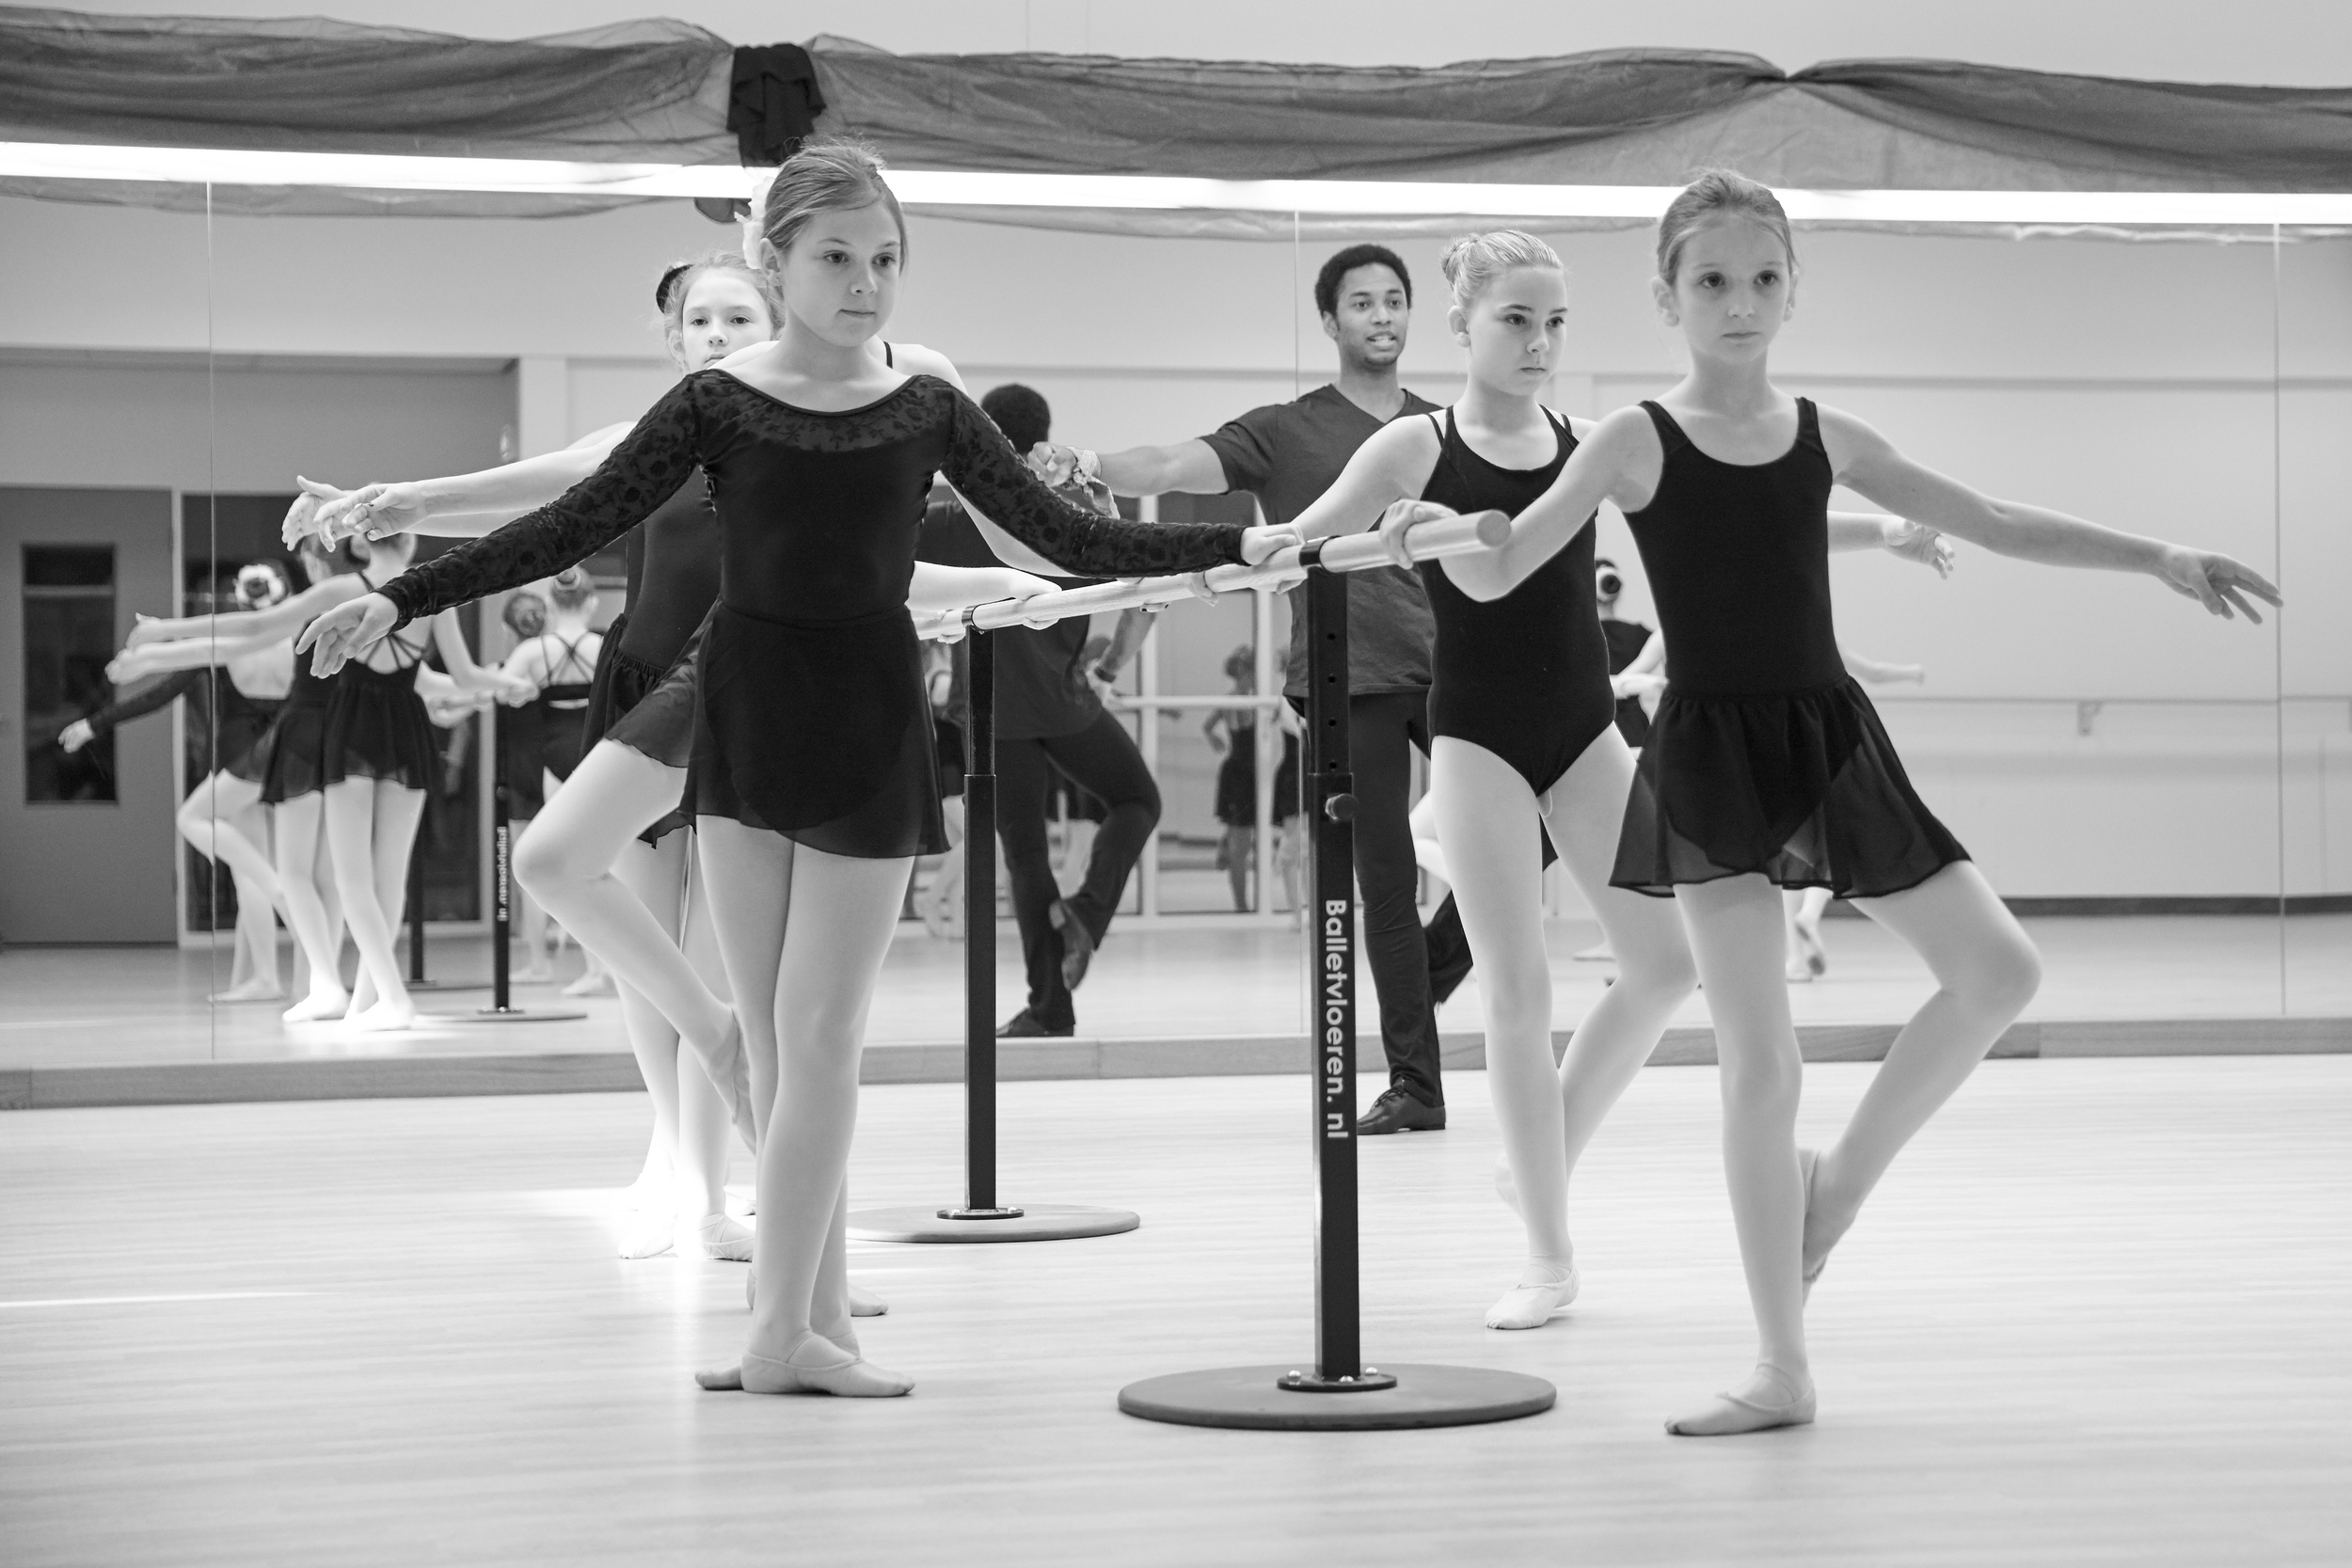
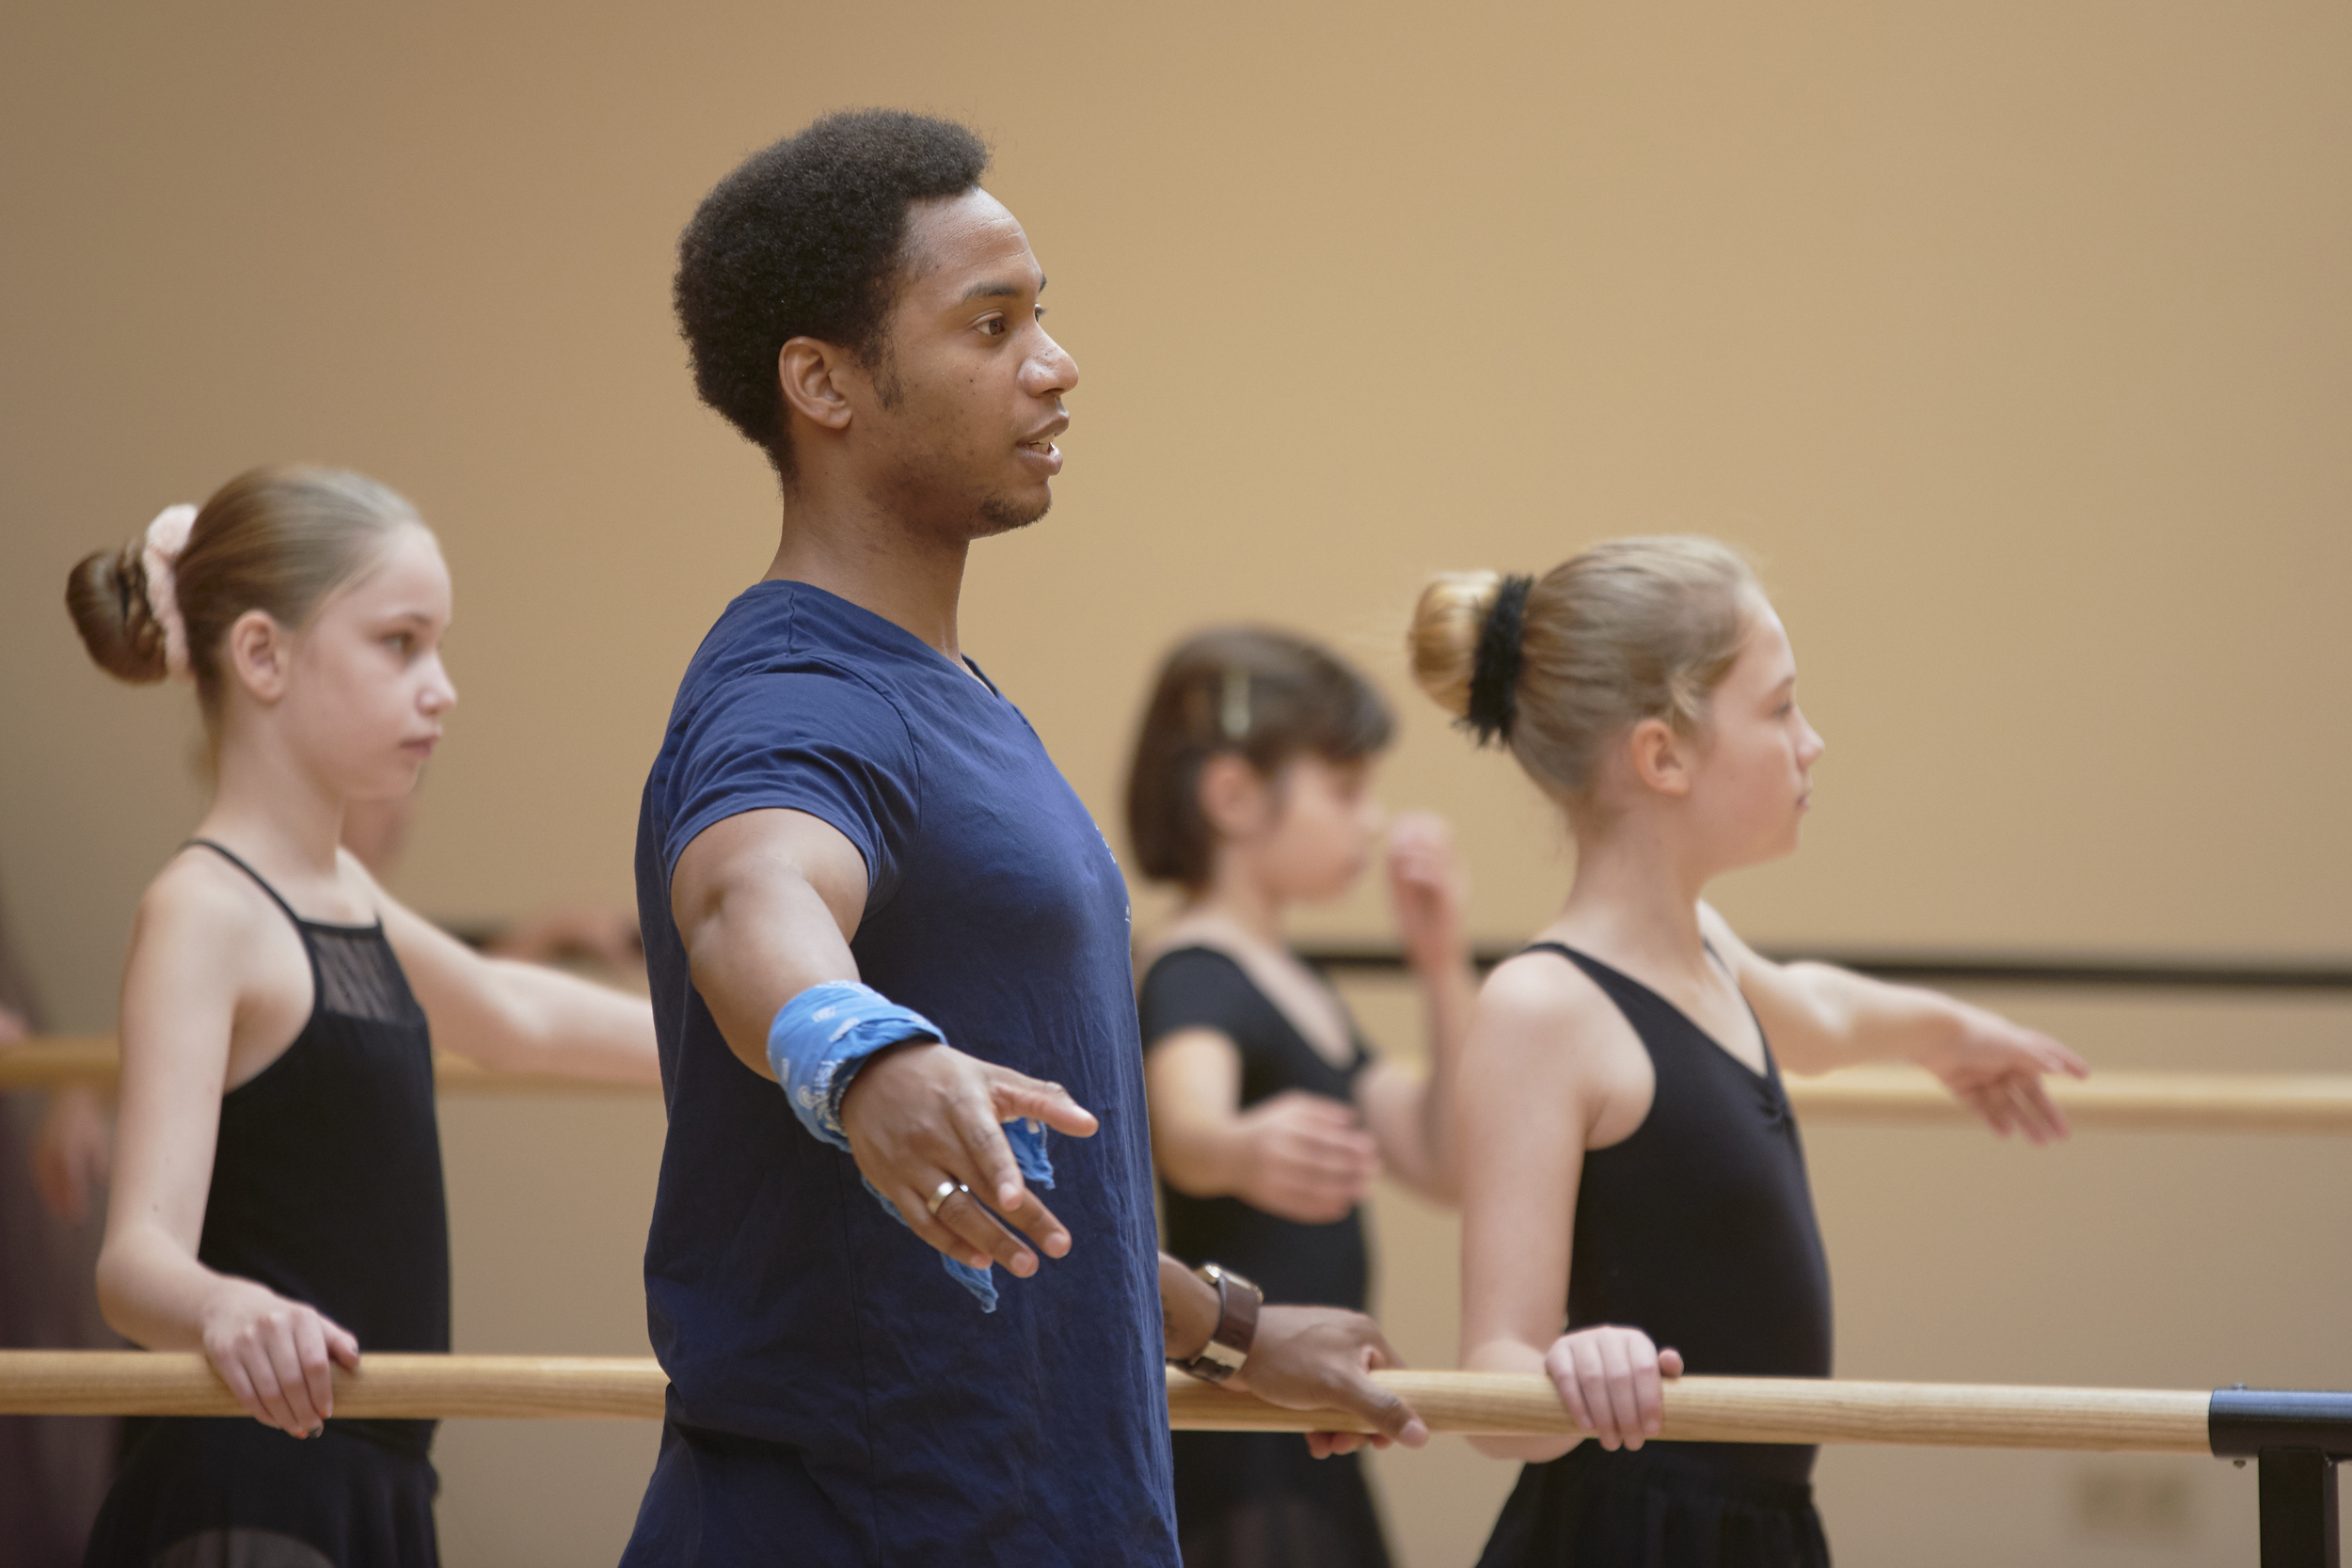
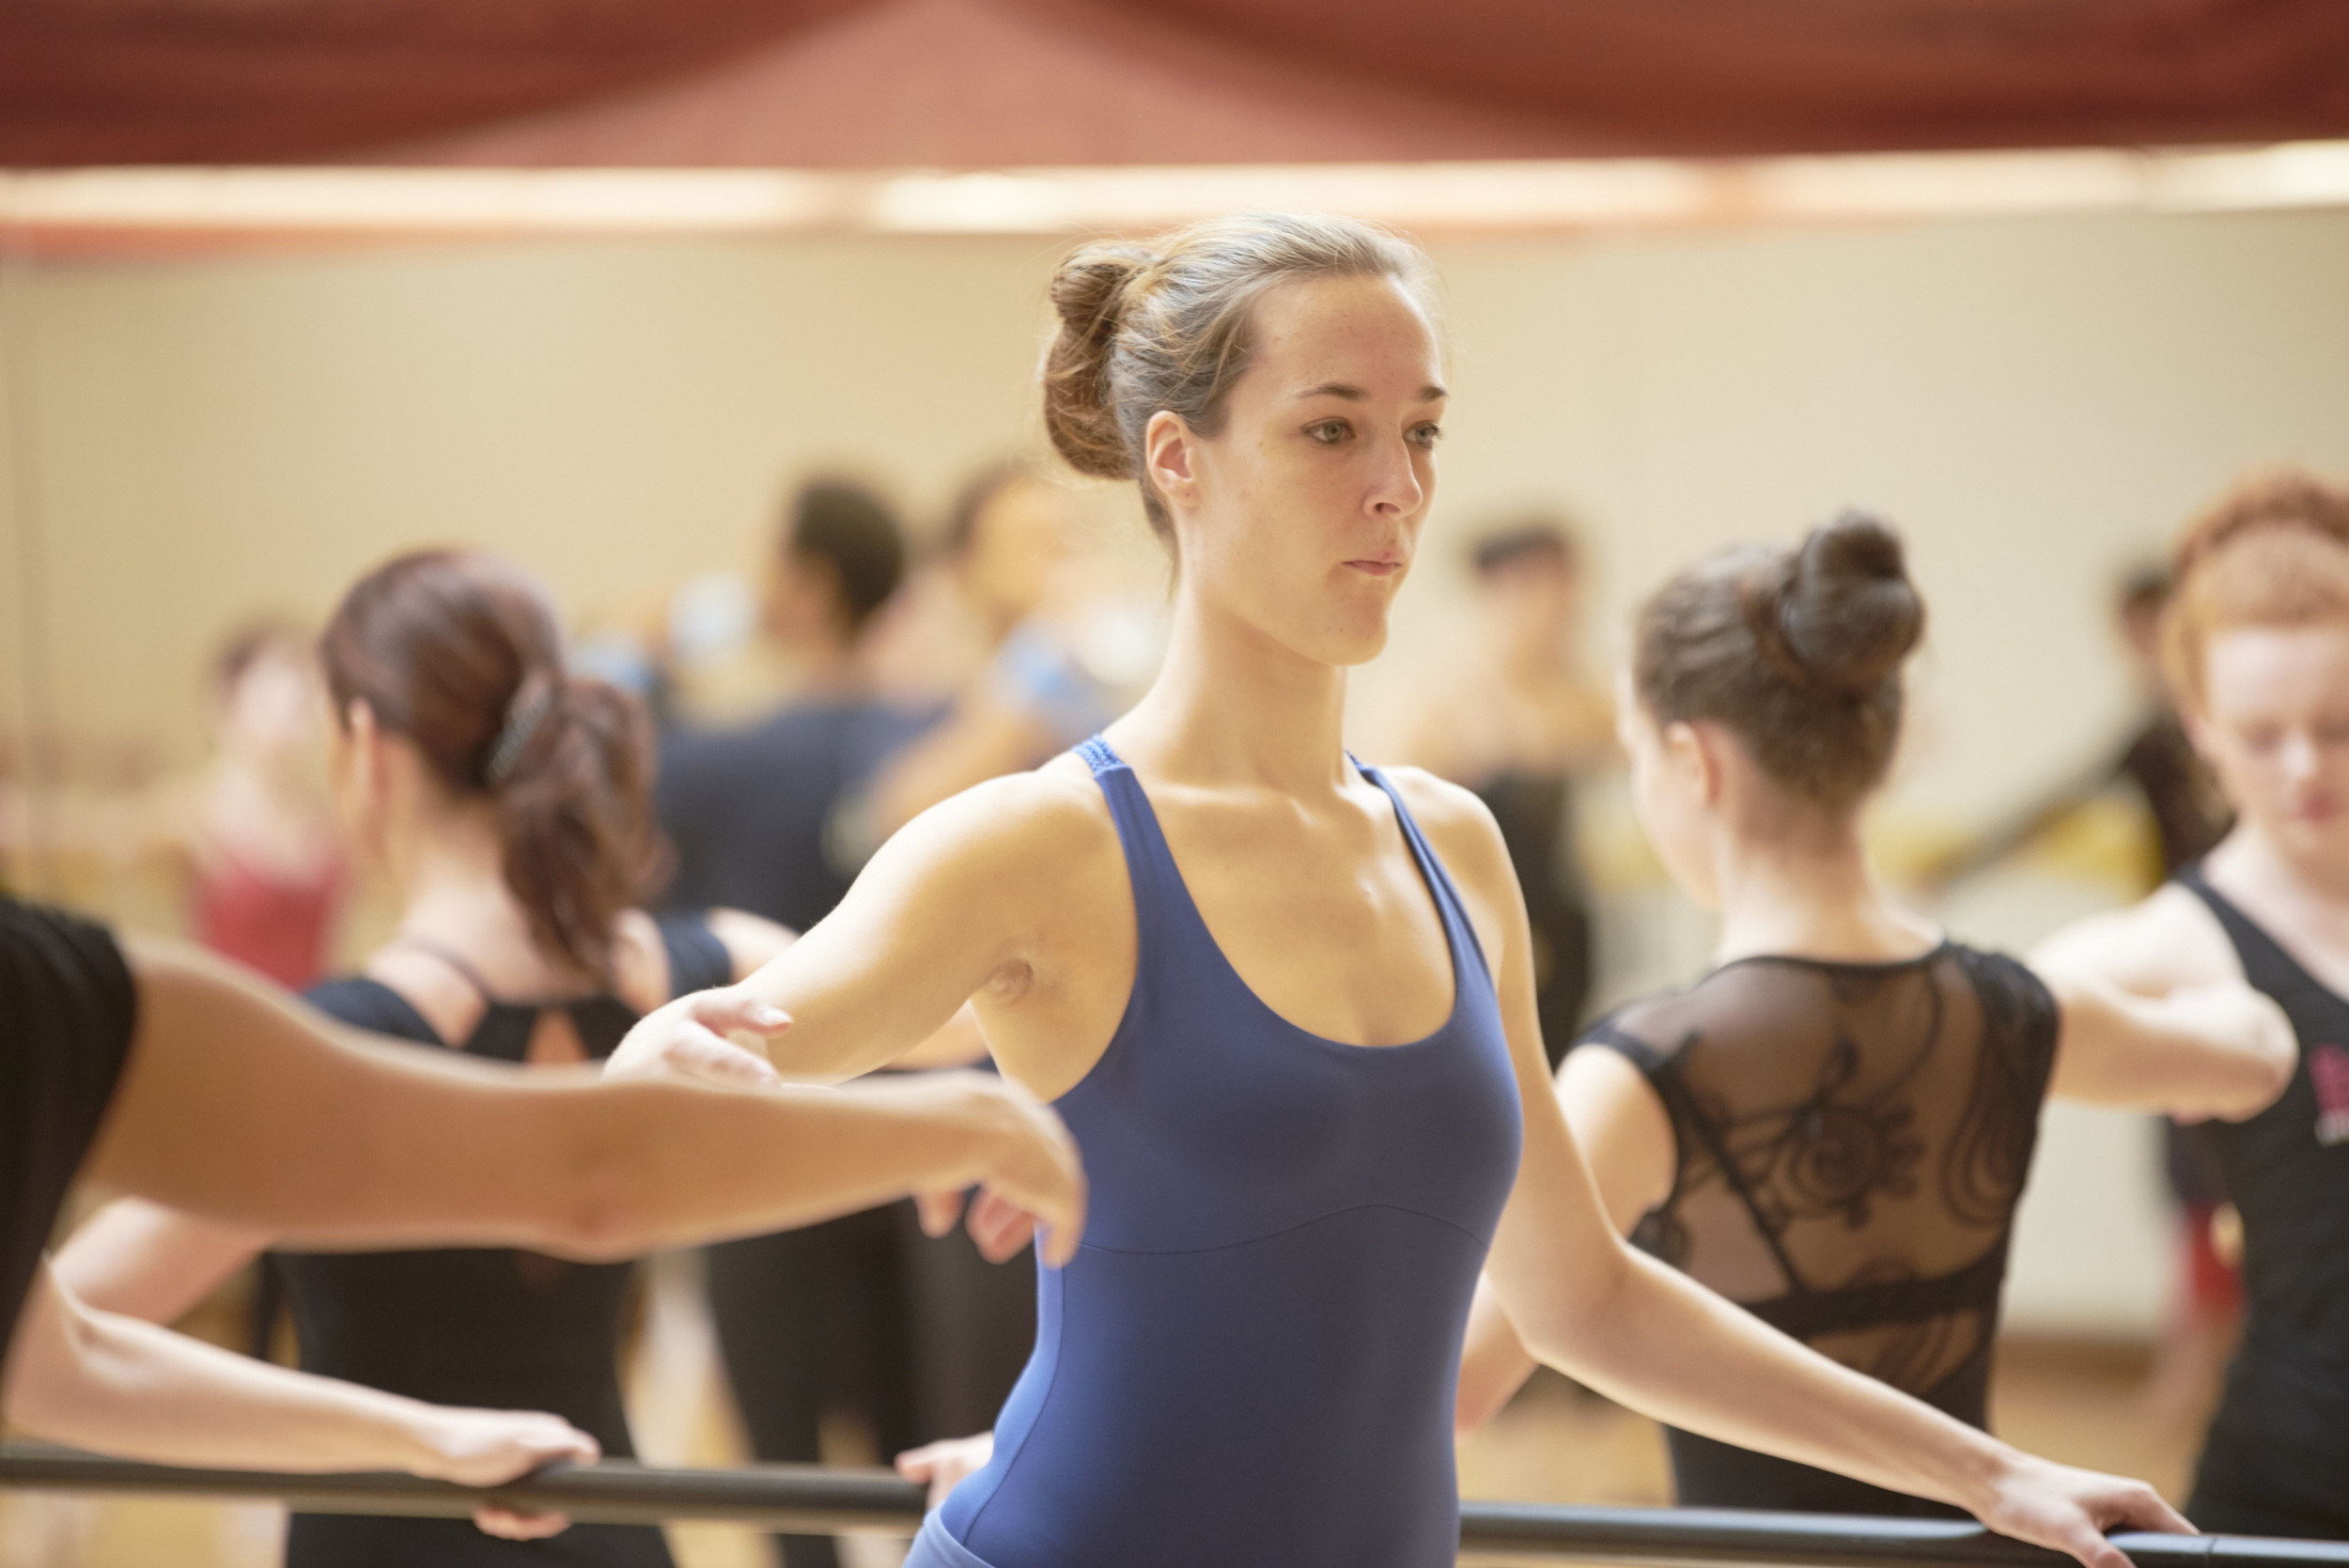
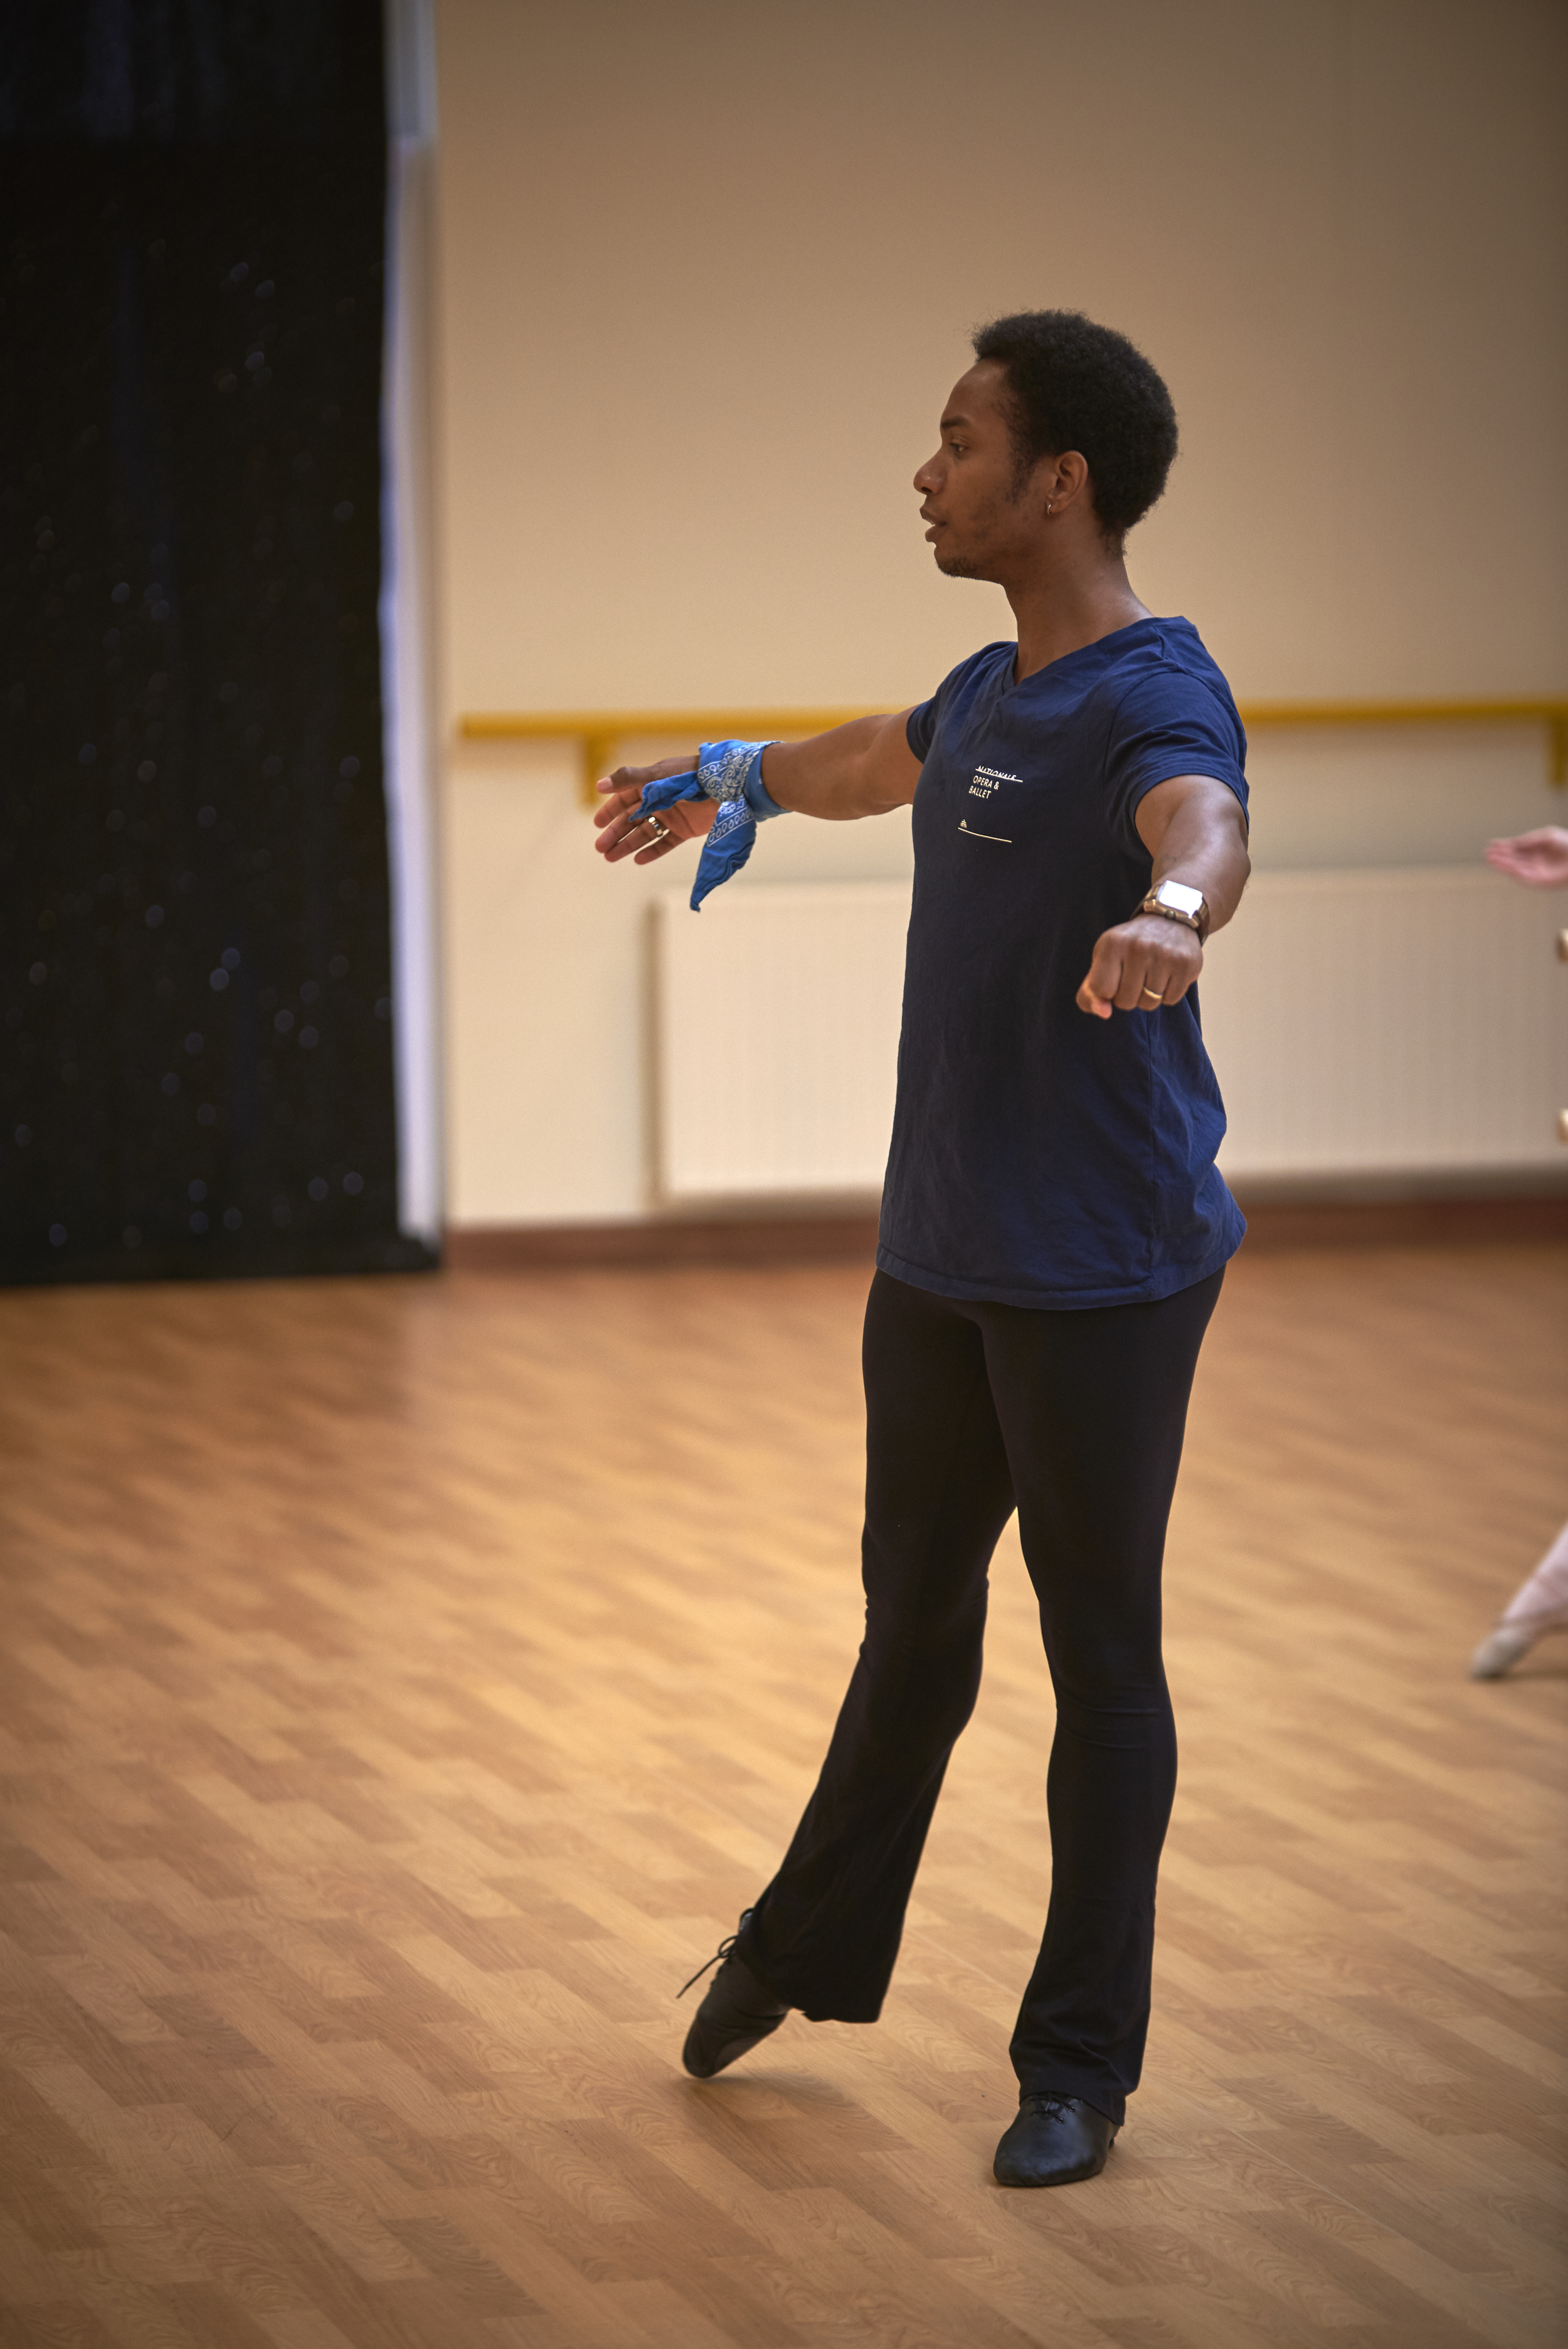
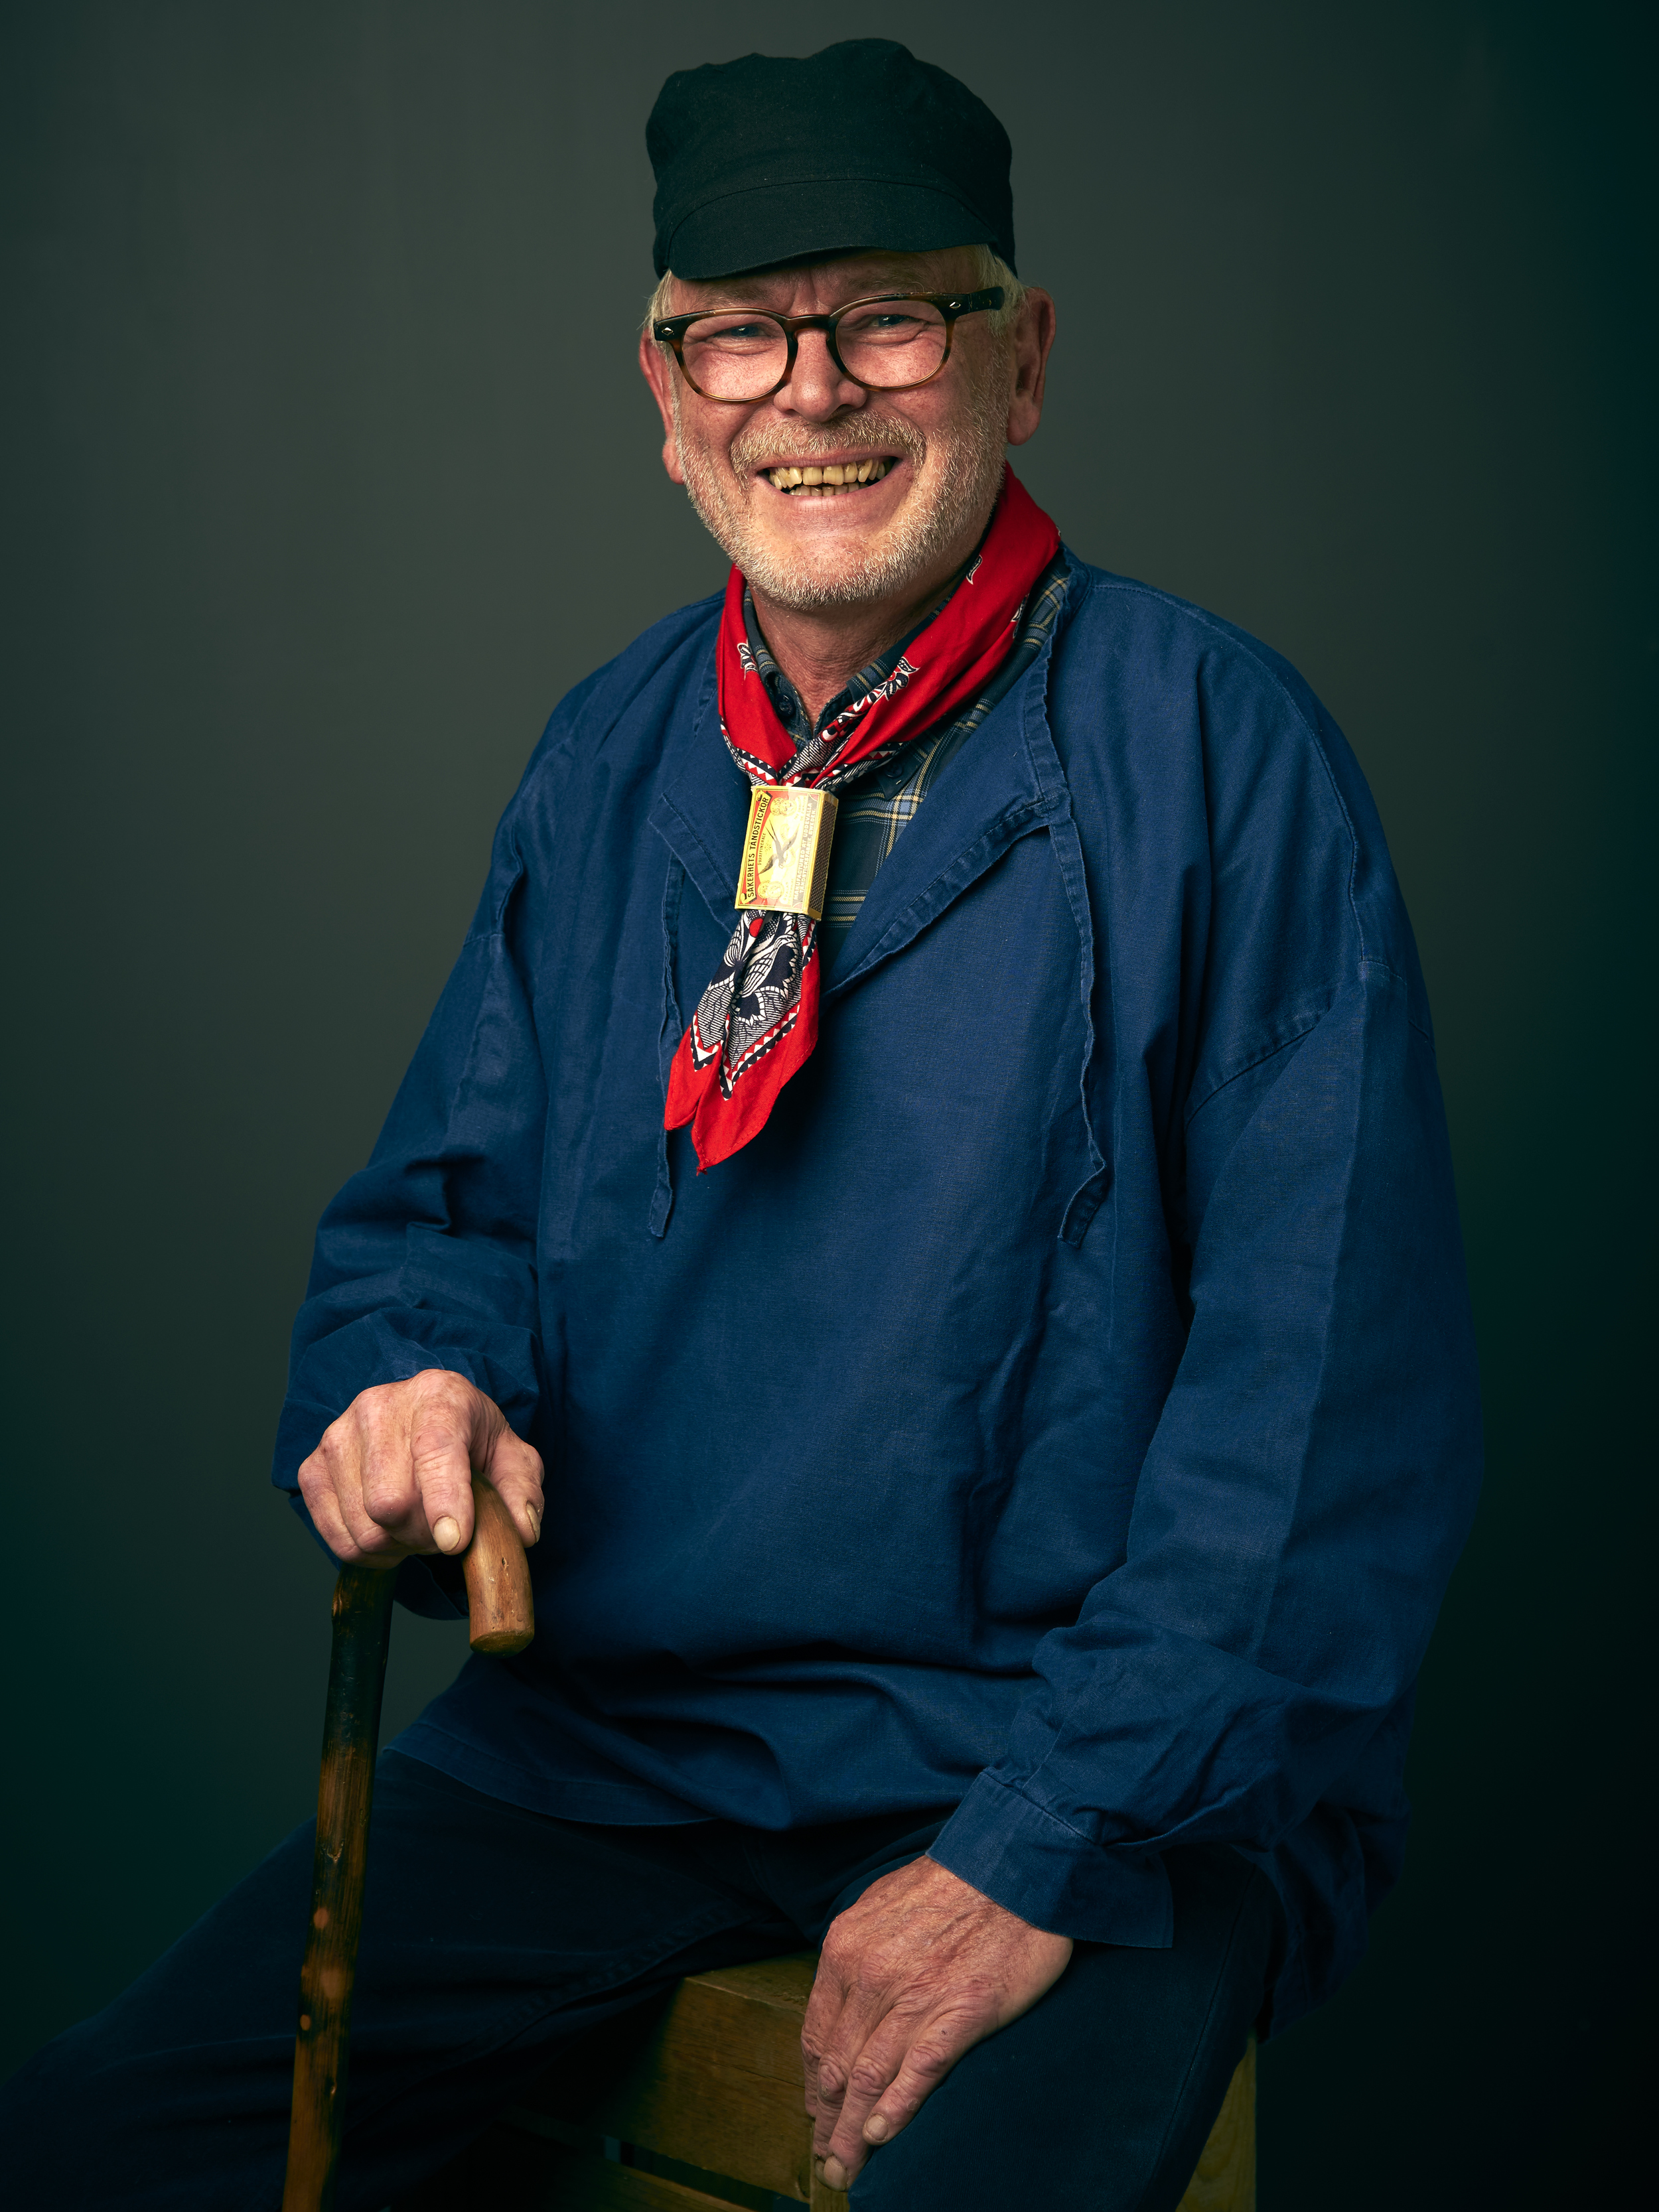
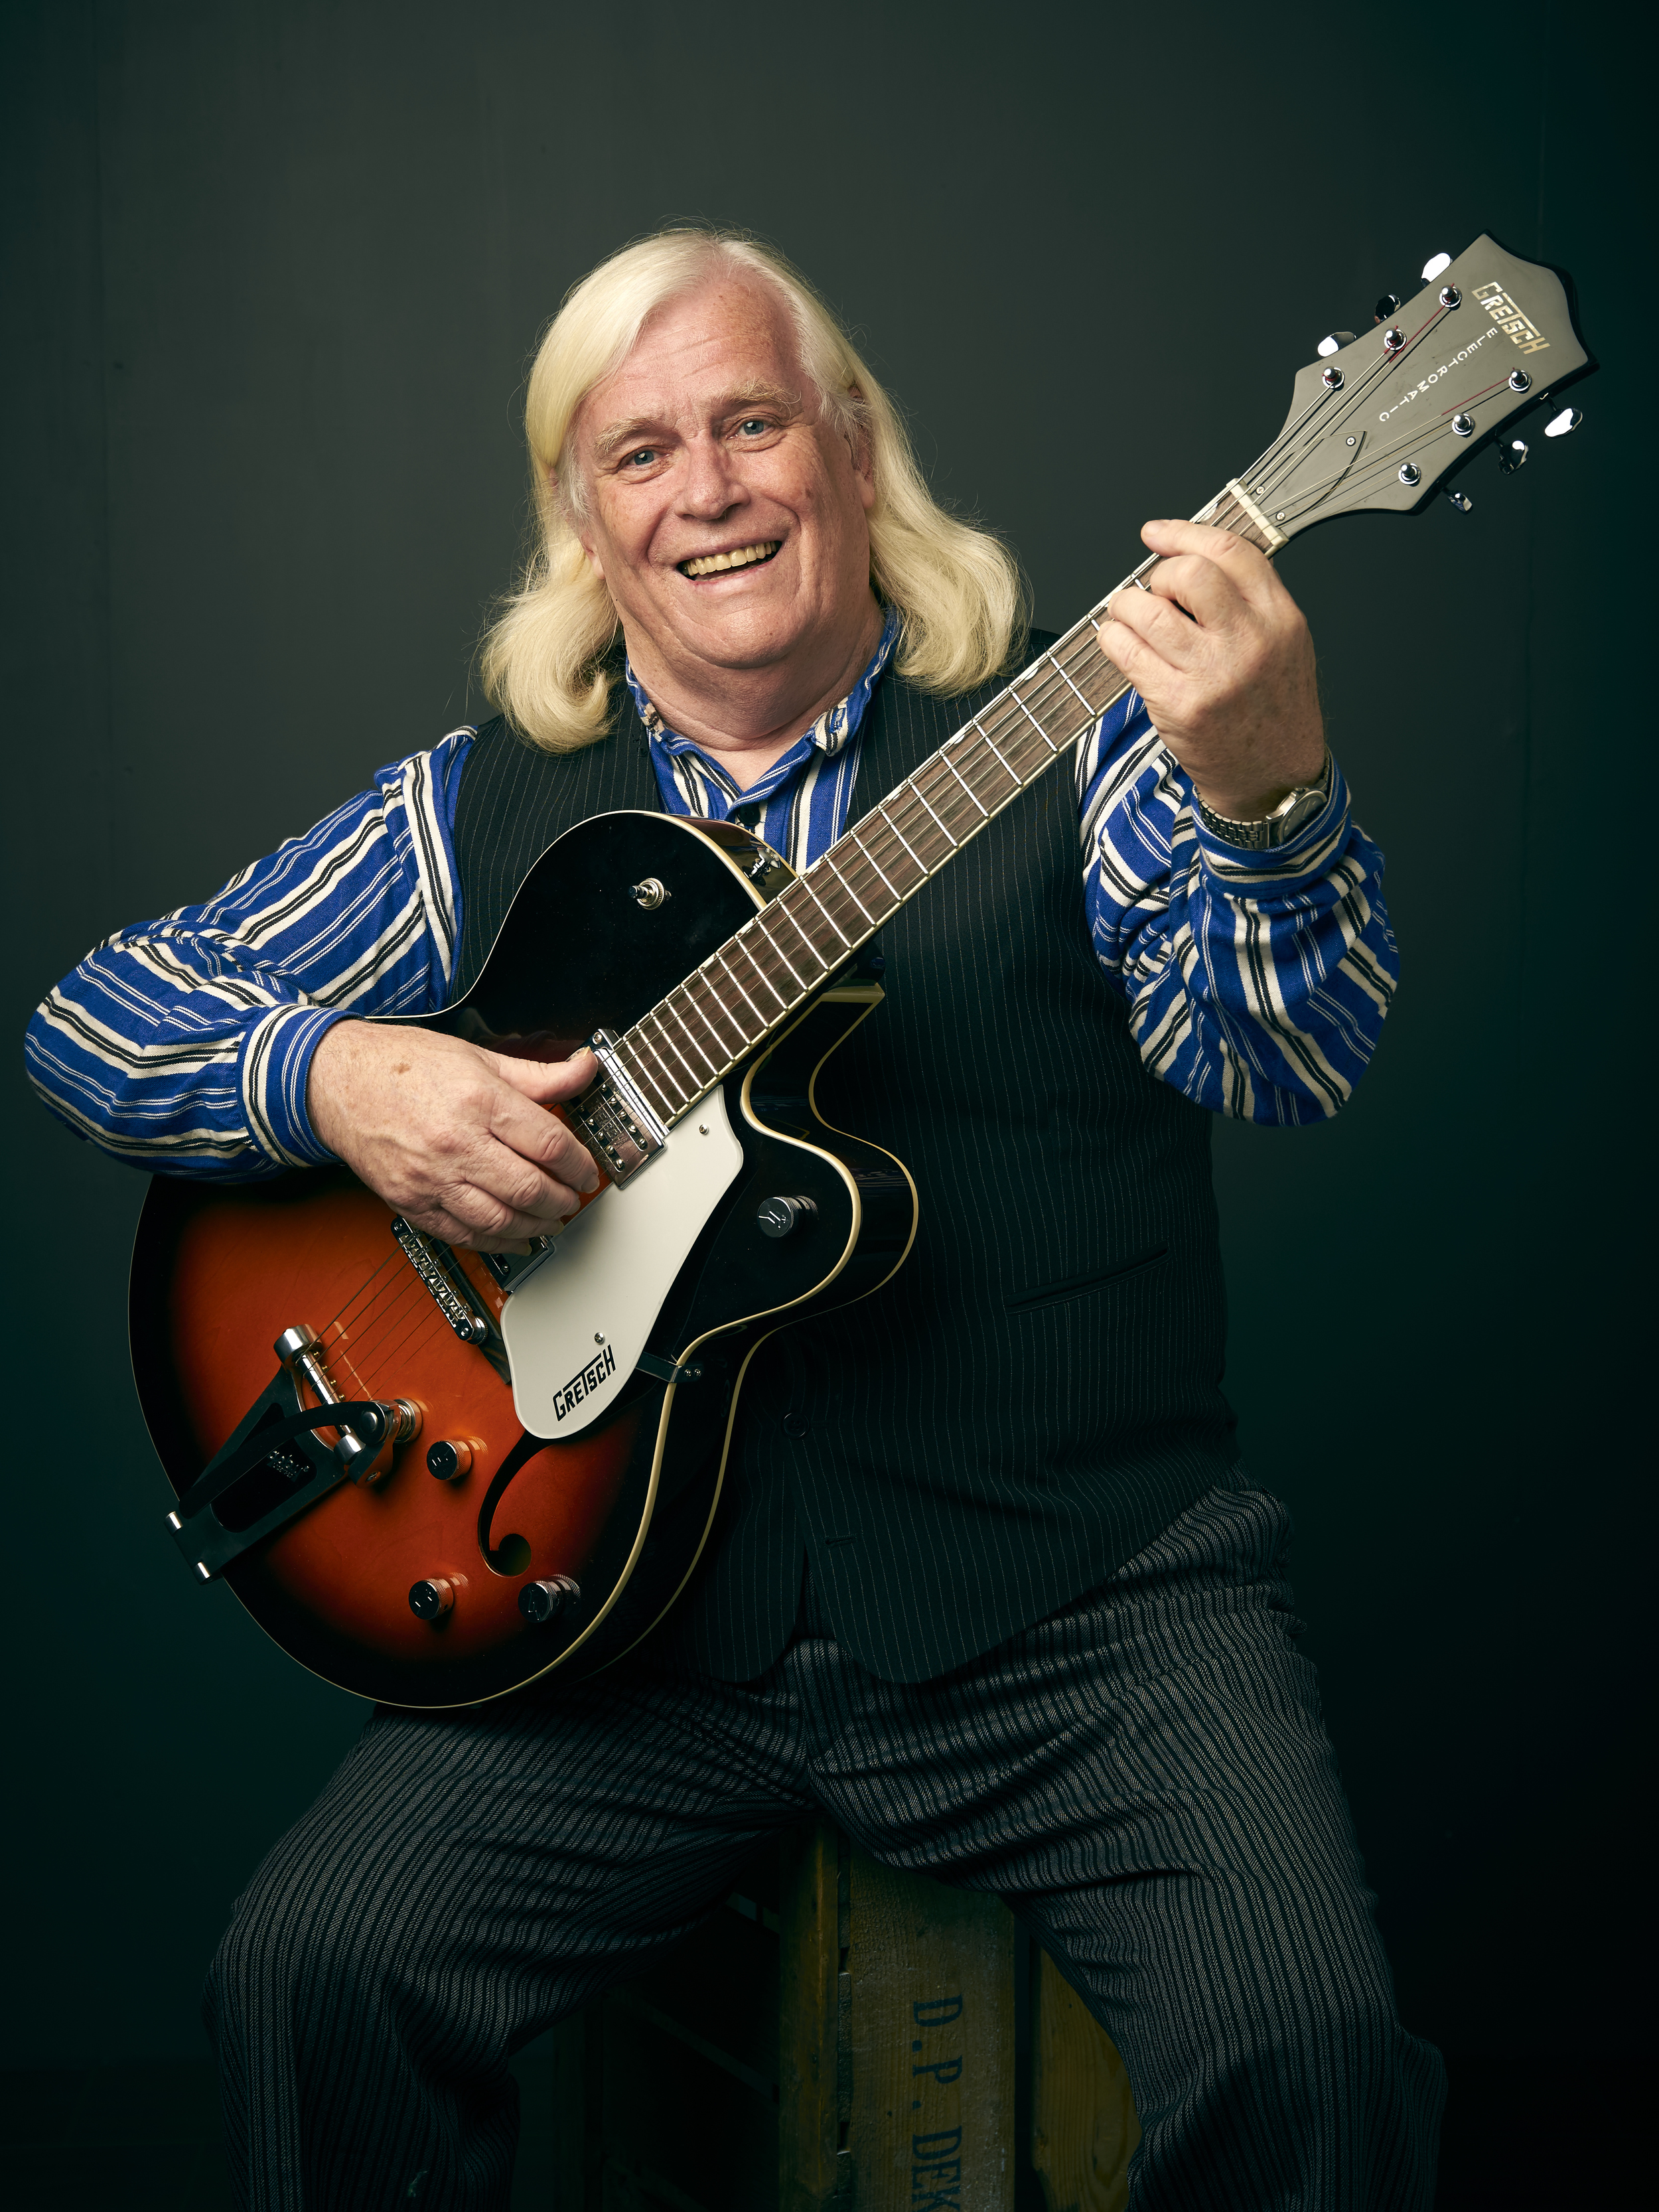
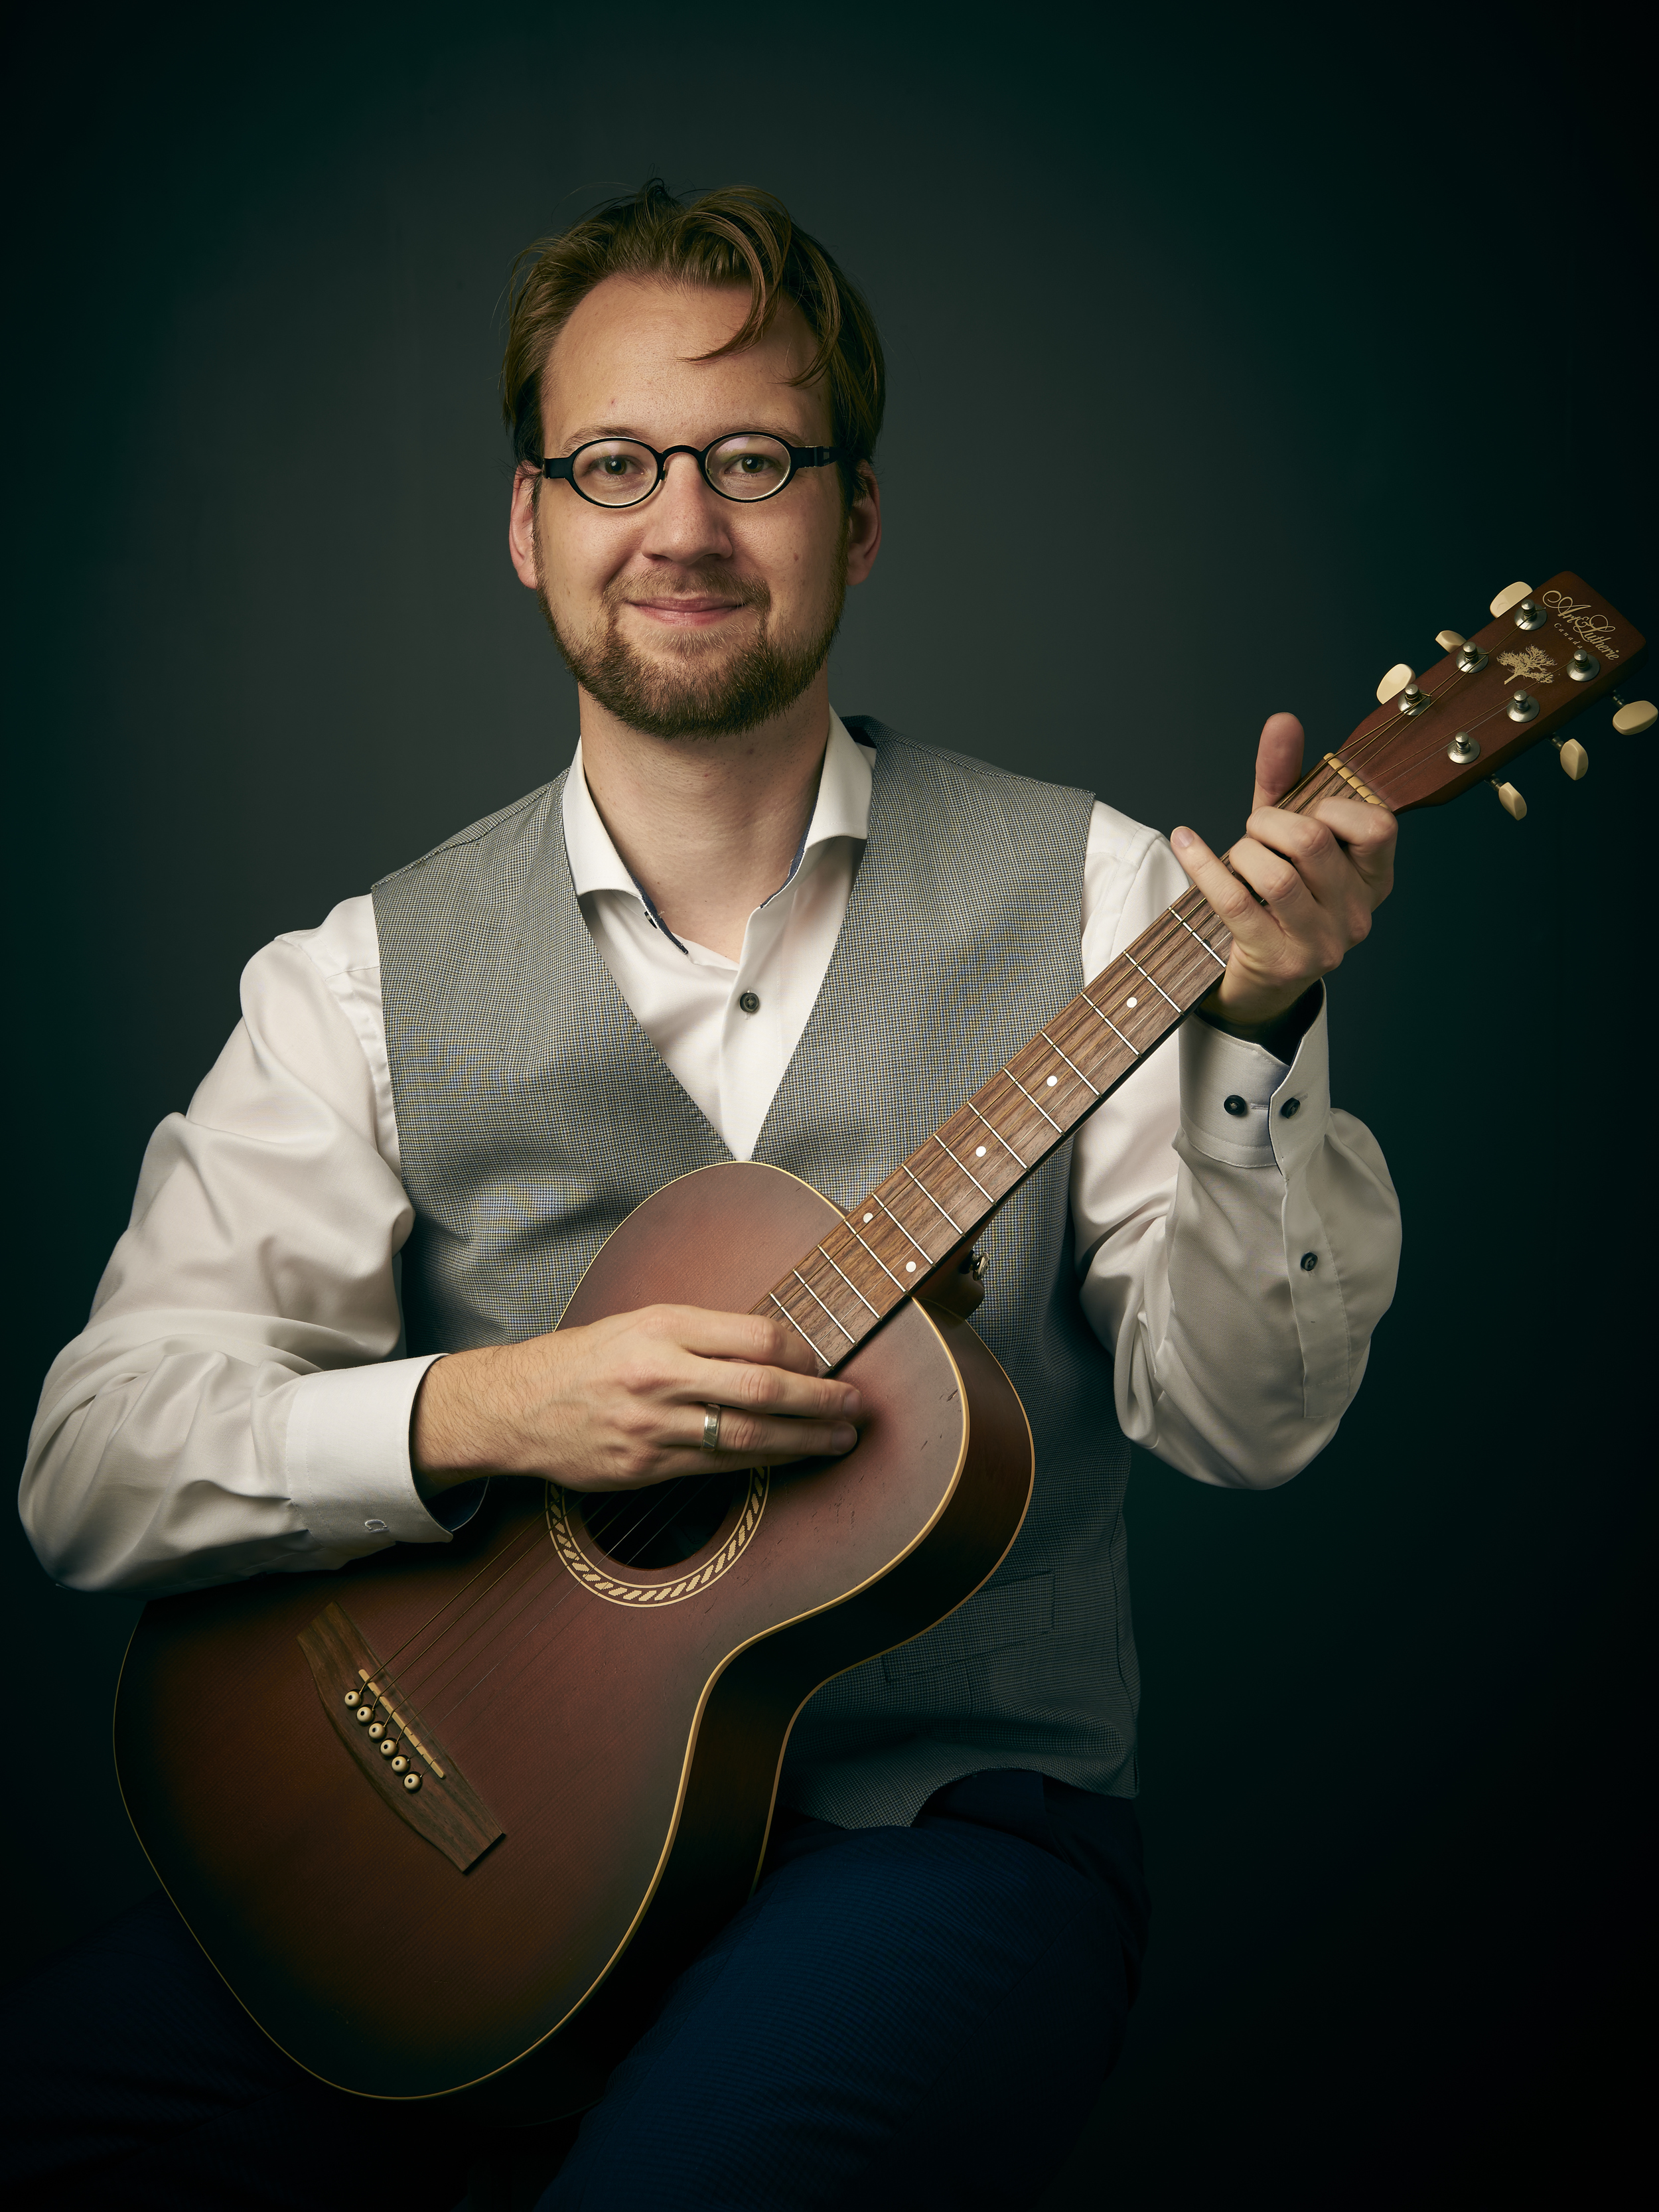
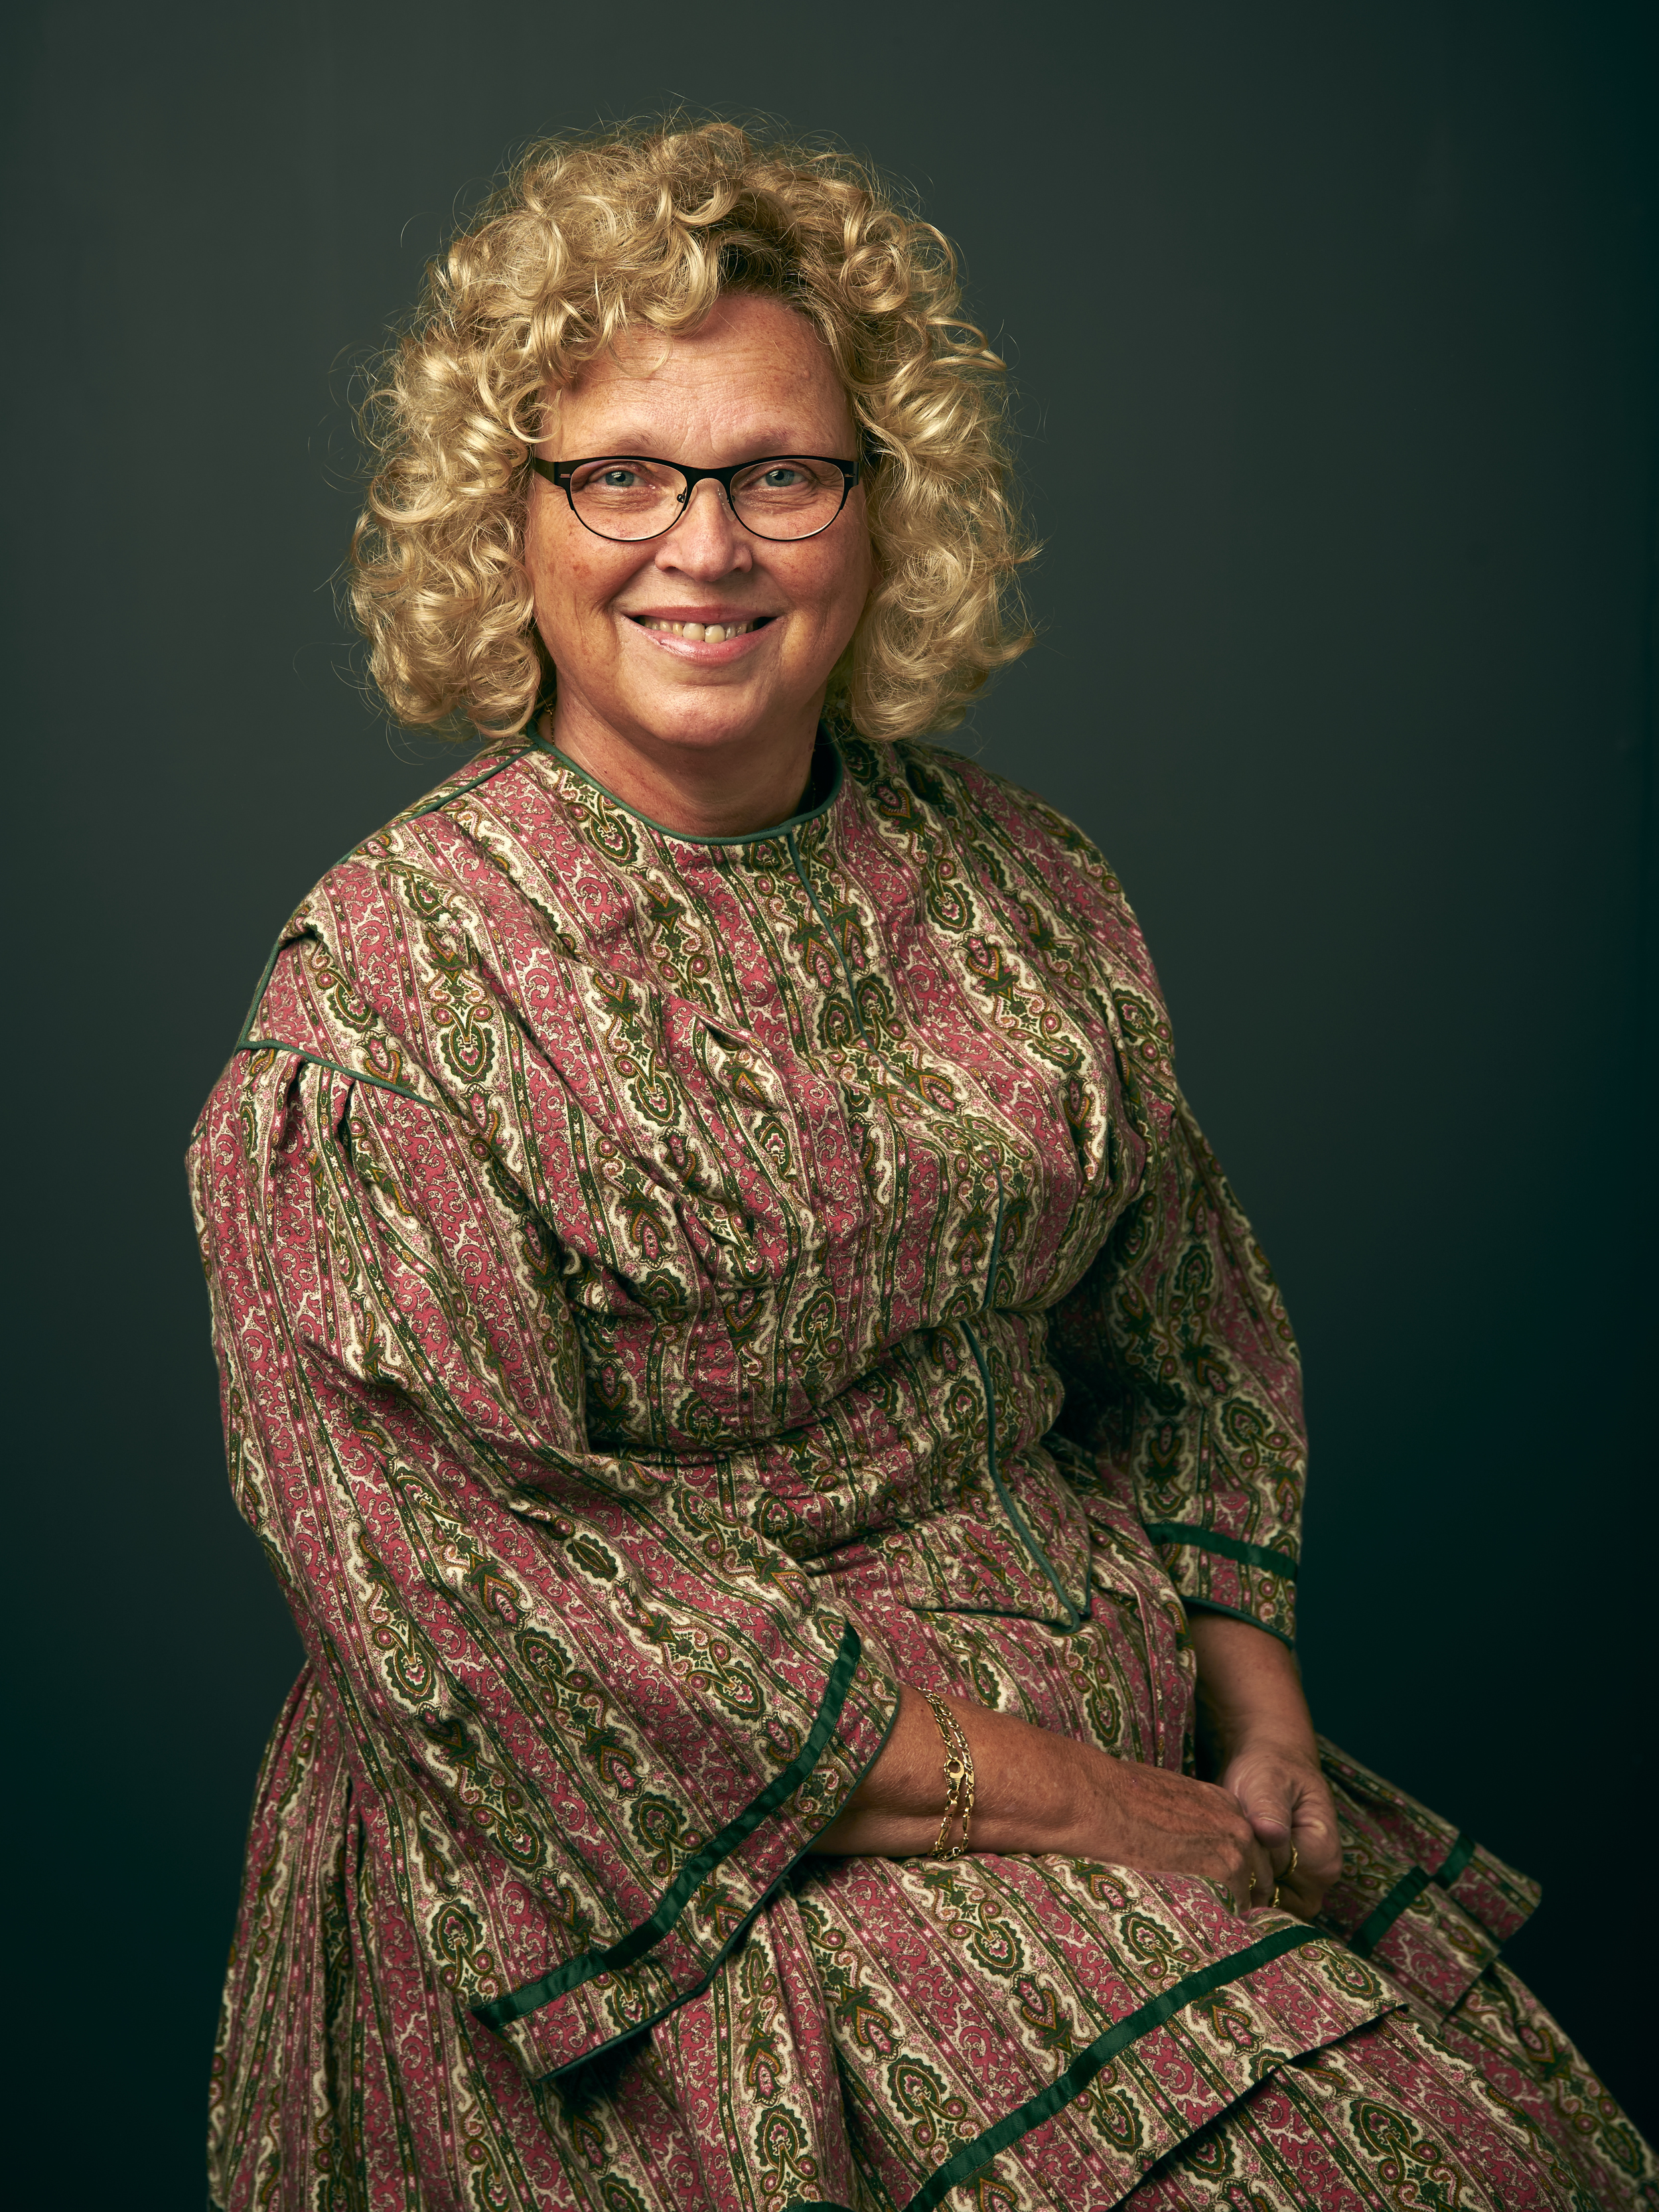
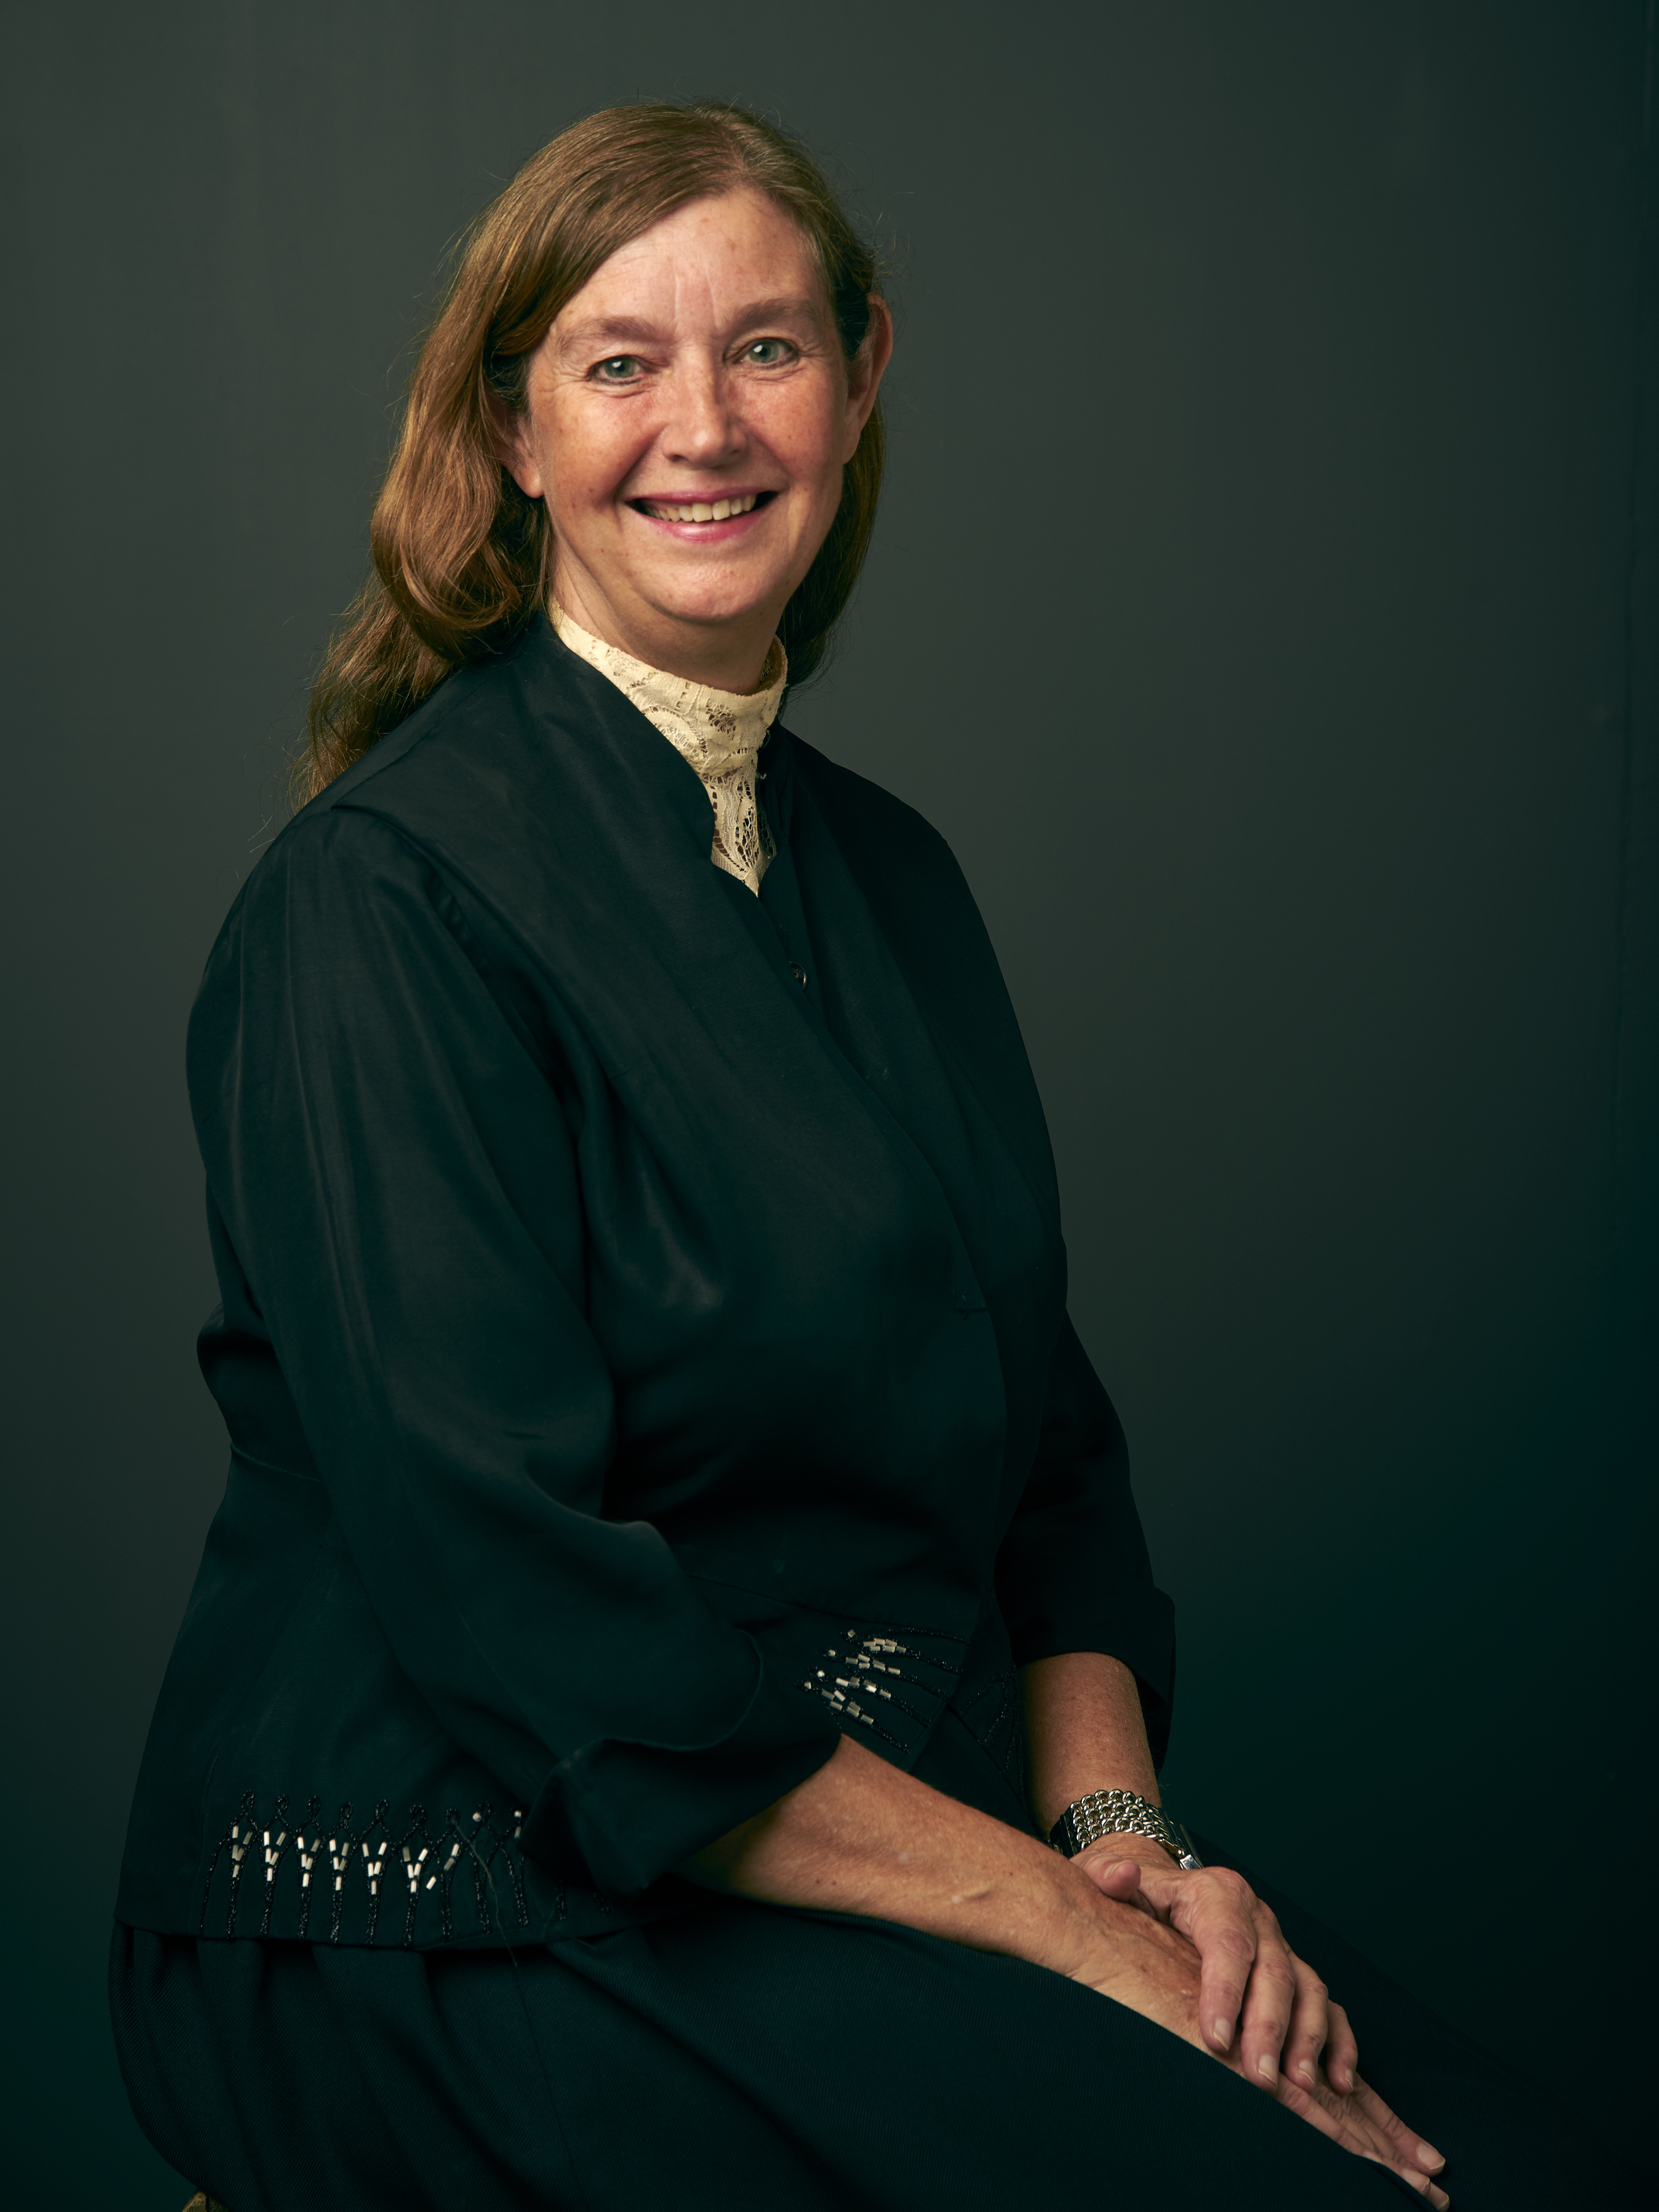
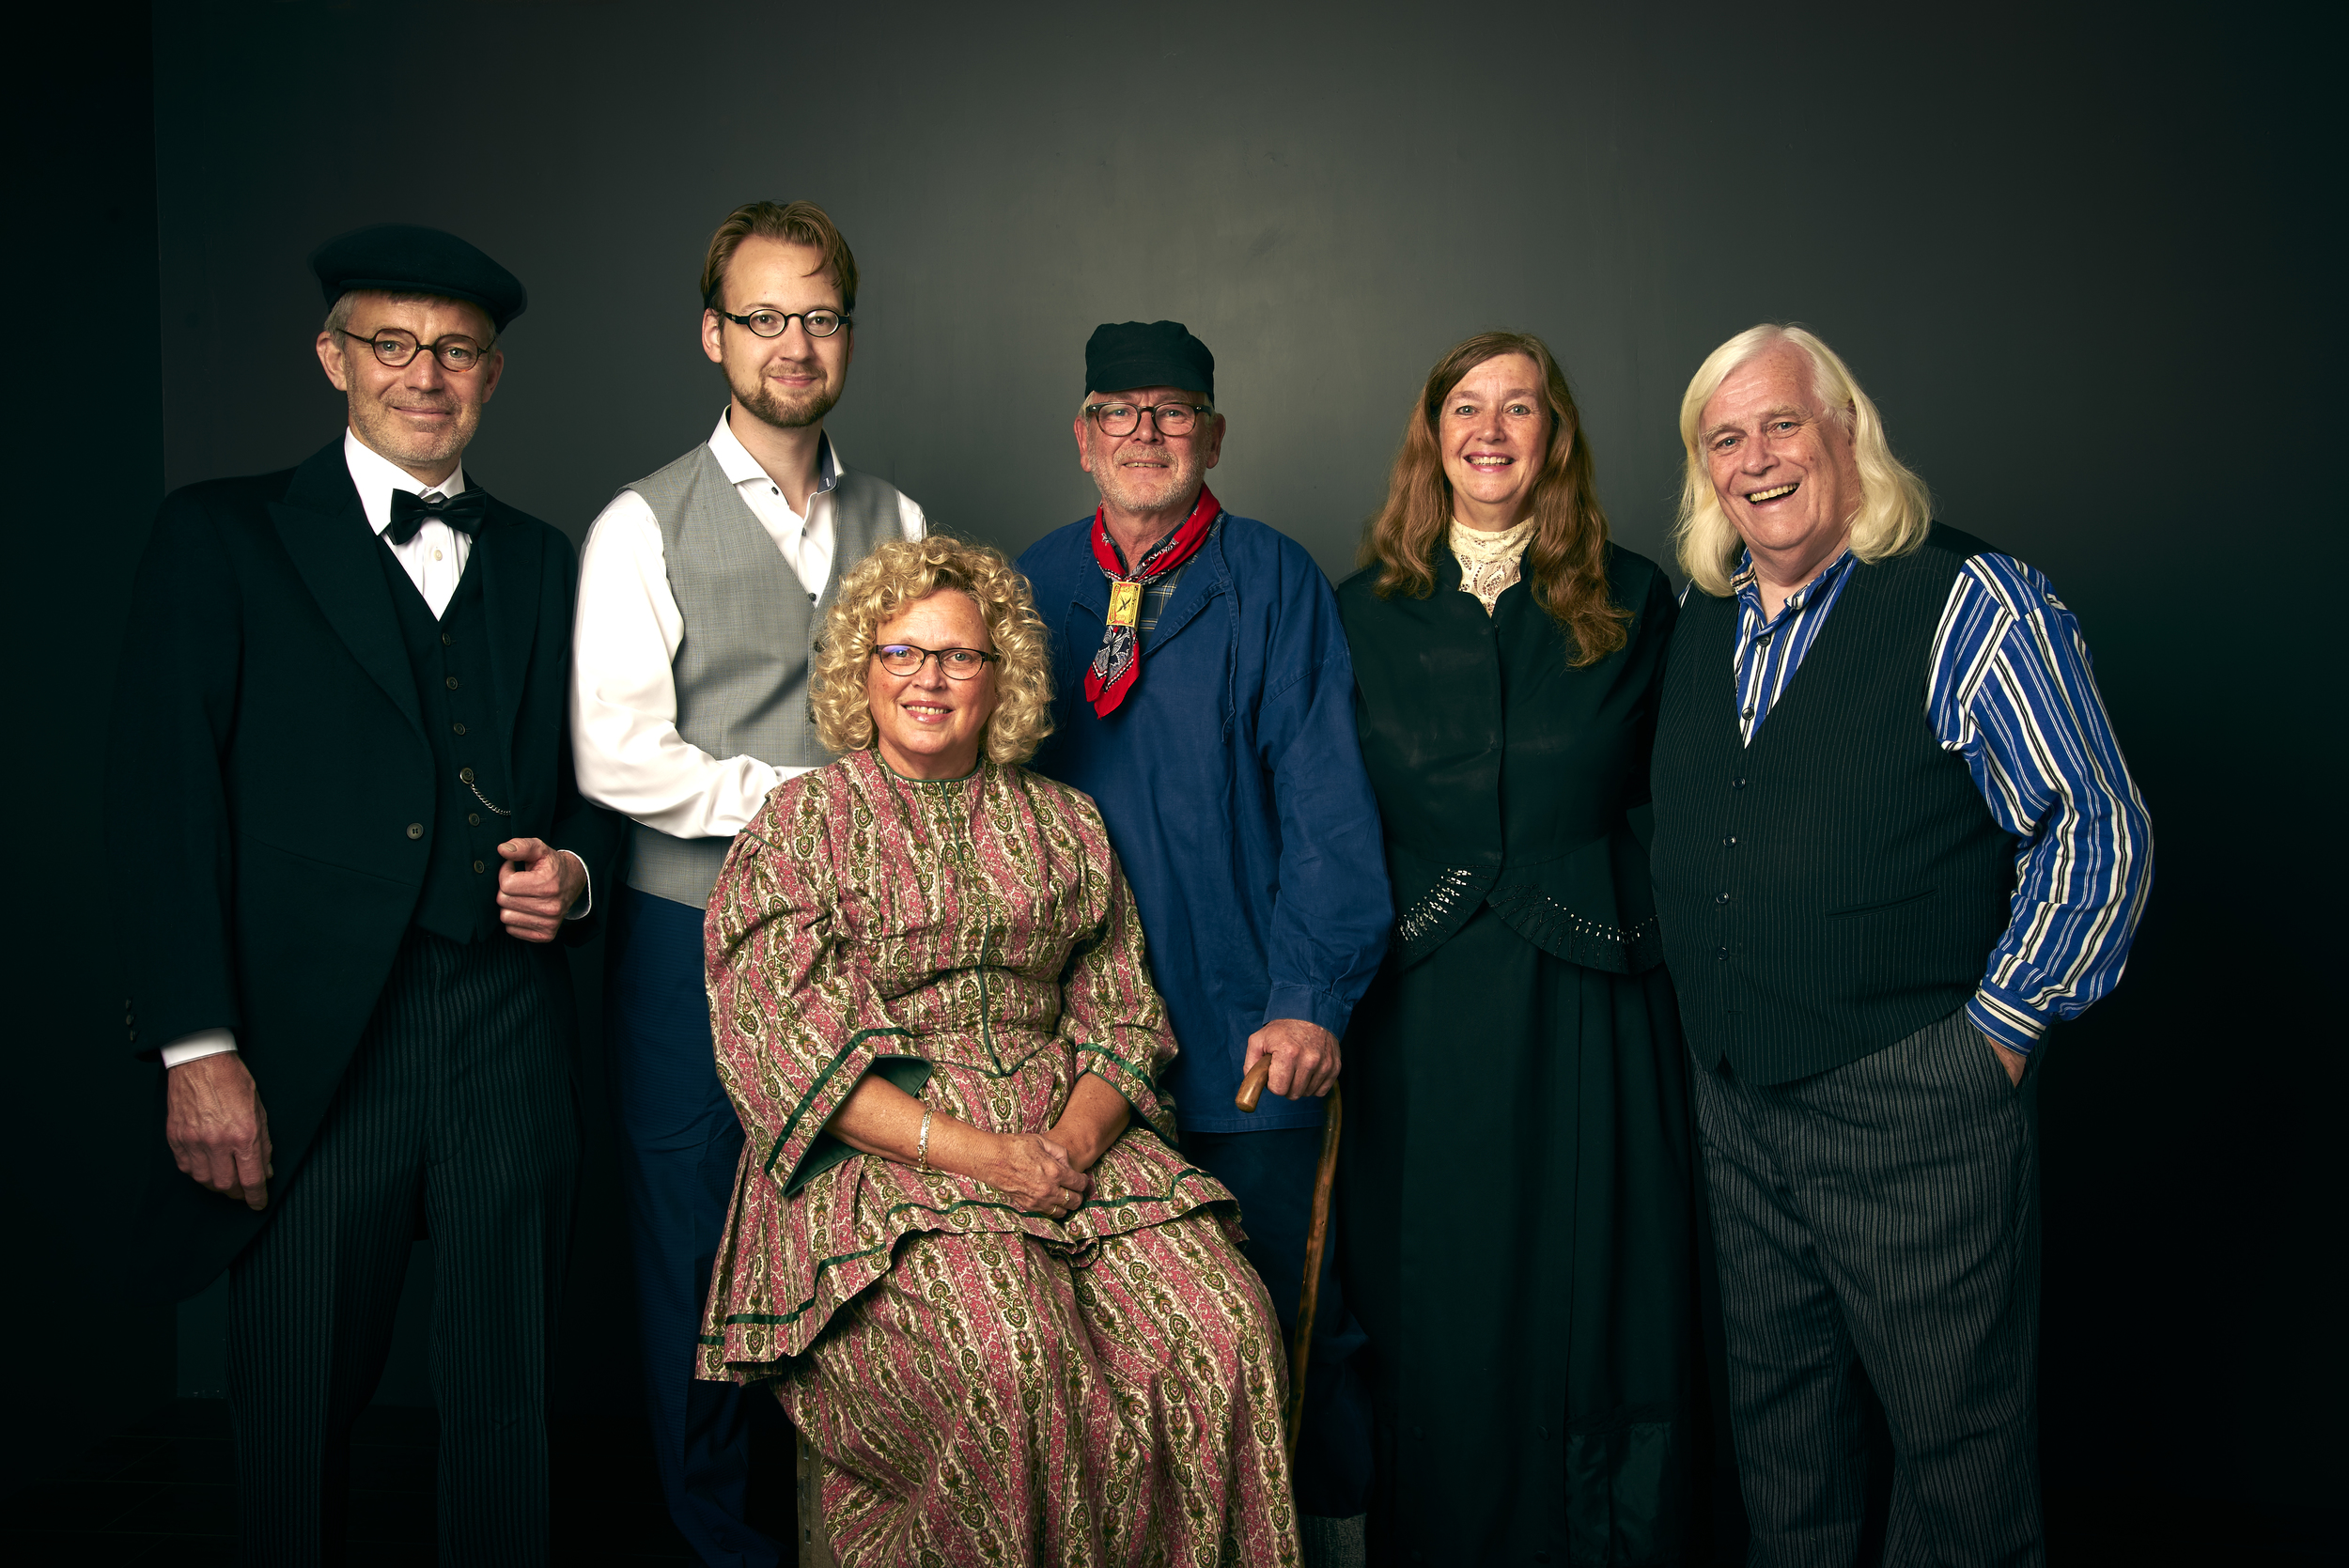
Balletschool Attitude 10th anniversary
Hi All,
For all the people who where at the celebration of Balletschool Attitude in Bergen. I have posted all the picture from the classes and the portraits on my Oypo account and you can view and other them there. Click HERE to go to the Oypo folder

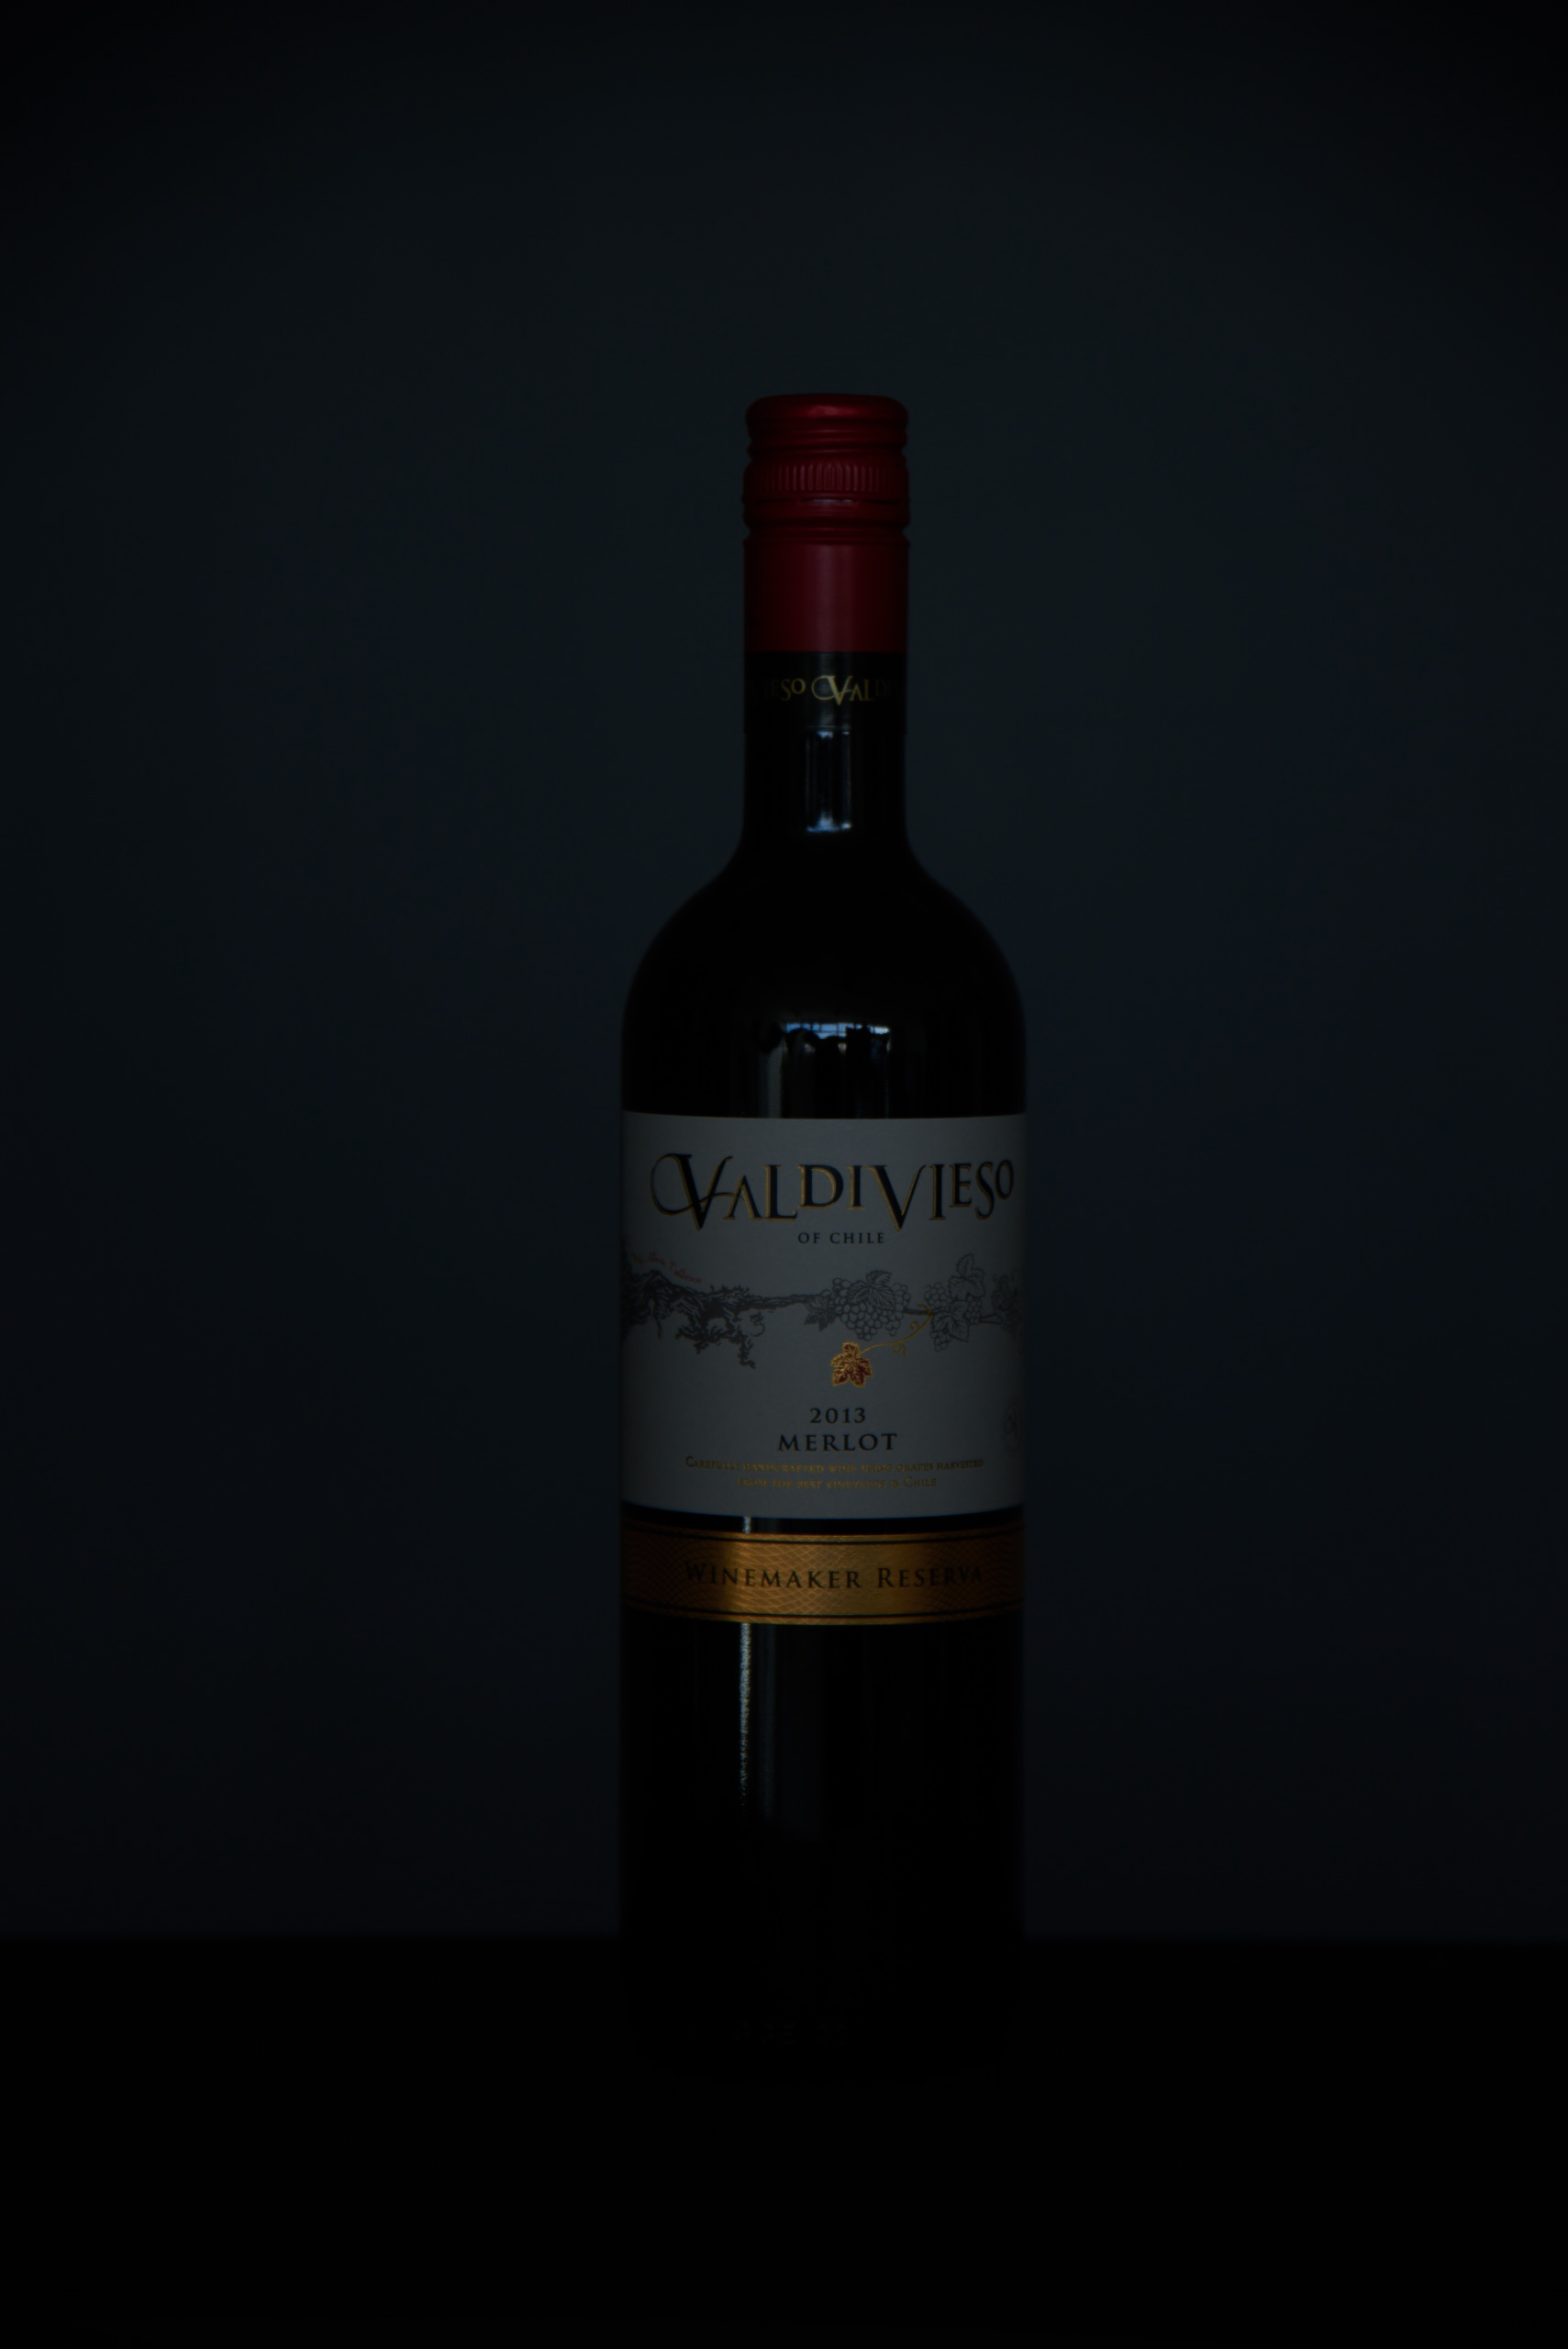
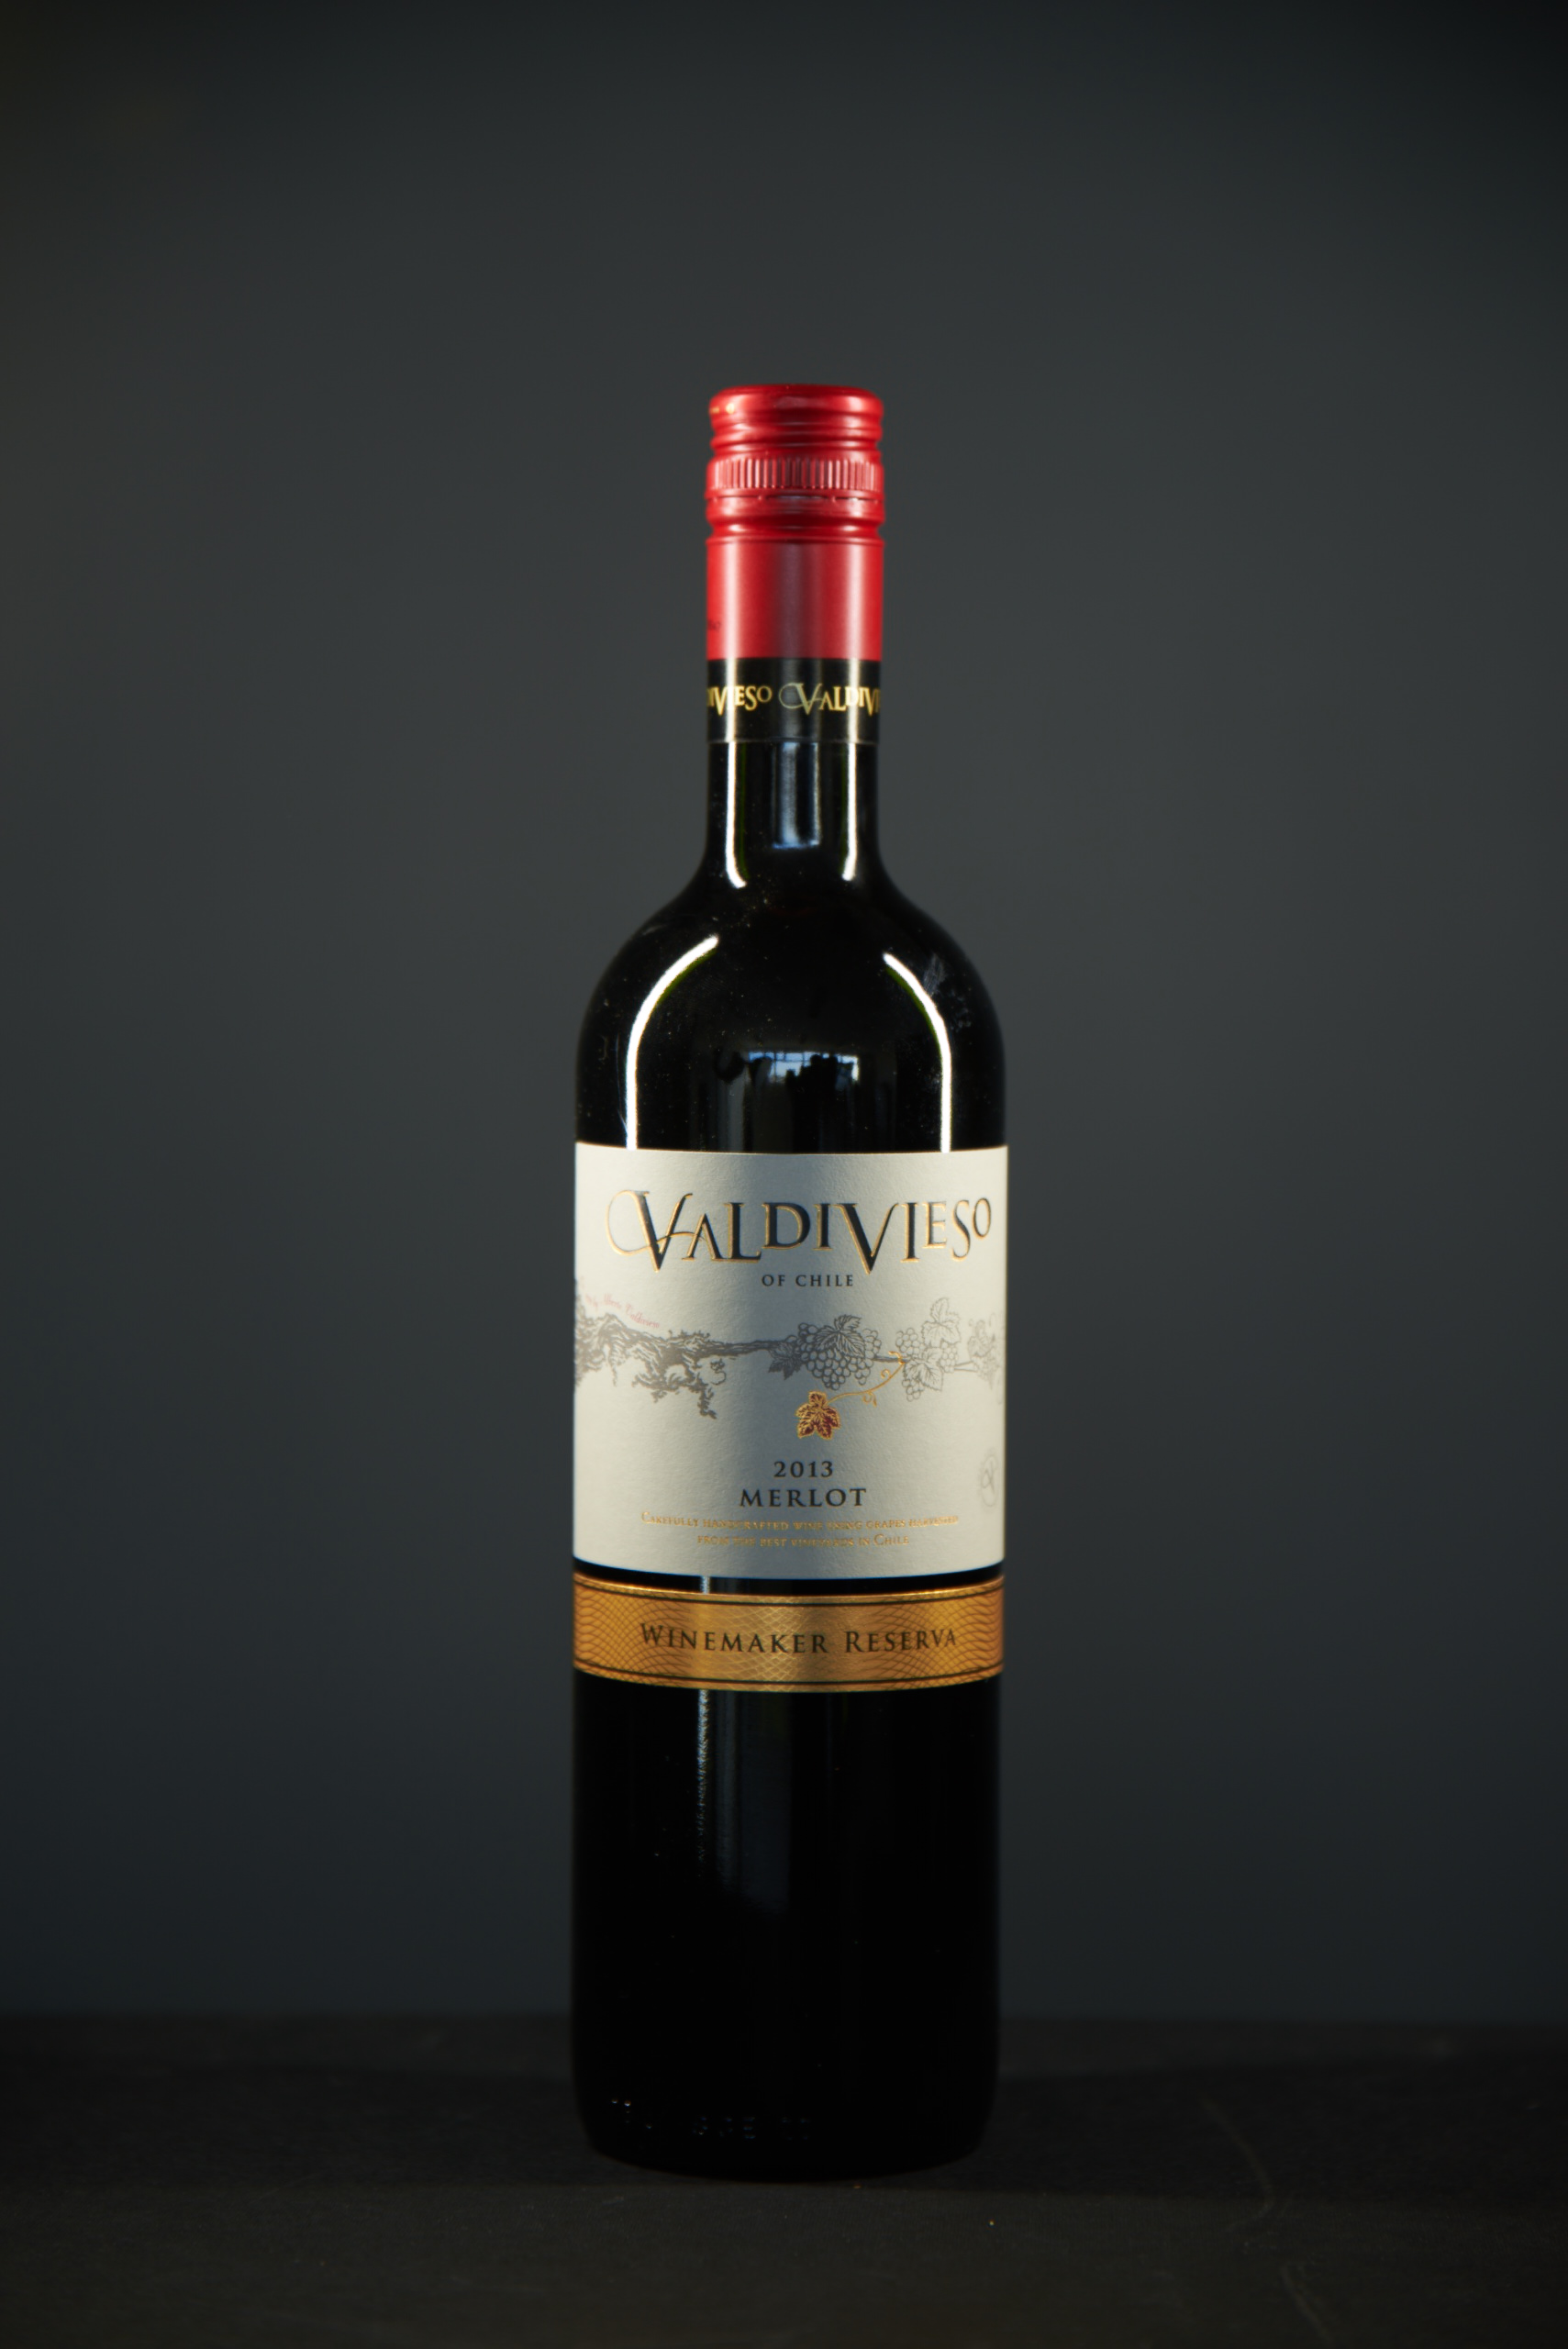
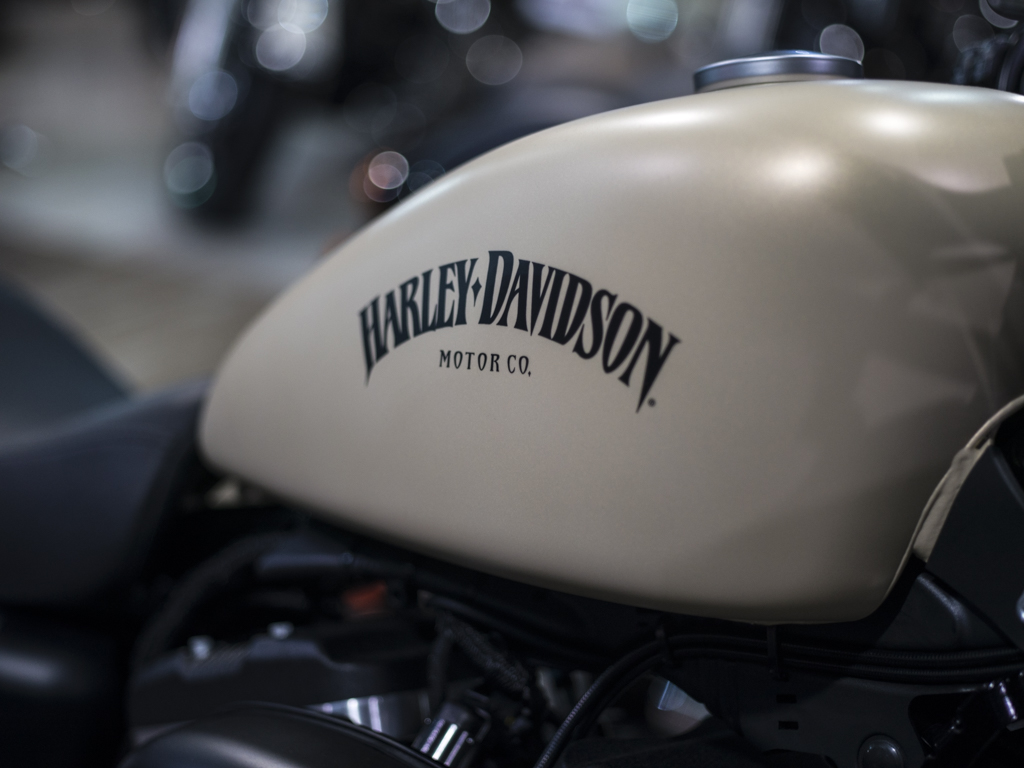
Review: Pipeline Reporter kit
During my visit at the IBC (read my IBC blog HERE) spotted the Pipeline Reporterkit made by the Danish company Brother, Brother and Son. At forst sight I looked like a great product for portrait and product photography. The kit is officially designed for reporters who need a small light kit to lit themselves quick and easily. And for that job it works great! I really think it is a great product voor CamJo, vloggers and other people who have to create video's everywhere.
The Pipeline Reporter Kit
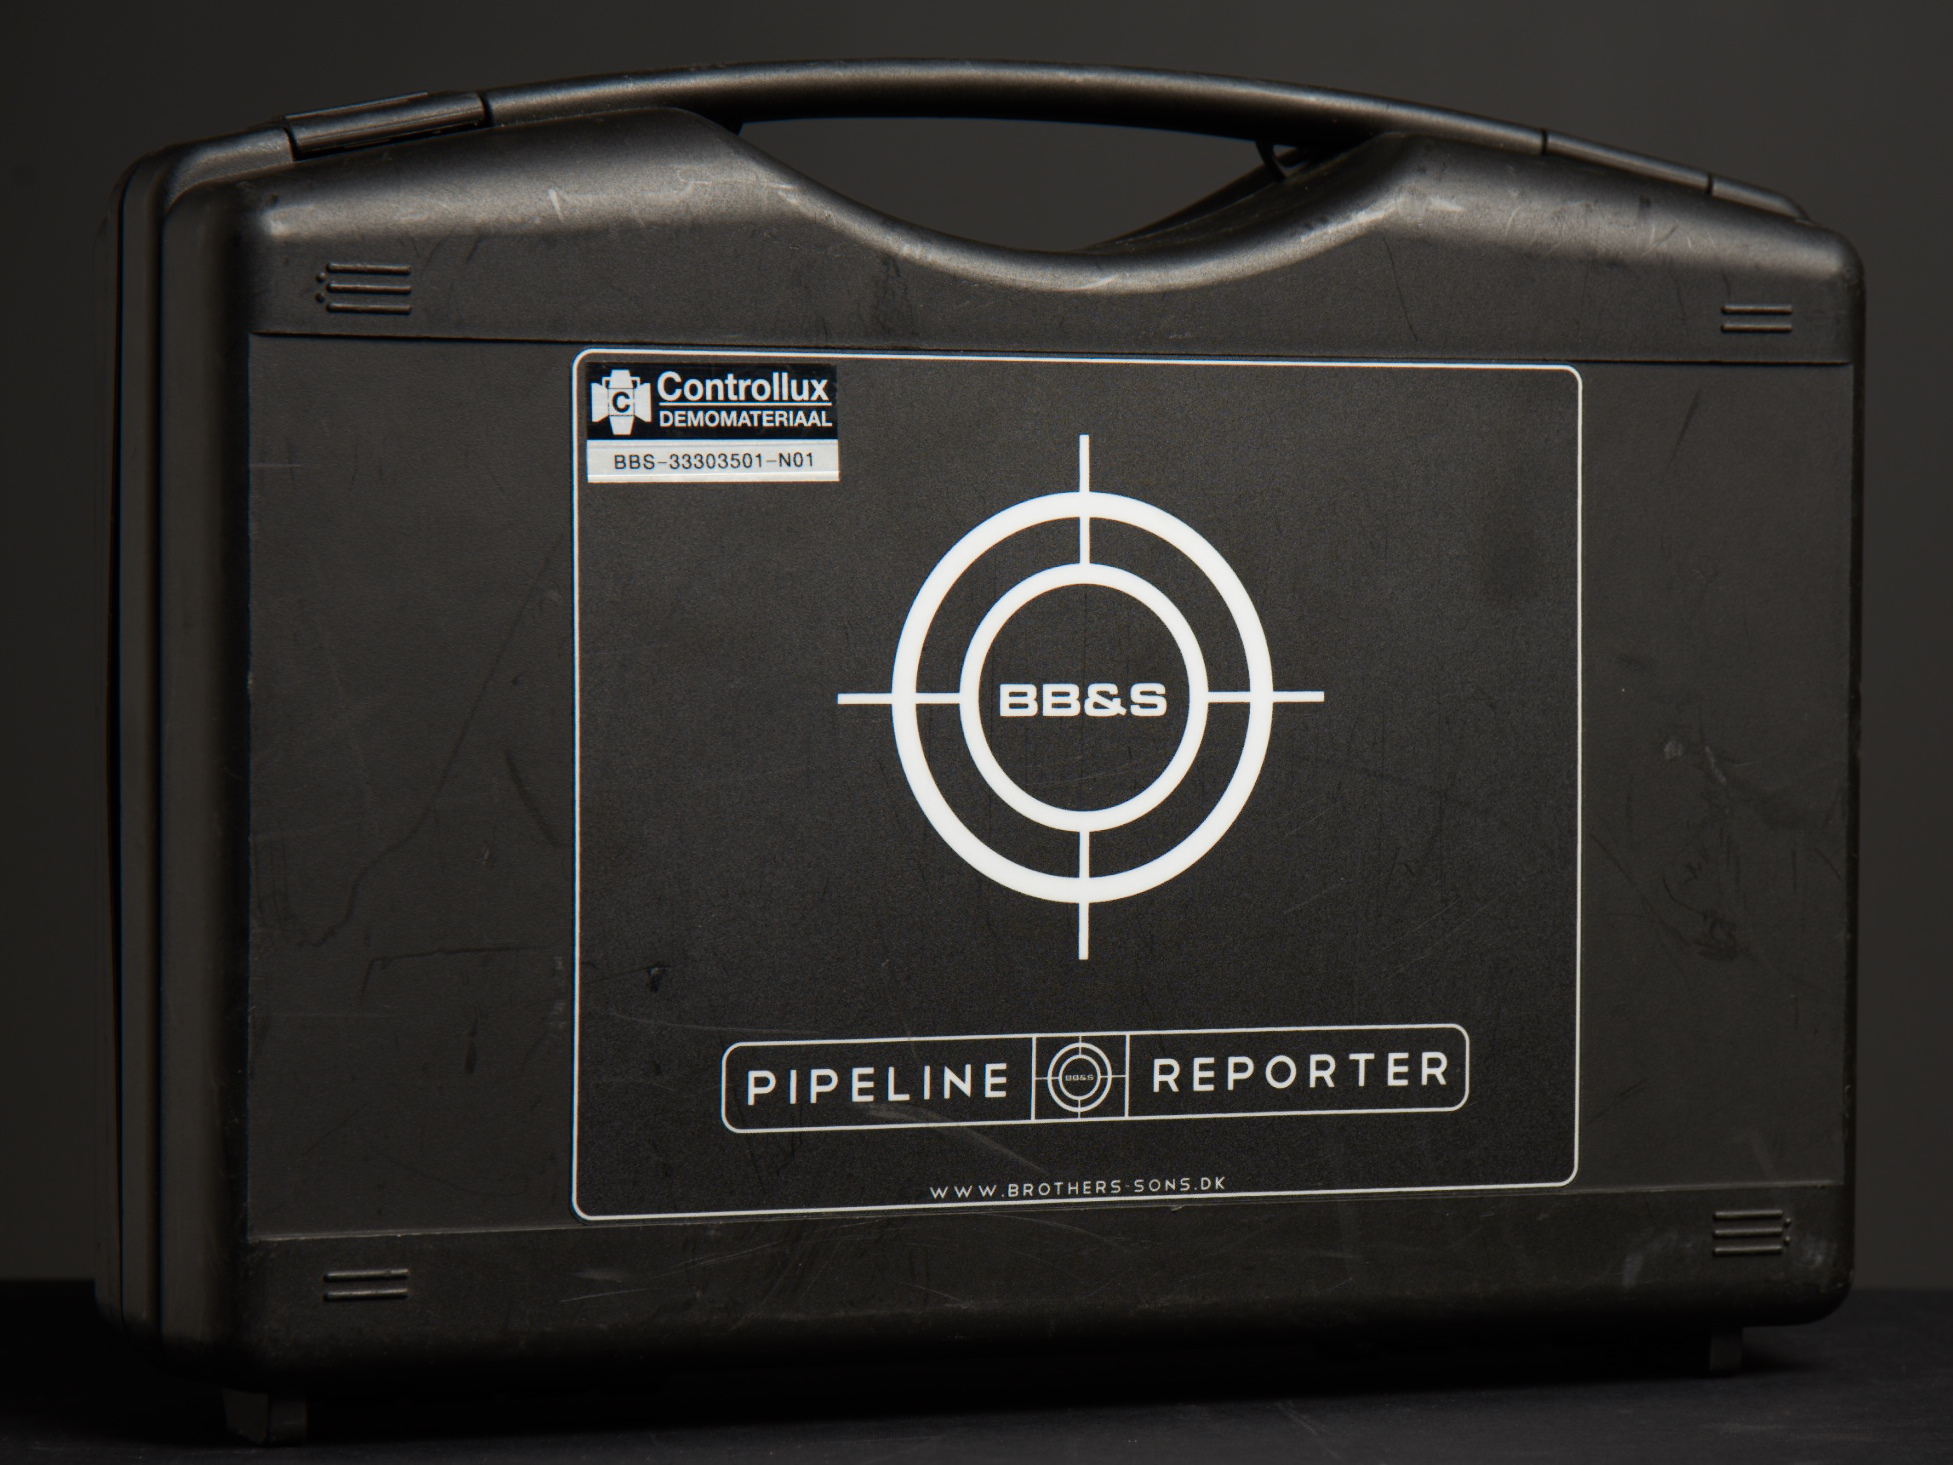

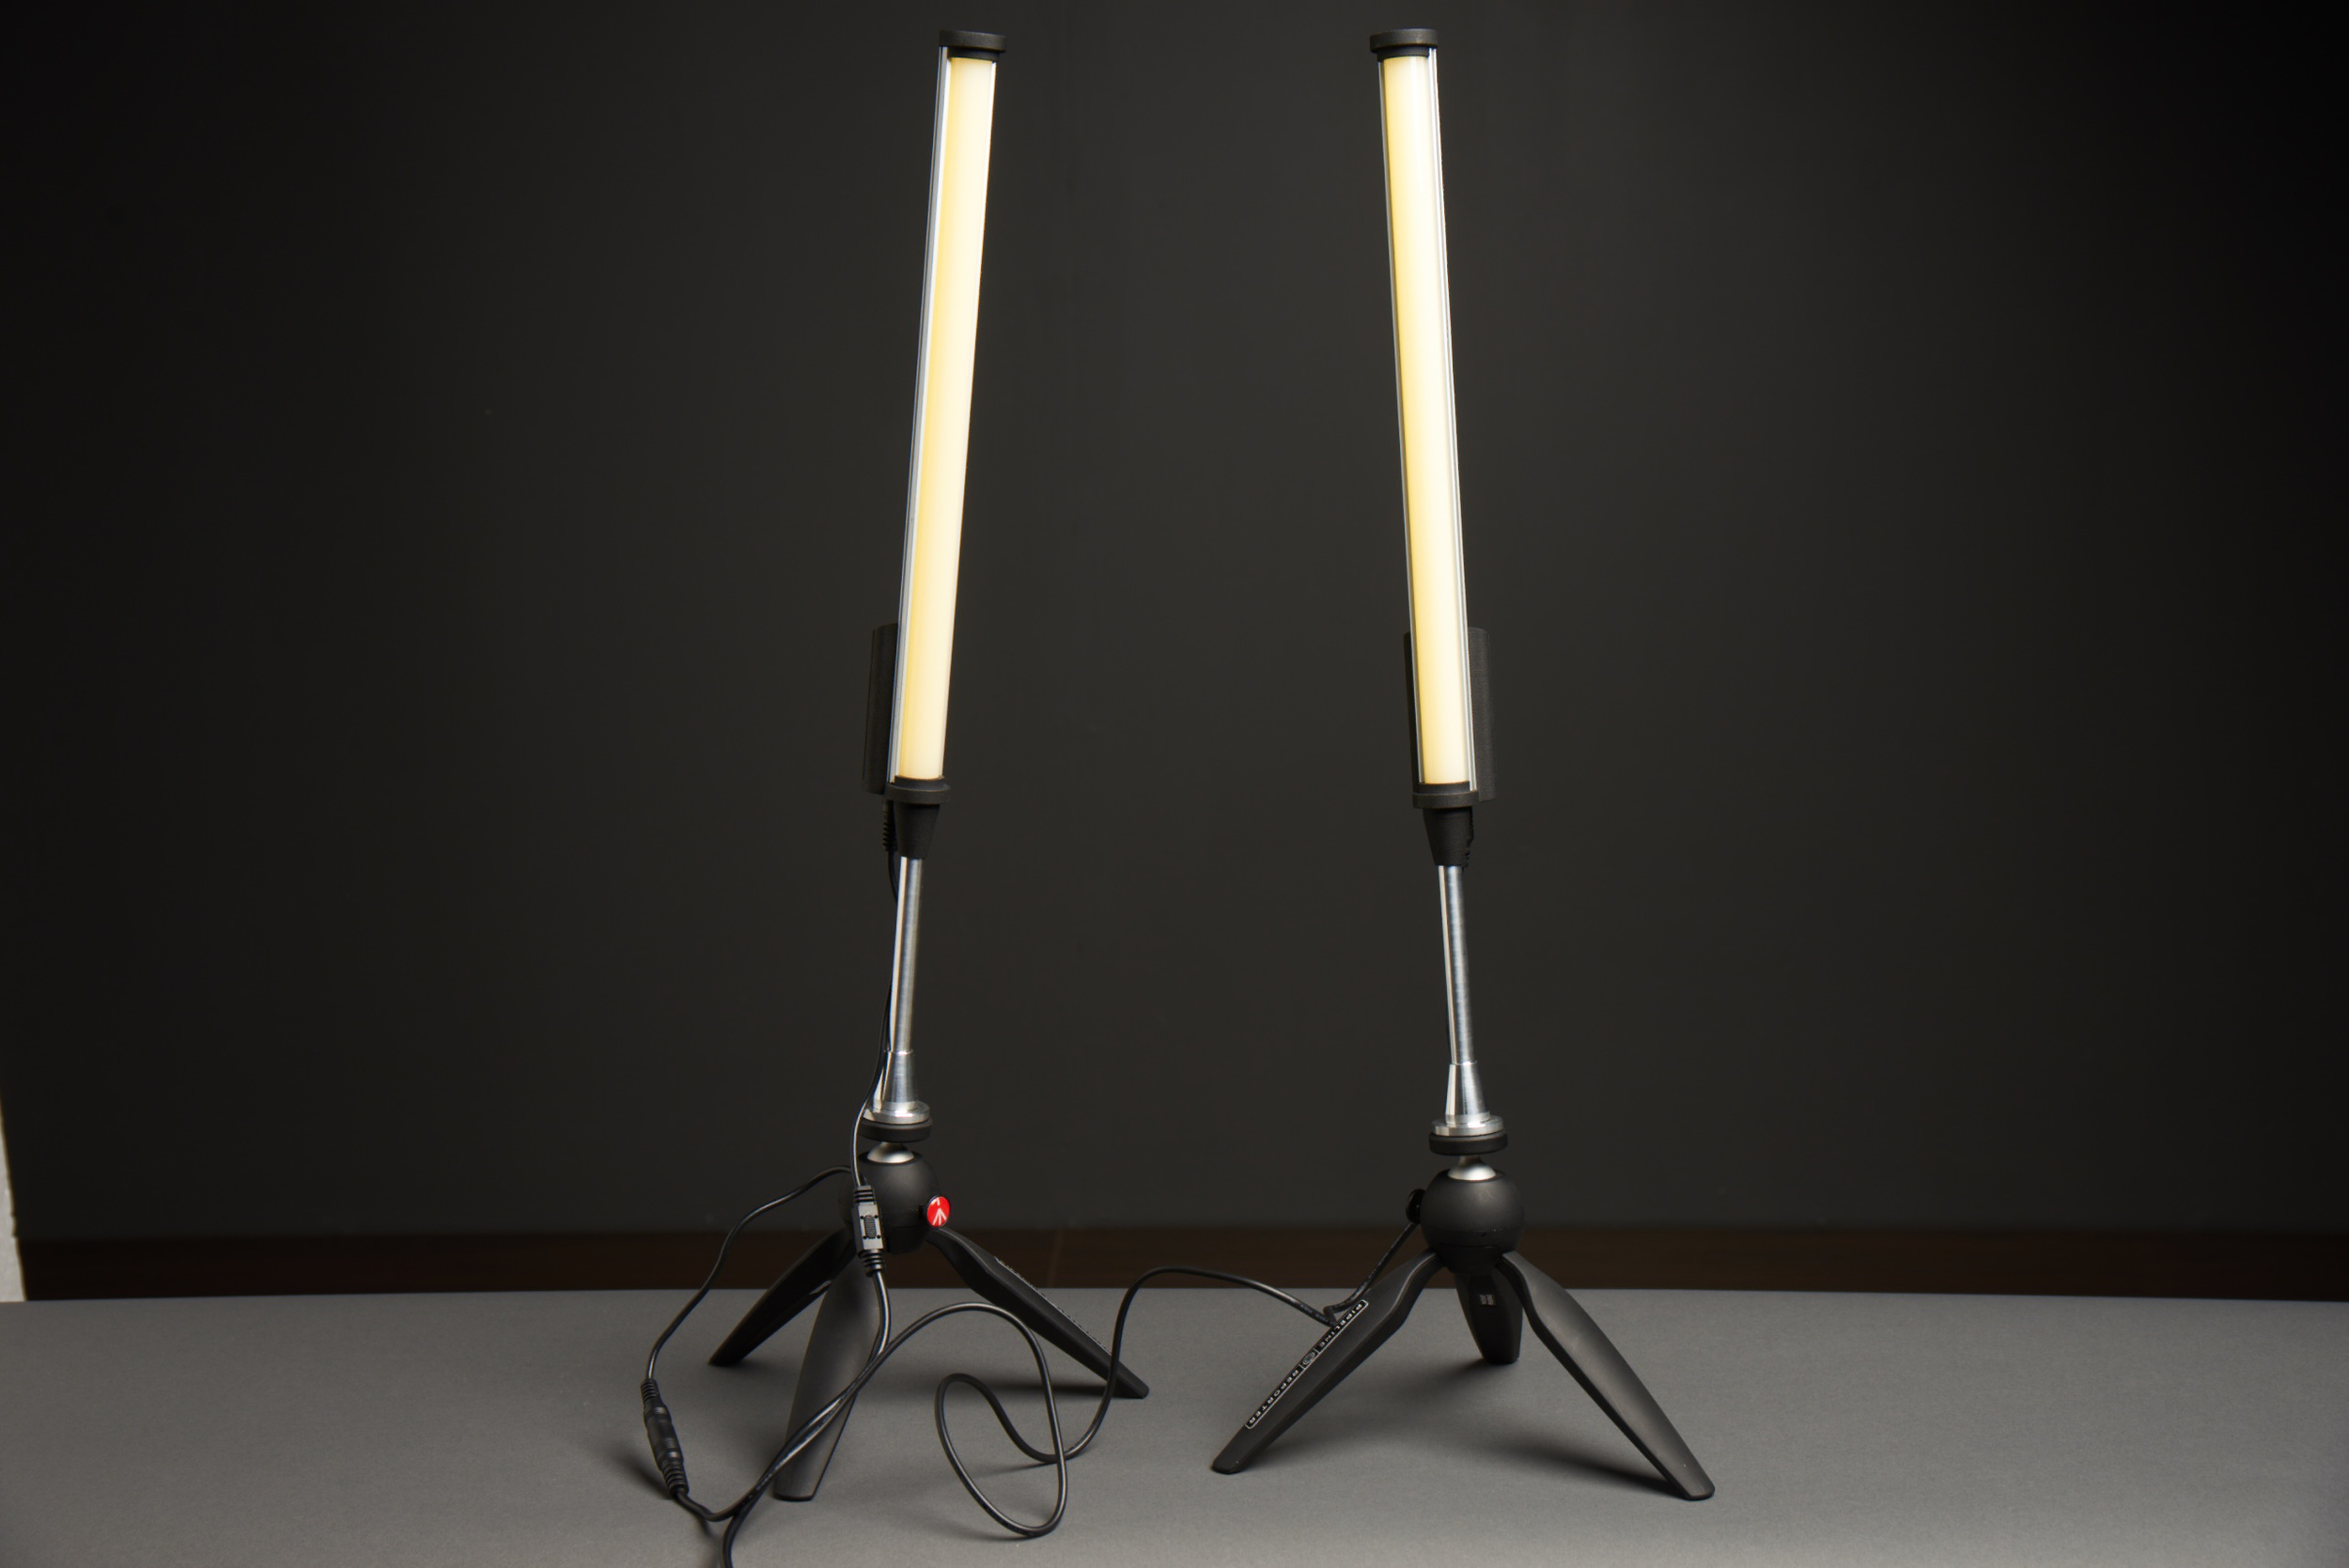
The kit includes 2 small pipe light. Due the phosphor panels you get nice and even light from the two bars. On the back is a small knob to control the power output. You can also change the White balance by chancing the phosphor light bars. There are also two small stand to put the lights on and the adapter and cabling.
The BUT
As you might have noticed in the intro there is a great but. But this but is mainly for photography. I was hoping to use this kit a nice light for a kind of Martin Schoeller looking portraits (for more about Martin click HERE) or for product photography. But and now really comes the but! They don't have enough power to really lit somebody when there is normal daylight or TL light. For shooting people and products I had to use longer shutter times, higher ISO of aperture. Which also let a lot of environmental light in. In dark environments I will probably work better. But I mainly have to work during office our and in offices, so for my personal taste it isn't THE product I would like it to be. It are not poor mans Kinolights.
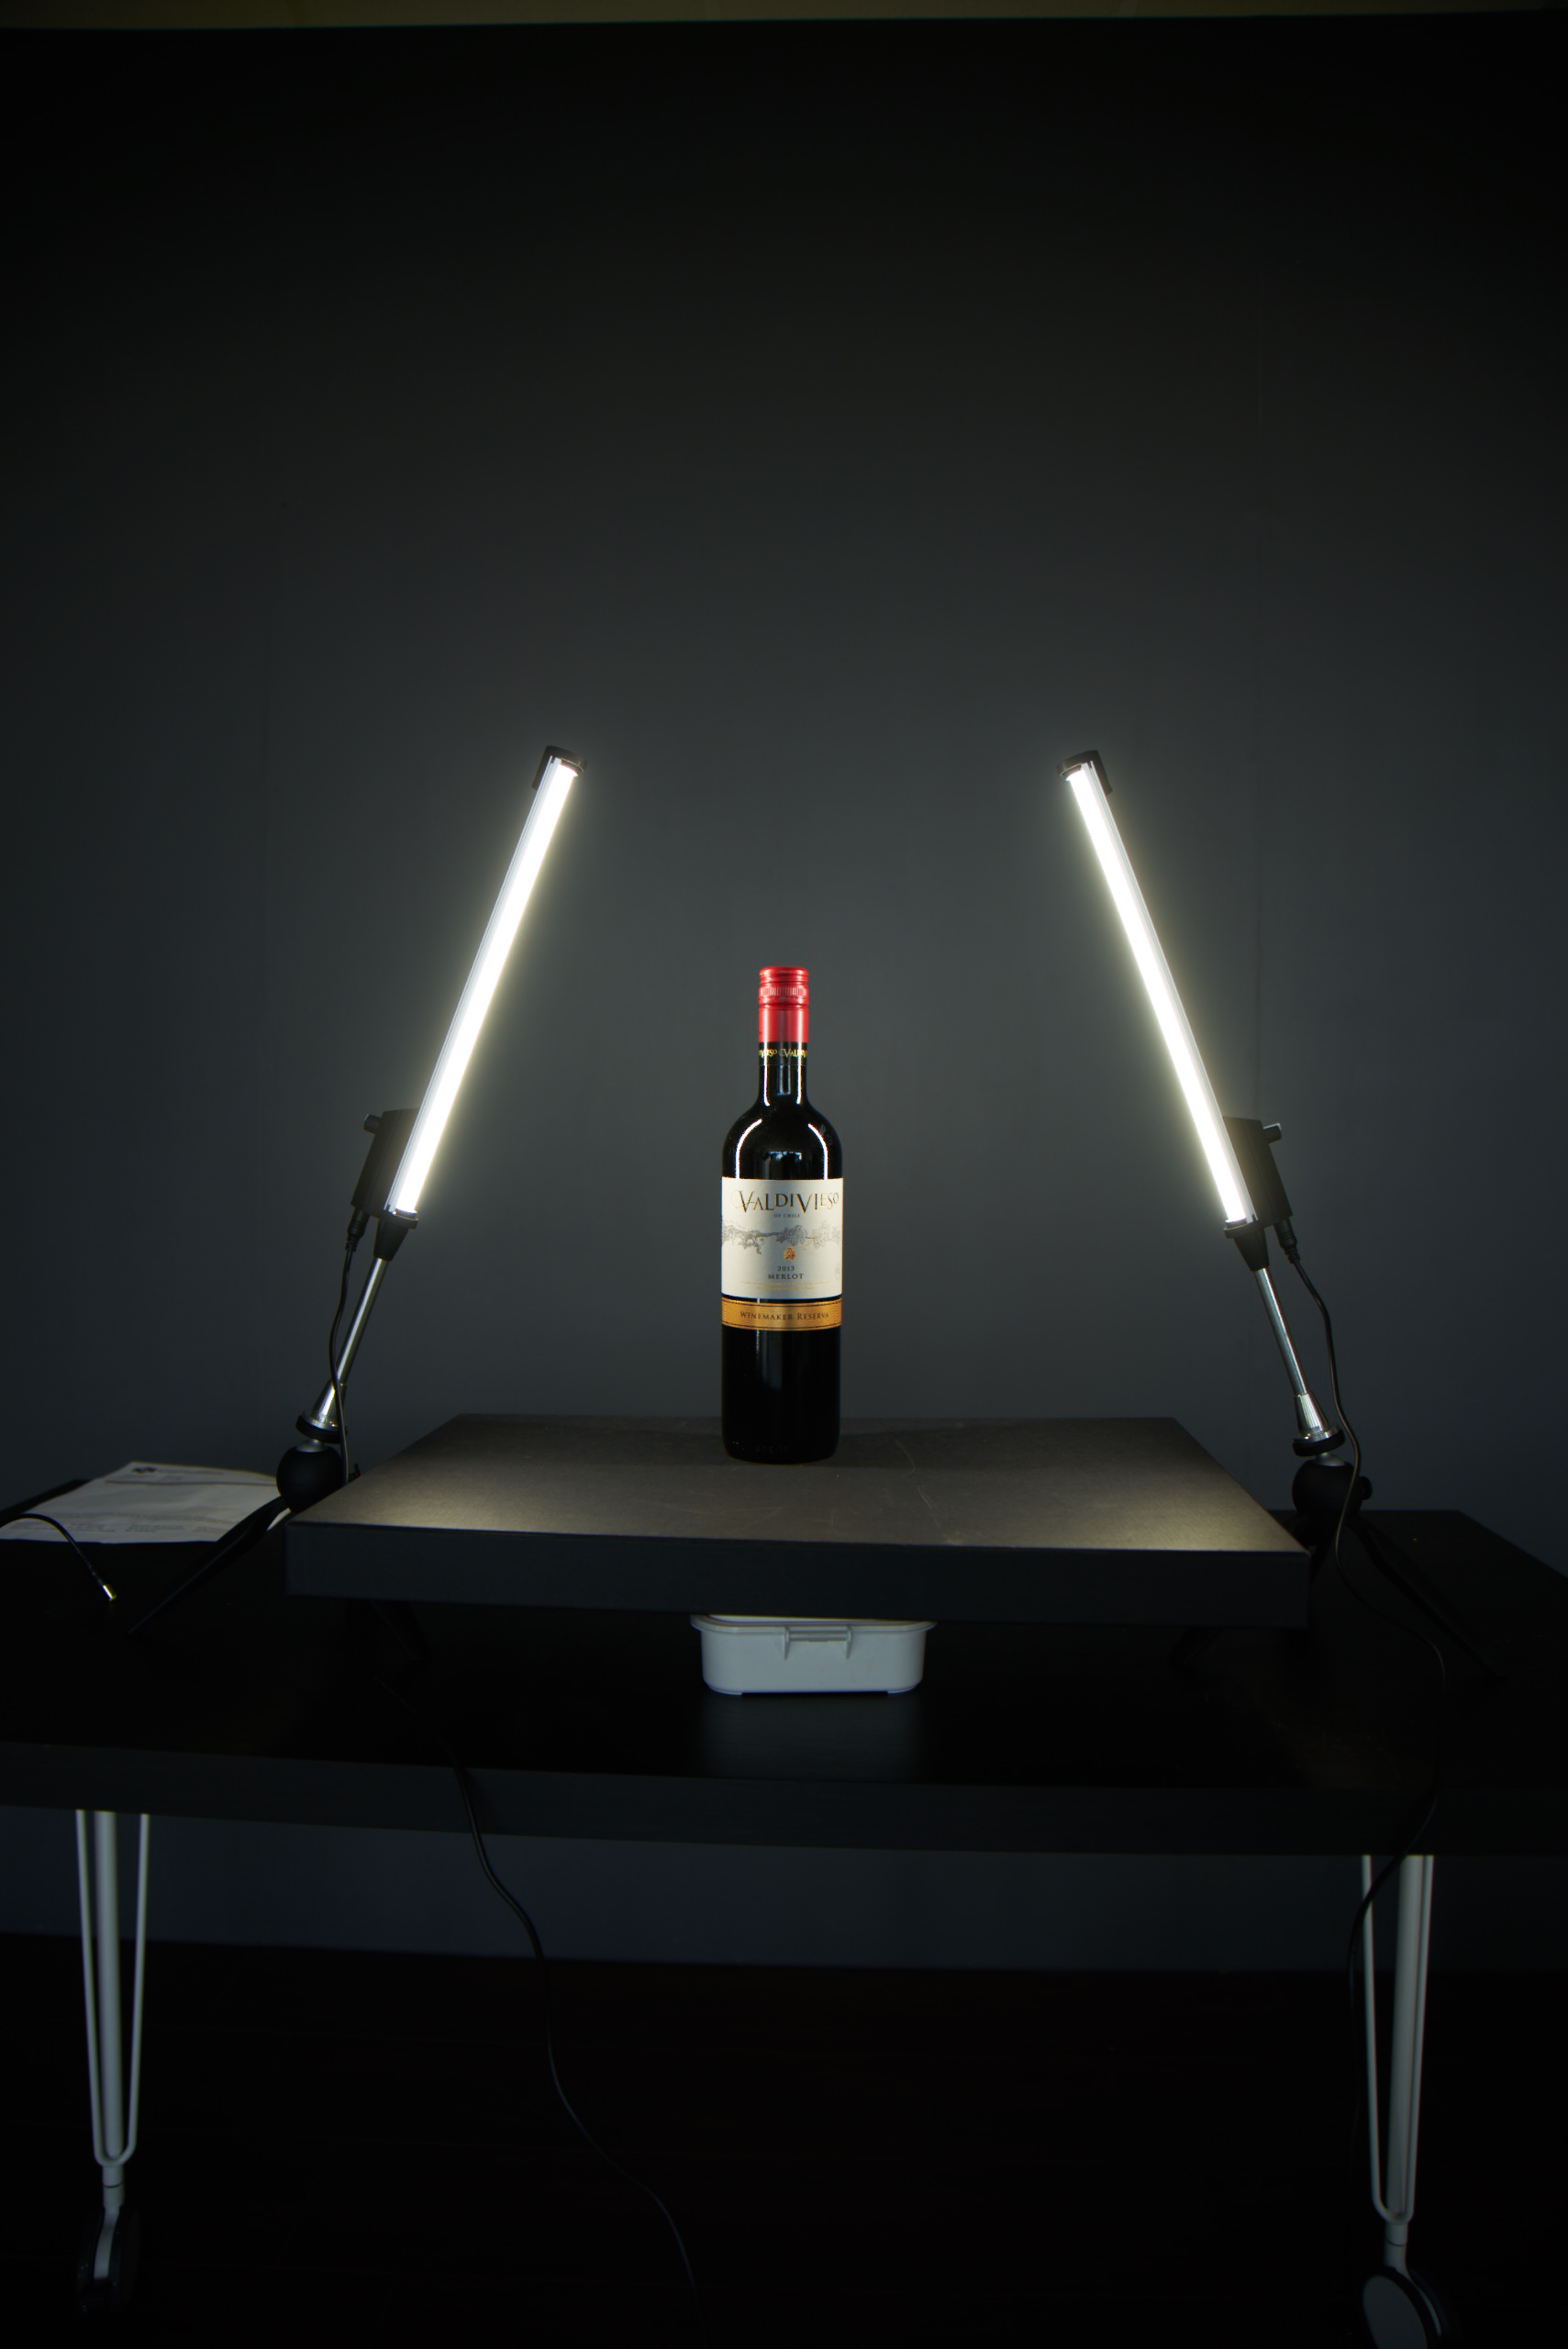
For video the light give enough light to lit up some body enough, but for photo's I want to have control and better quality.
Here are some test shots. There is a shot with and with out the kit on full power.


Conclusion
In my opinion this kit is great for traveling reporters who need a simple lighting setup for every where they might go. For photography I am not so pleased with it as I thought I would be.
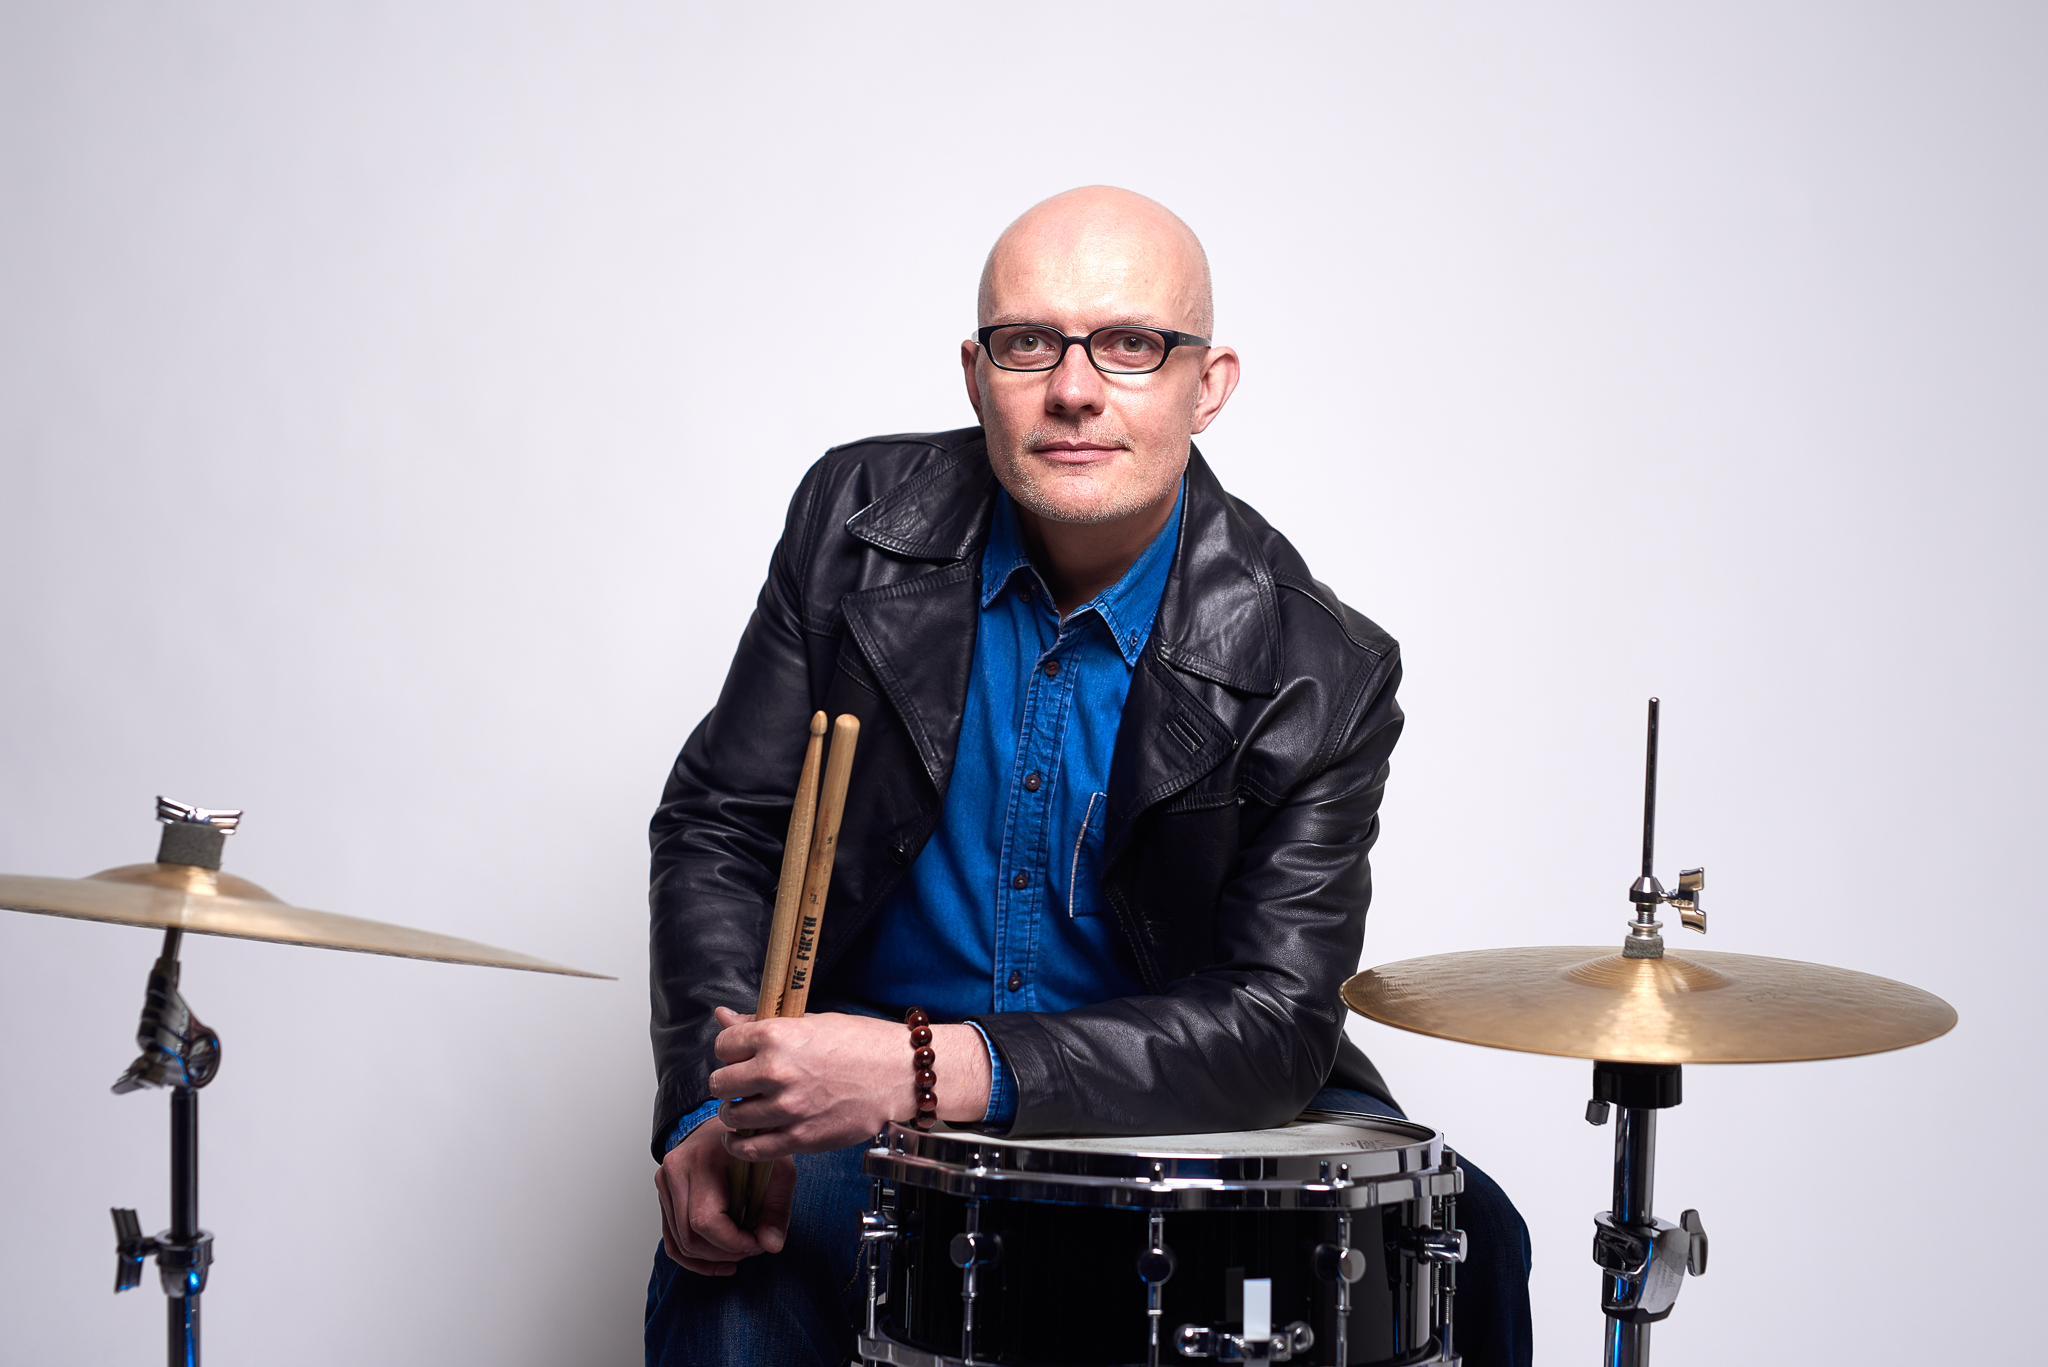
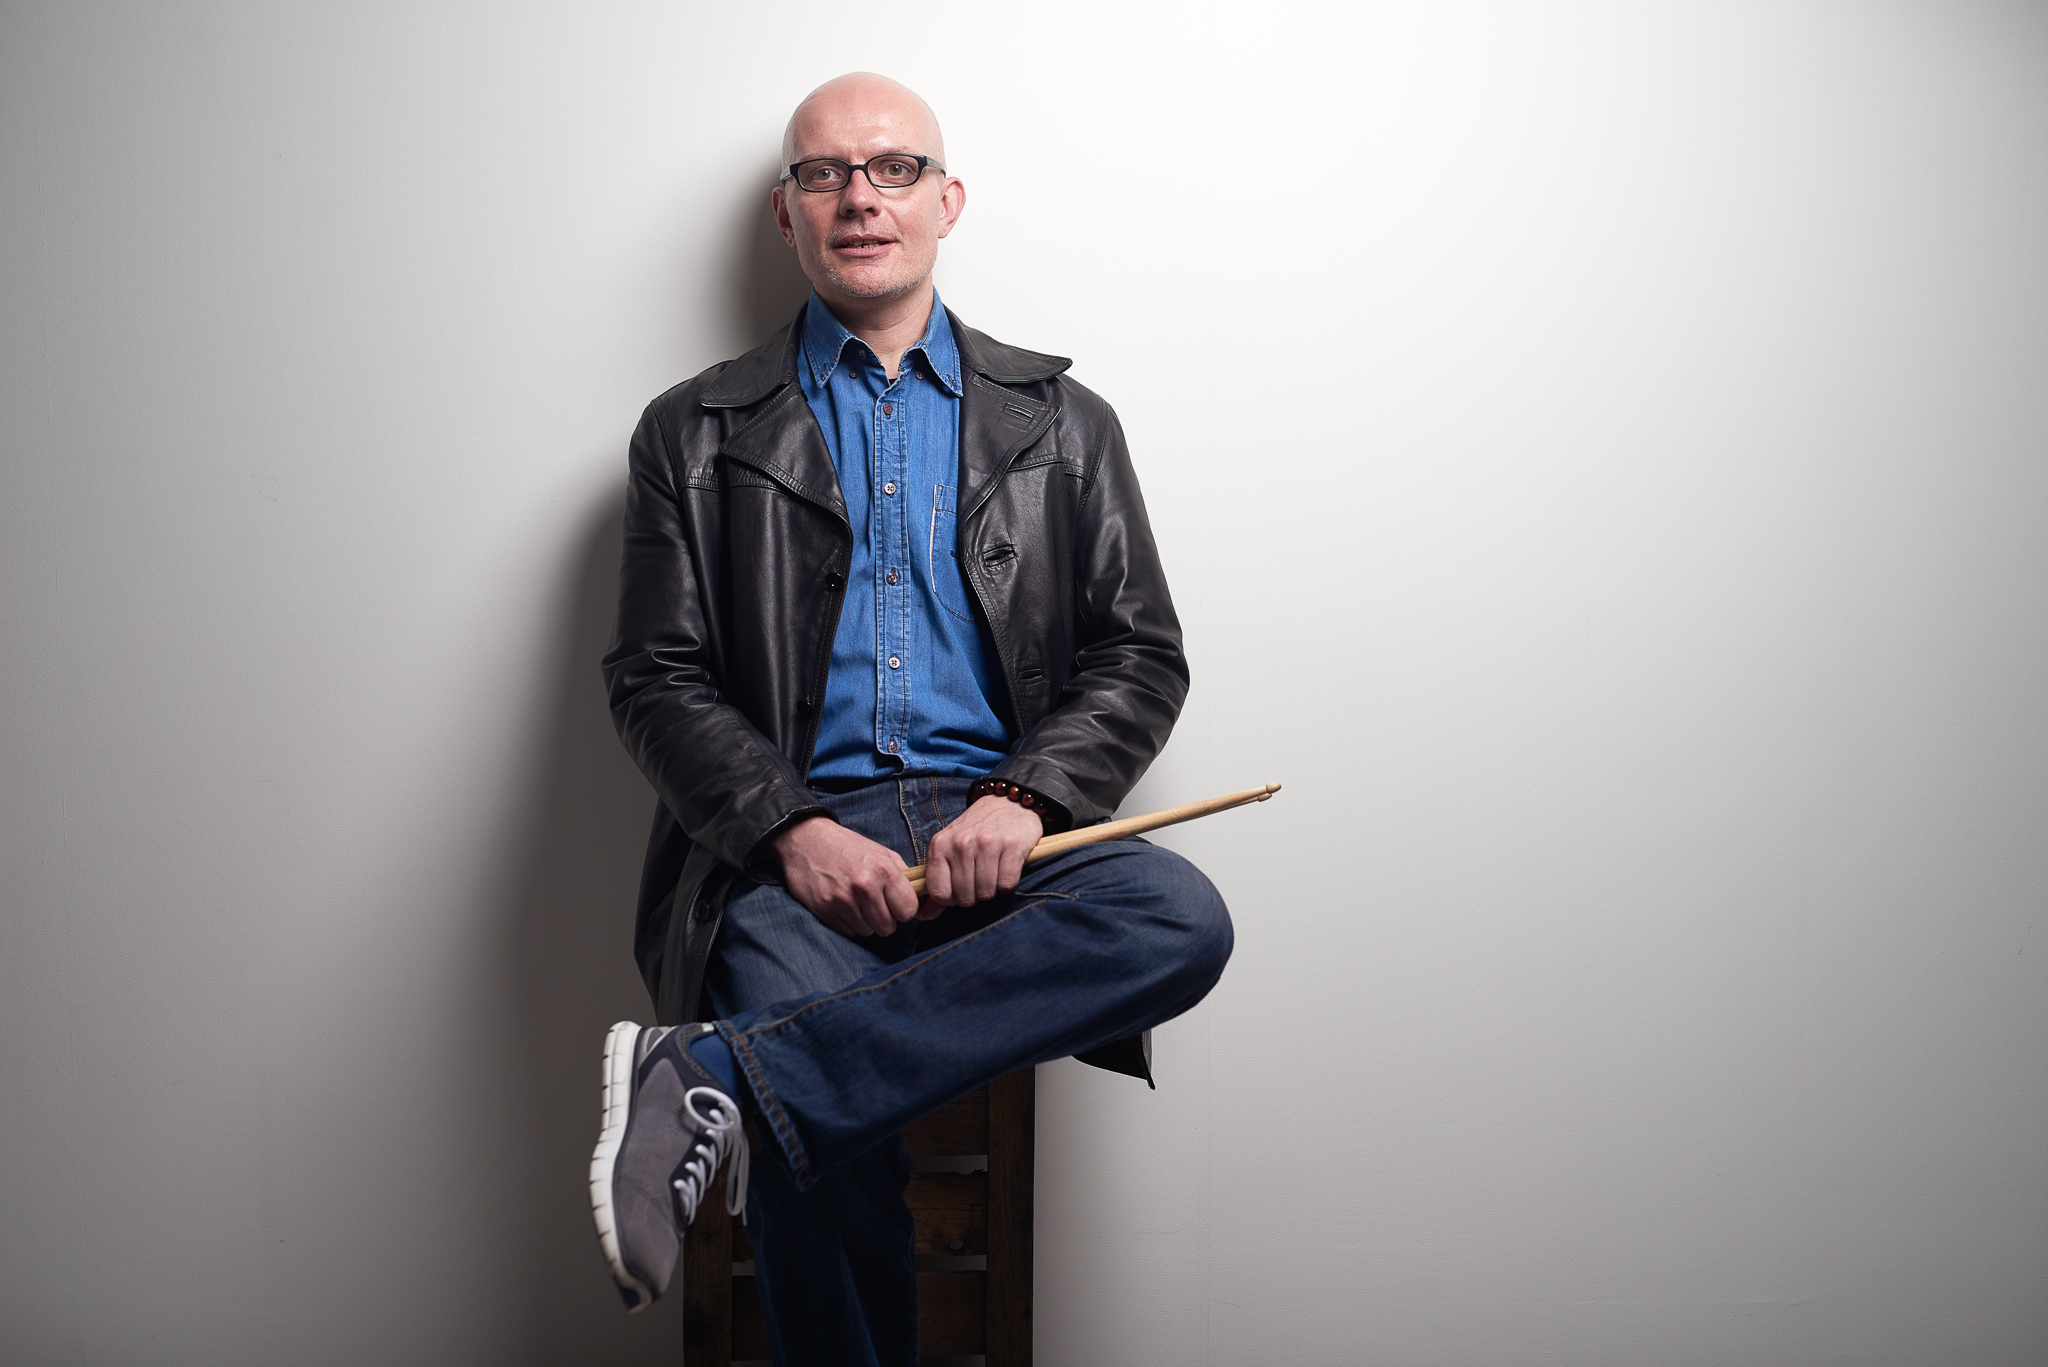
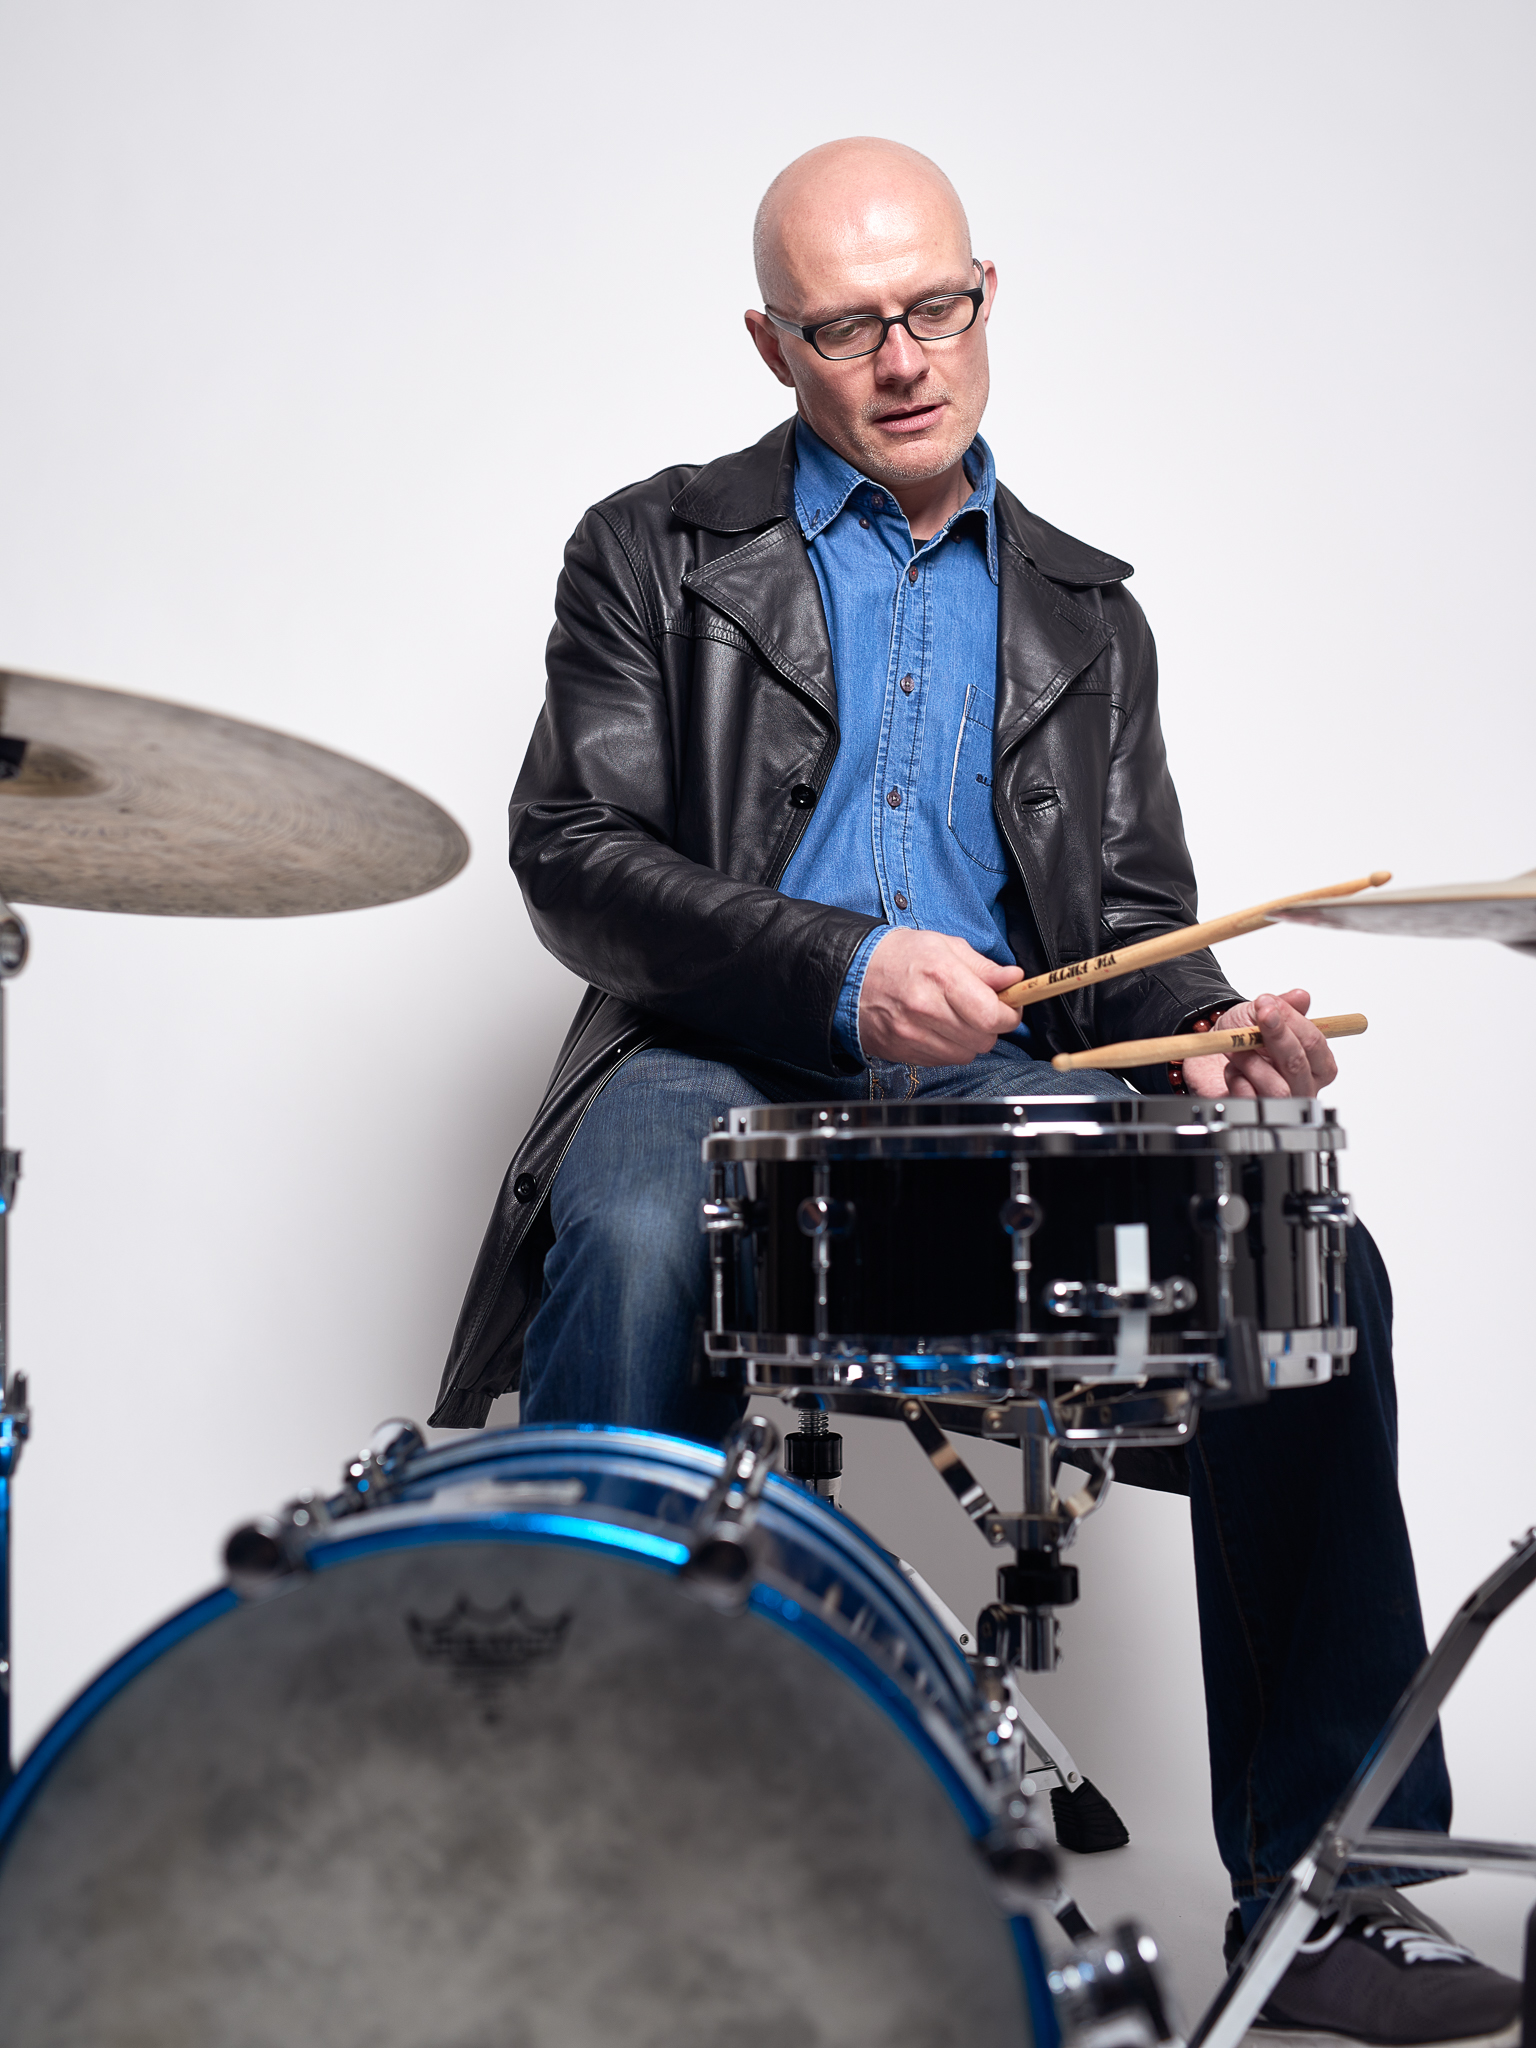
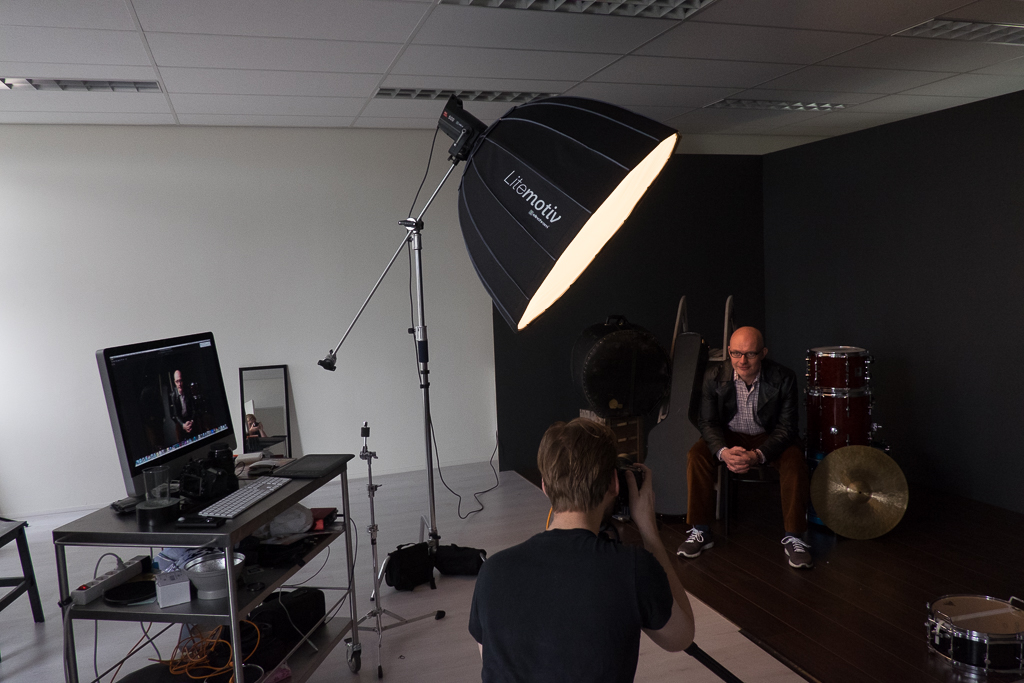
Armand van Middendorp
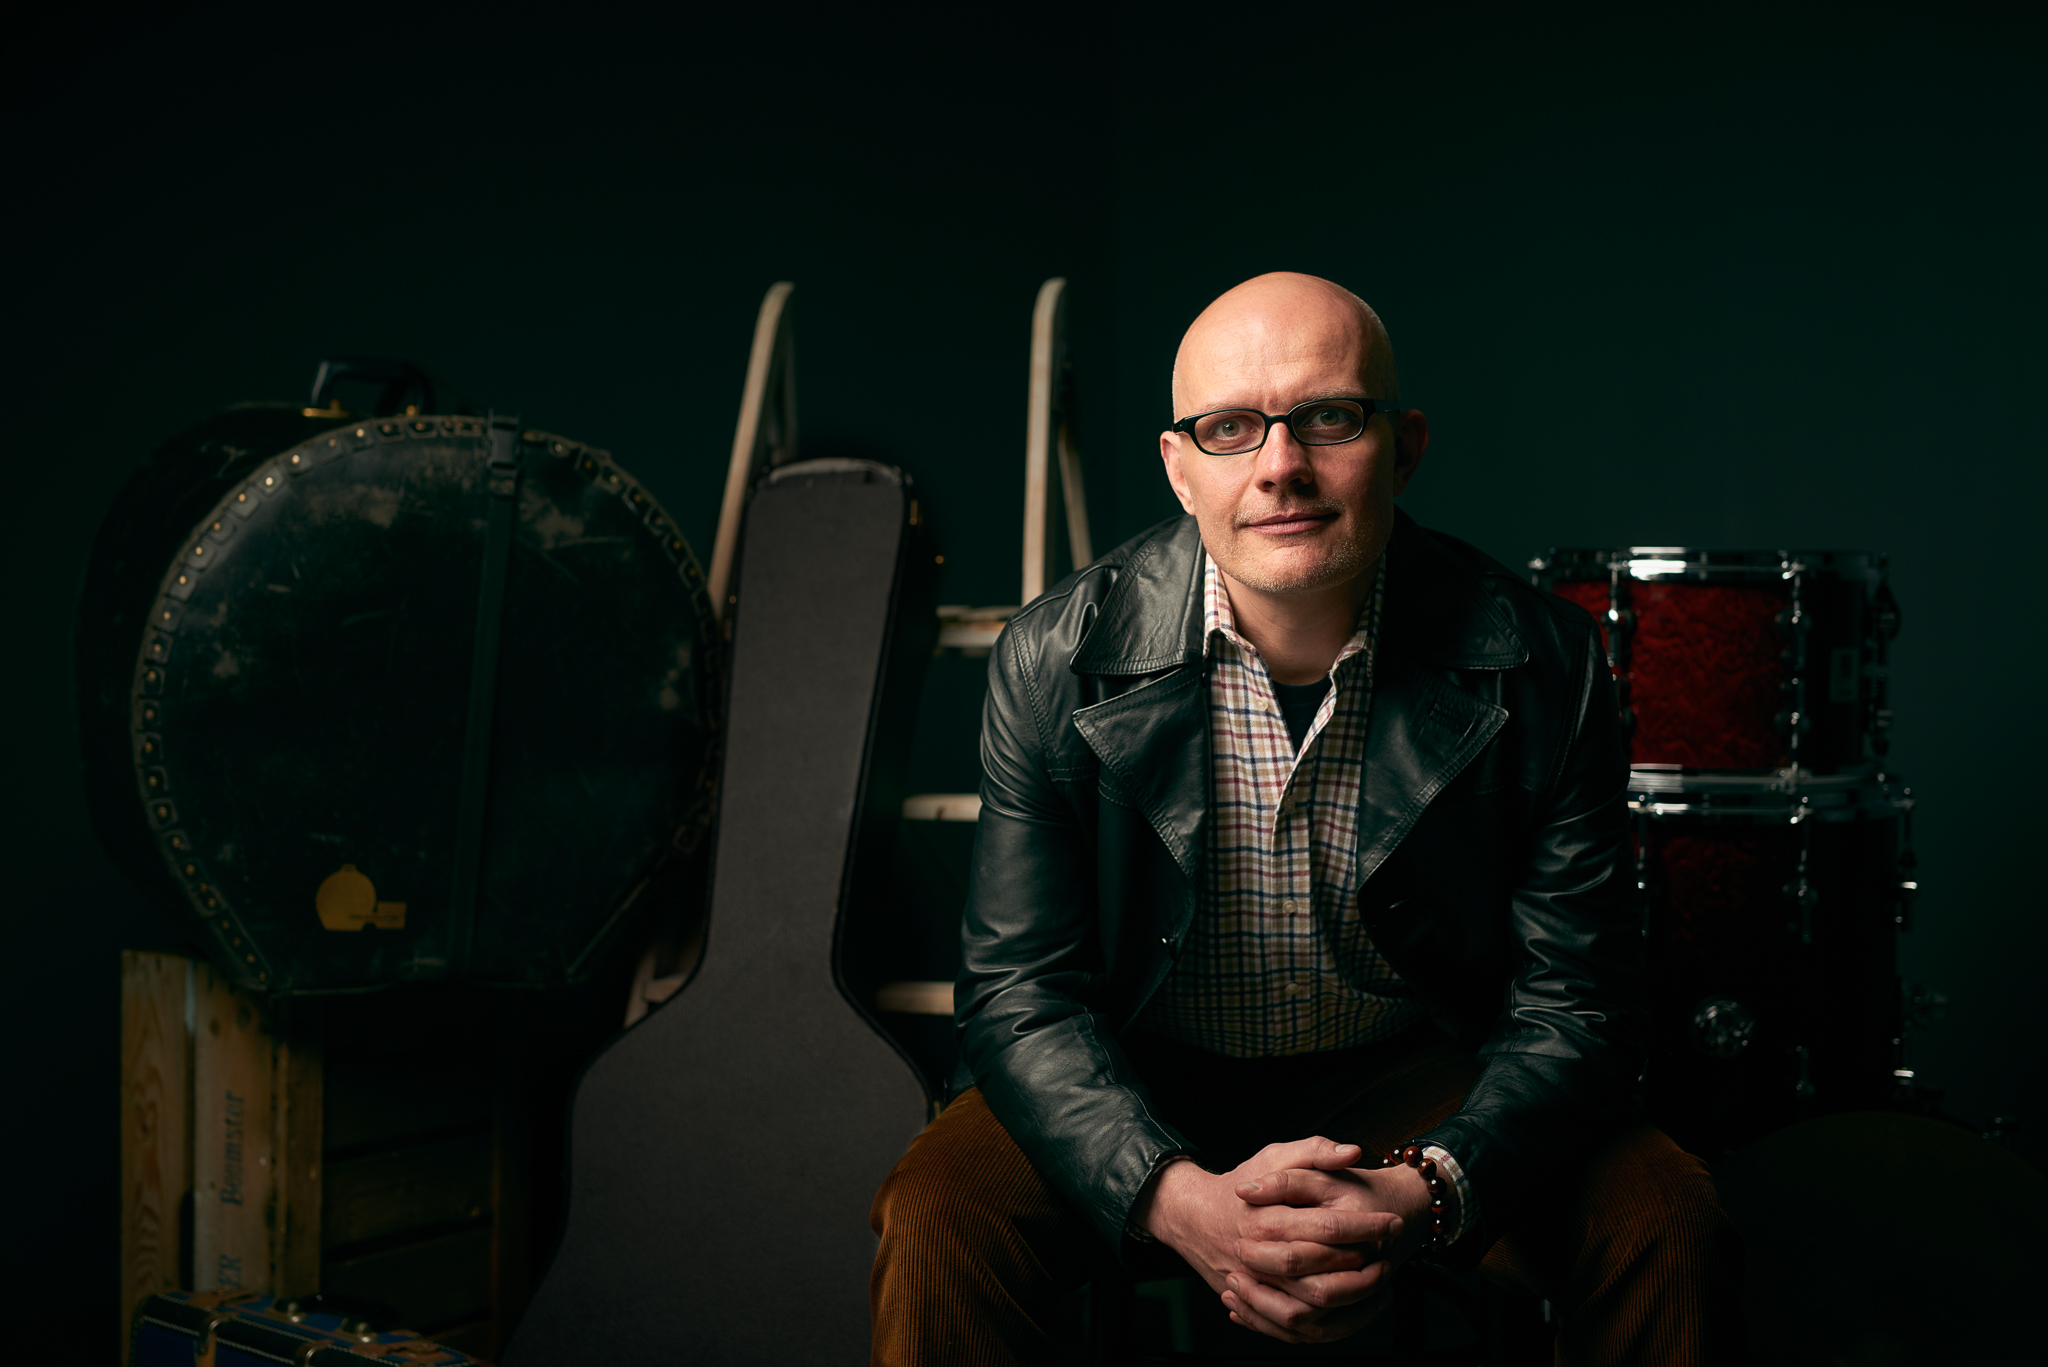
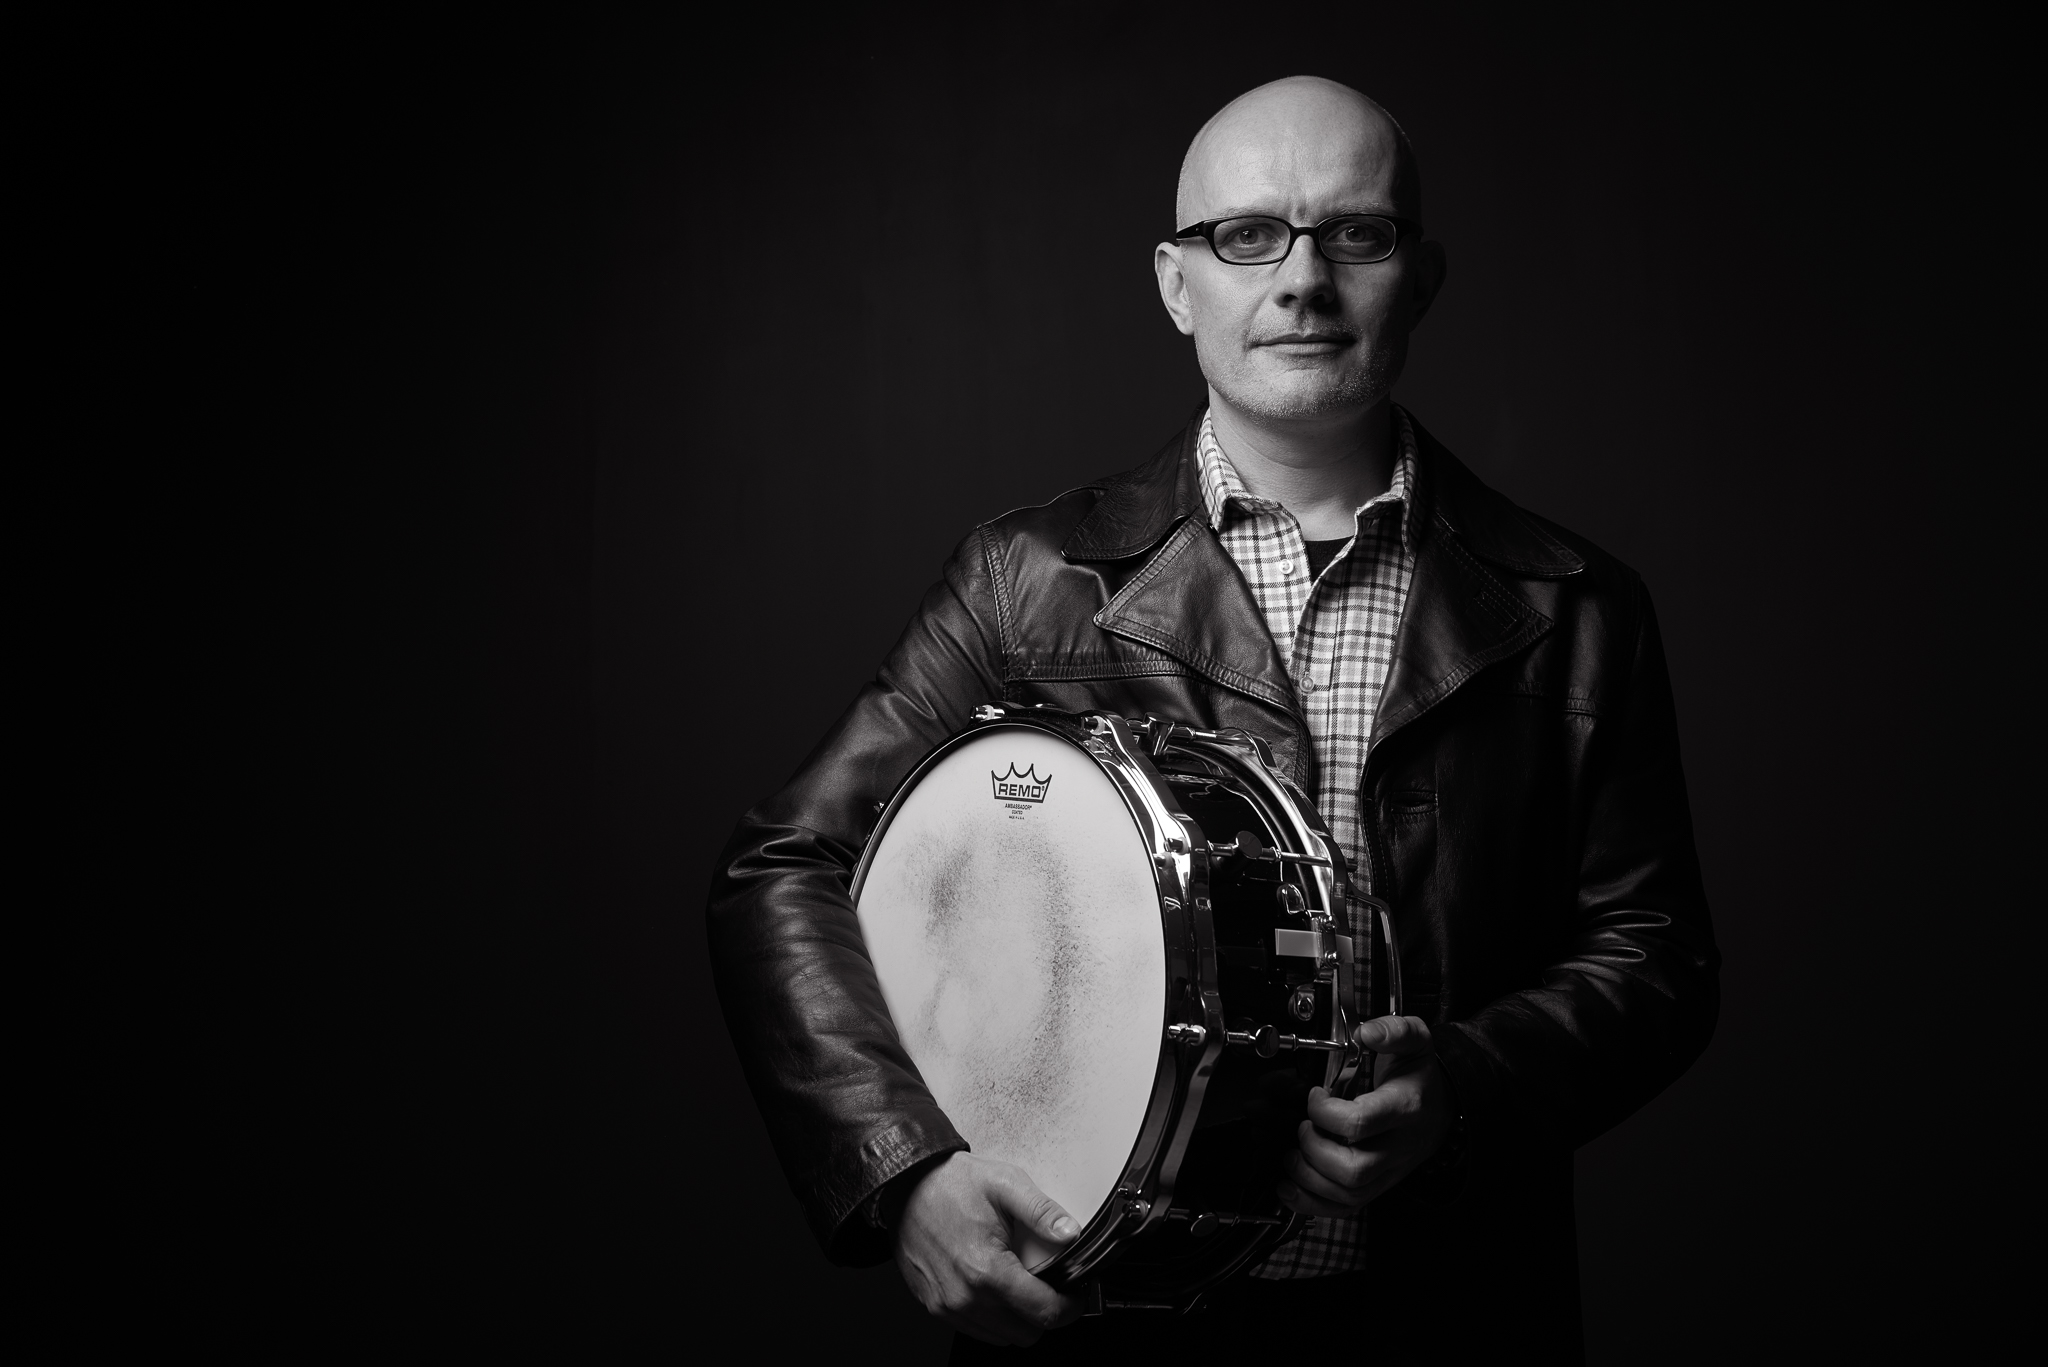
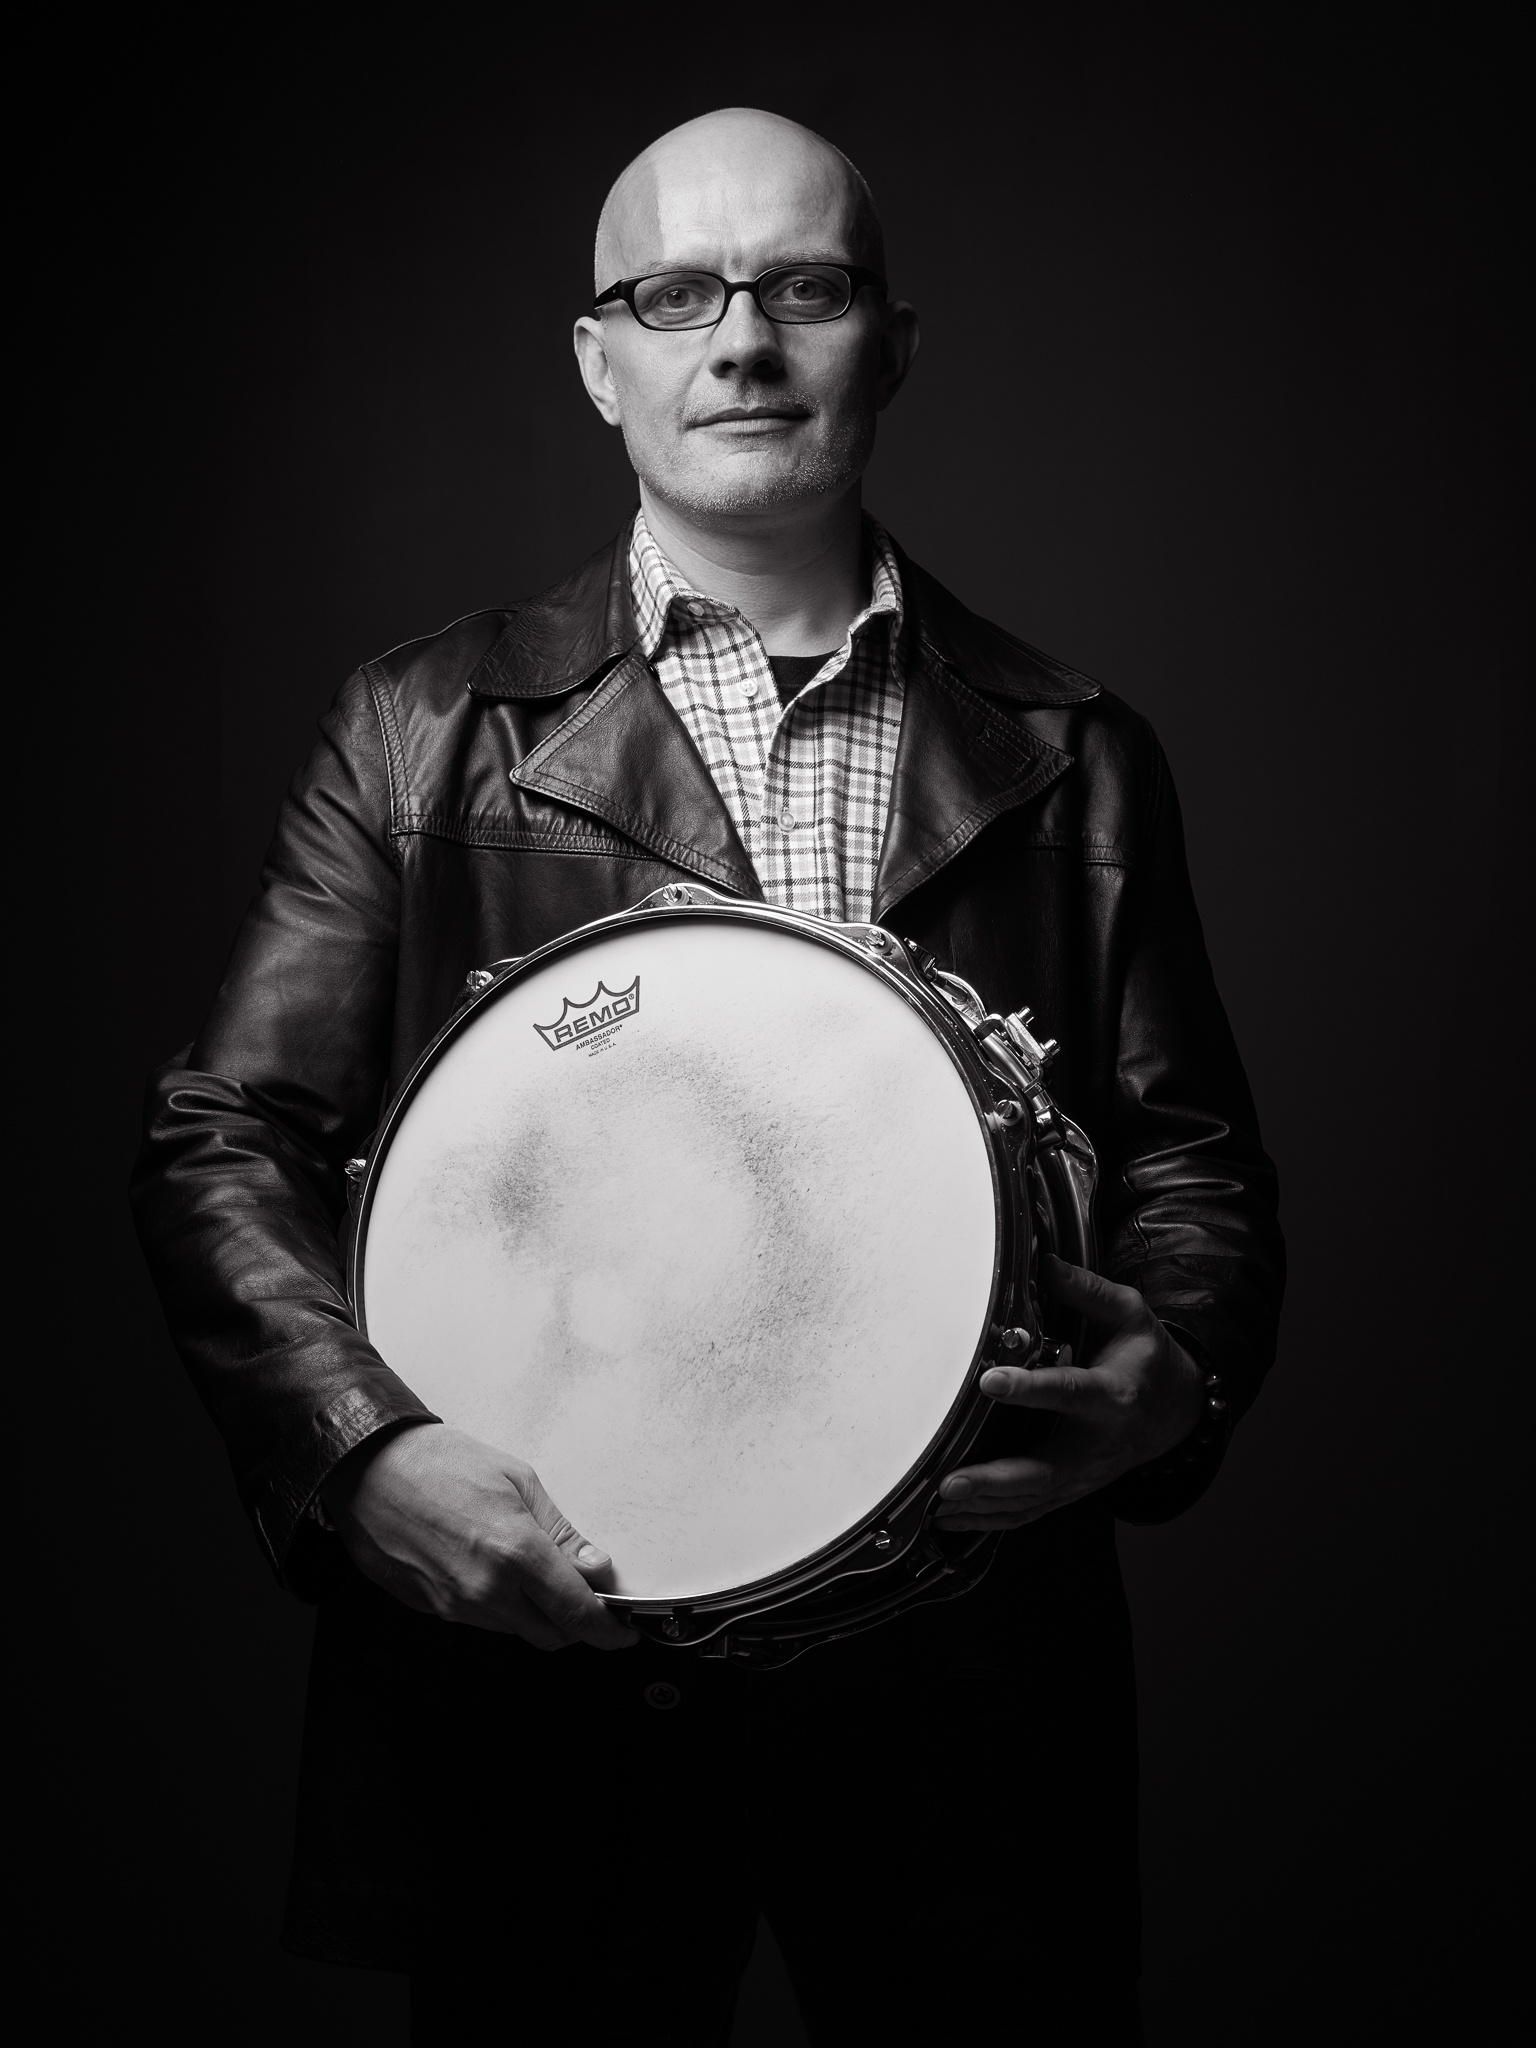
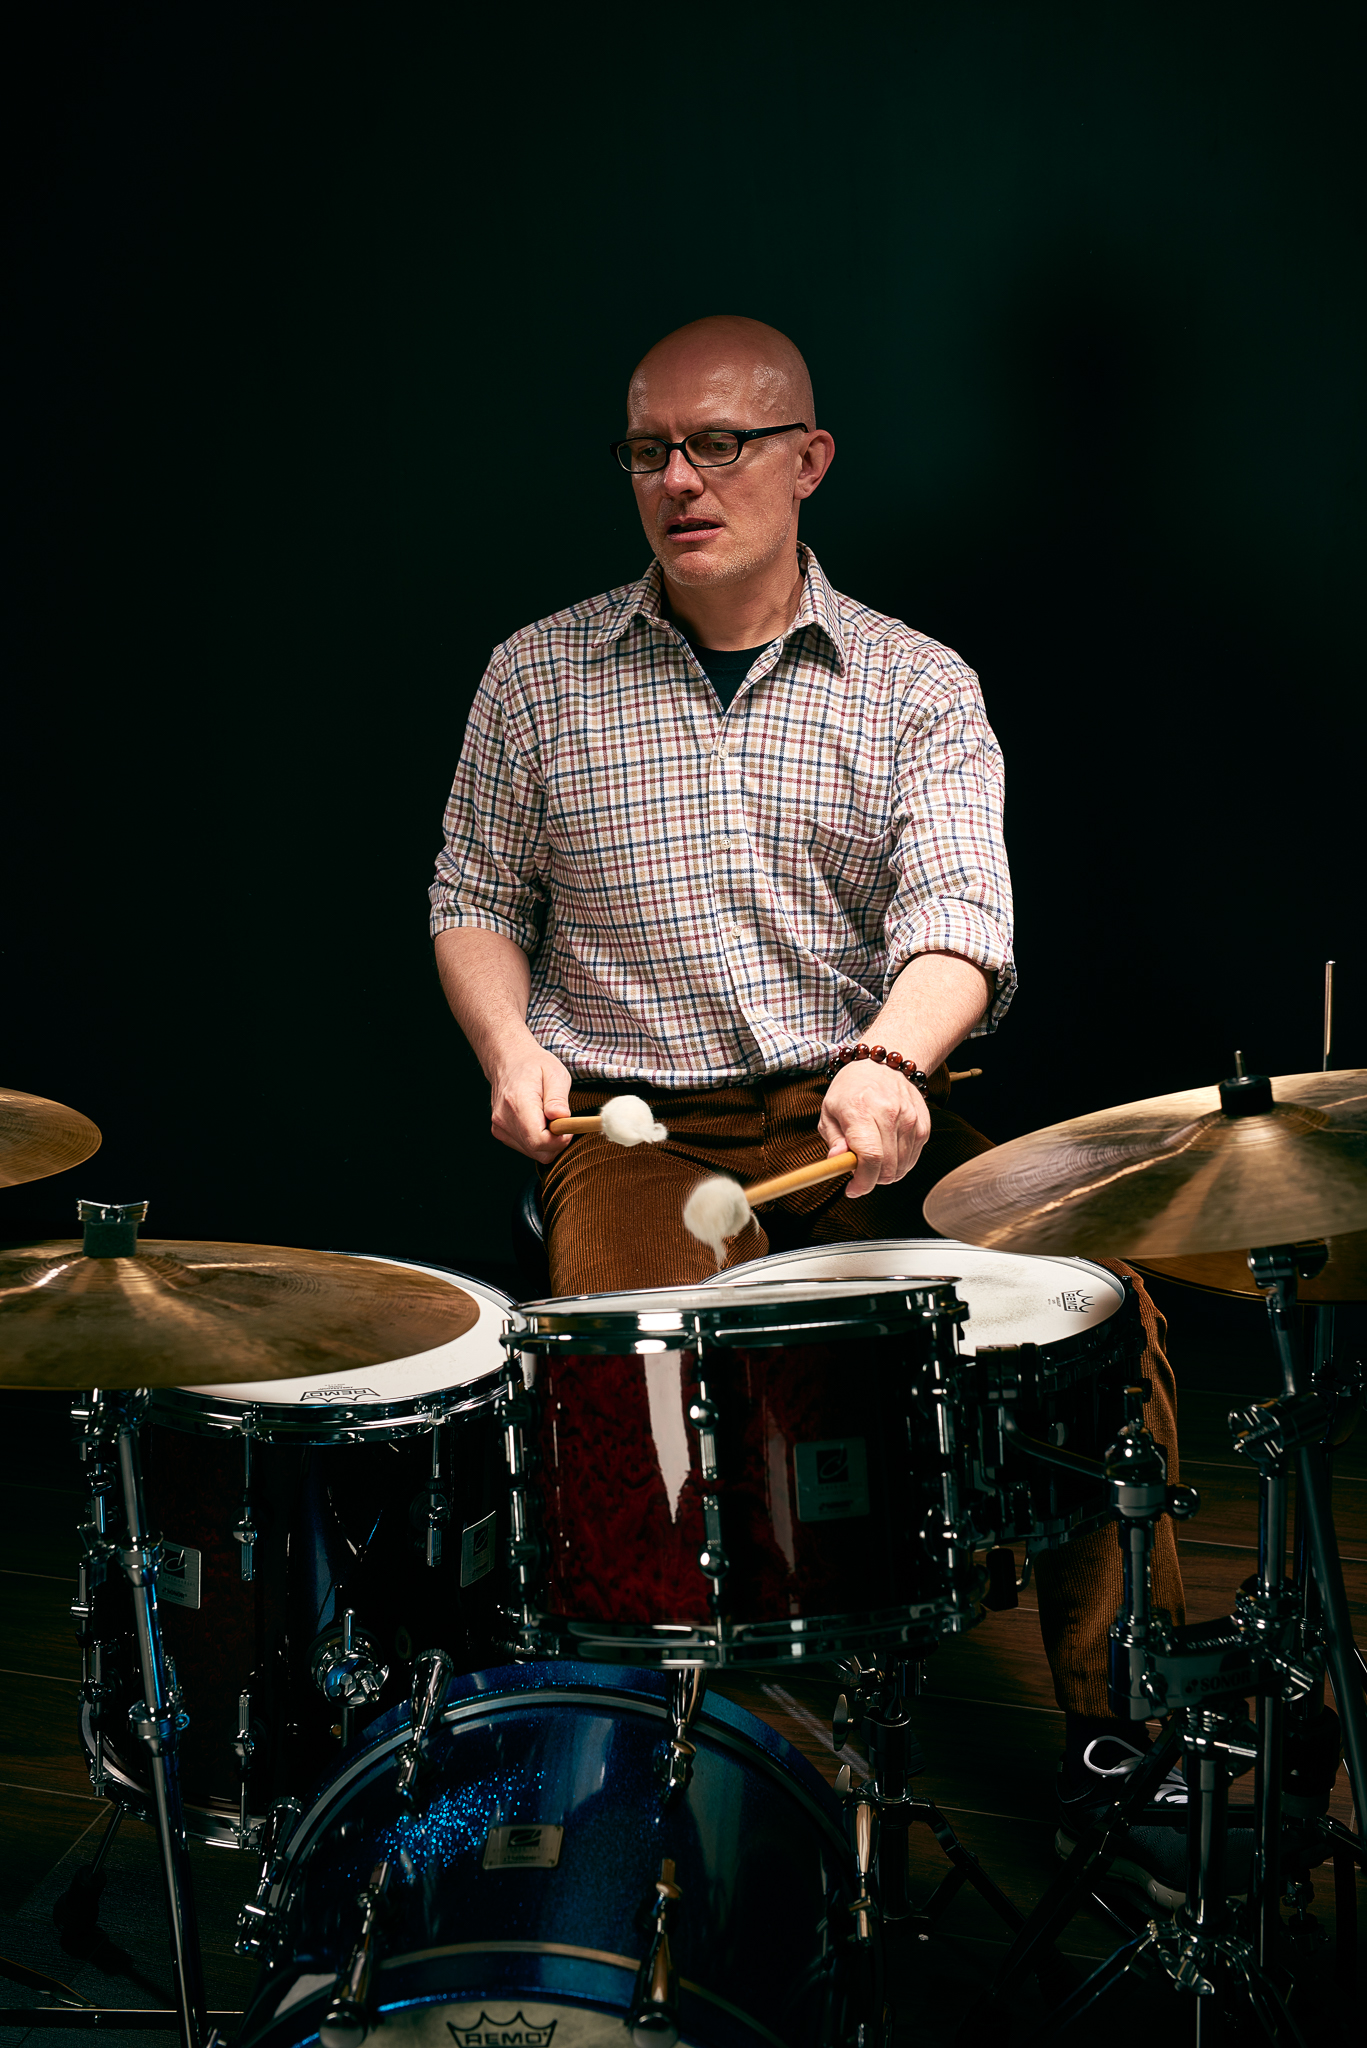
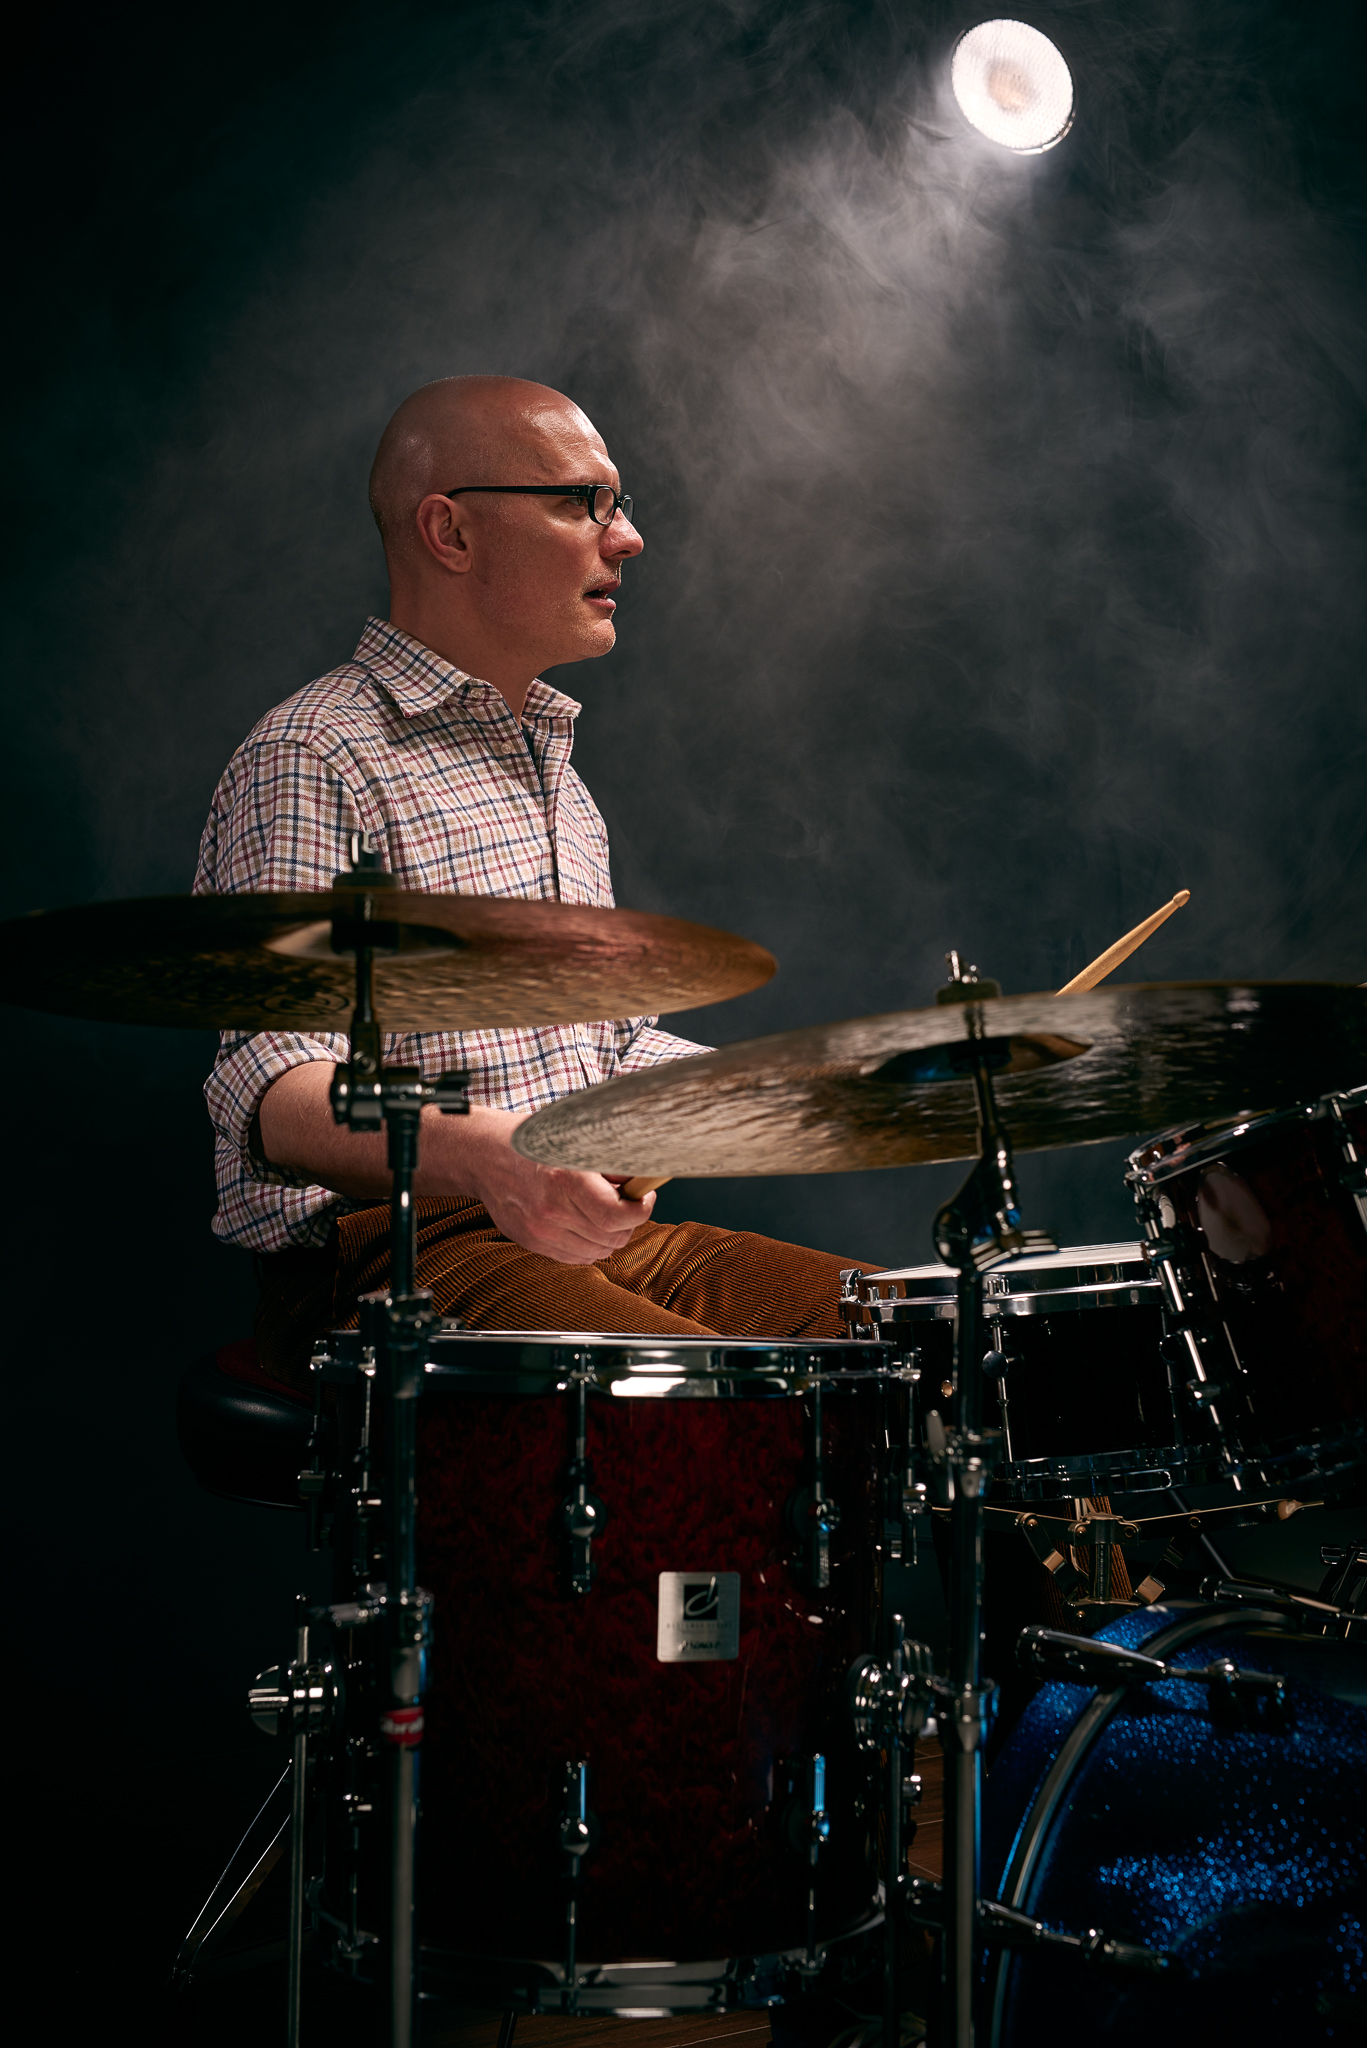
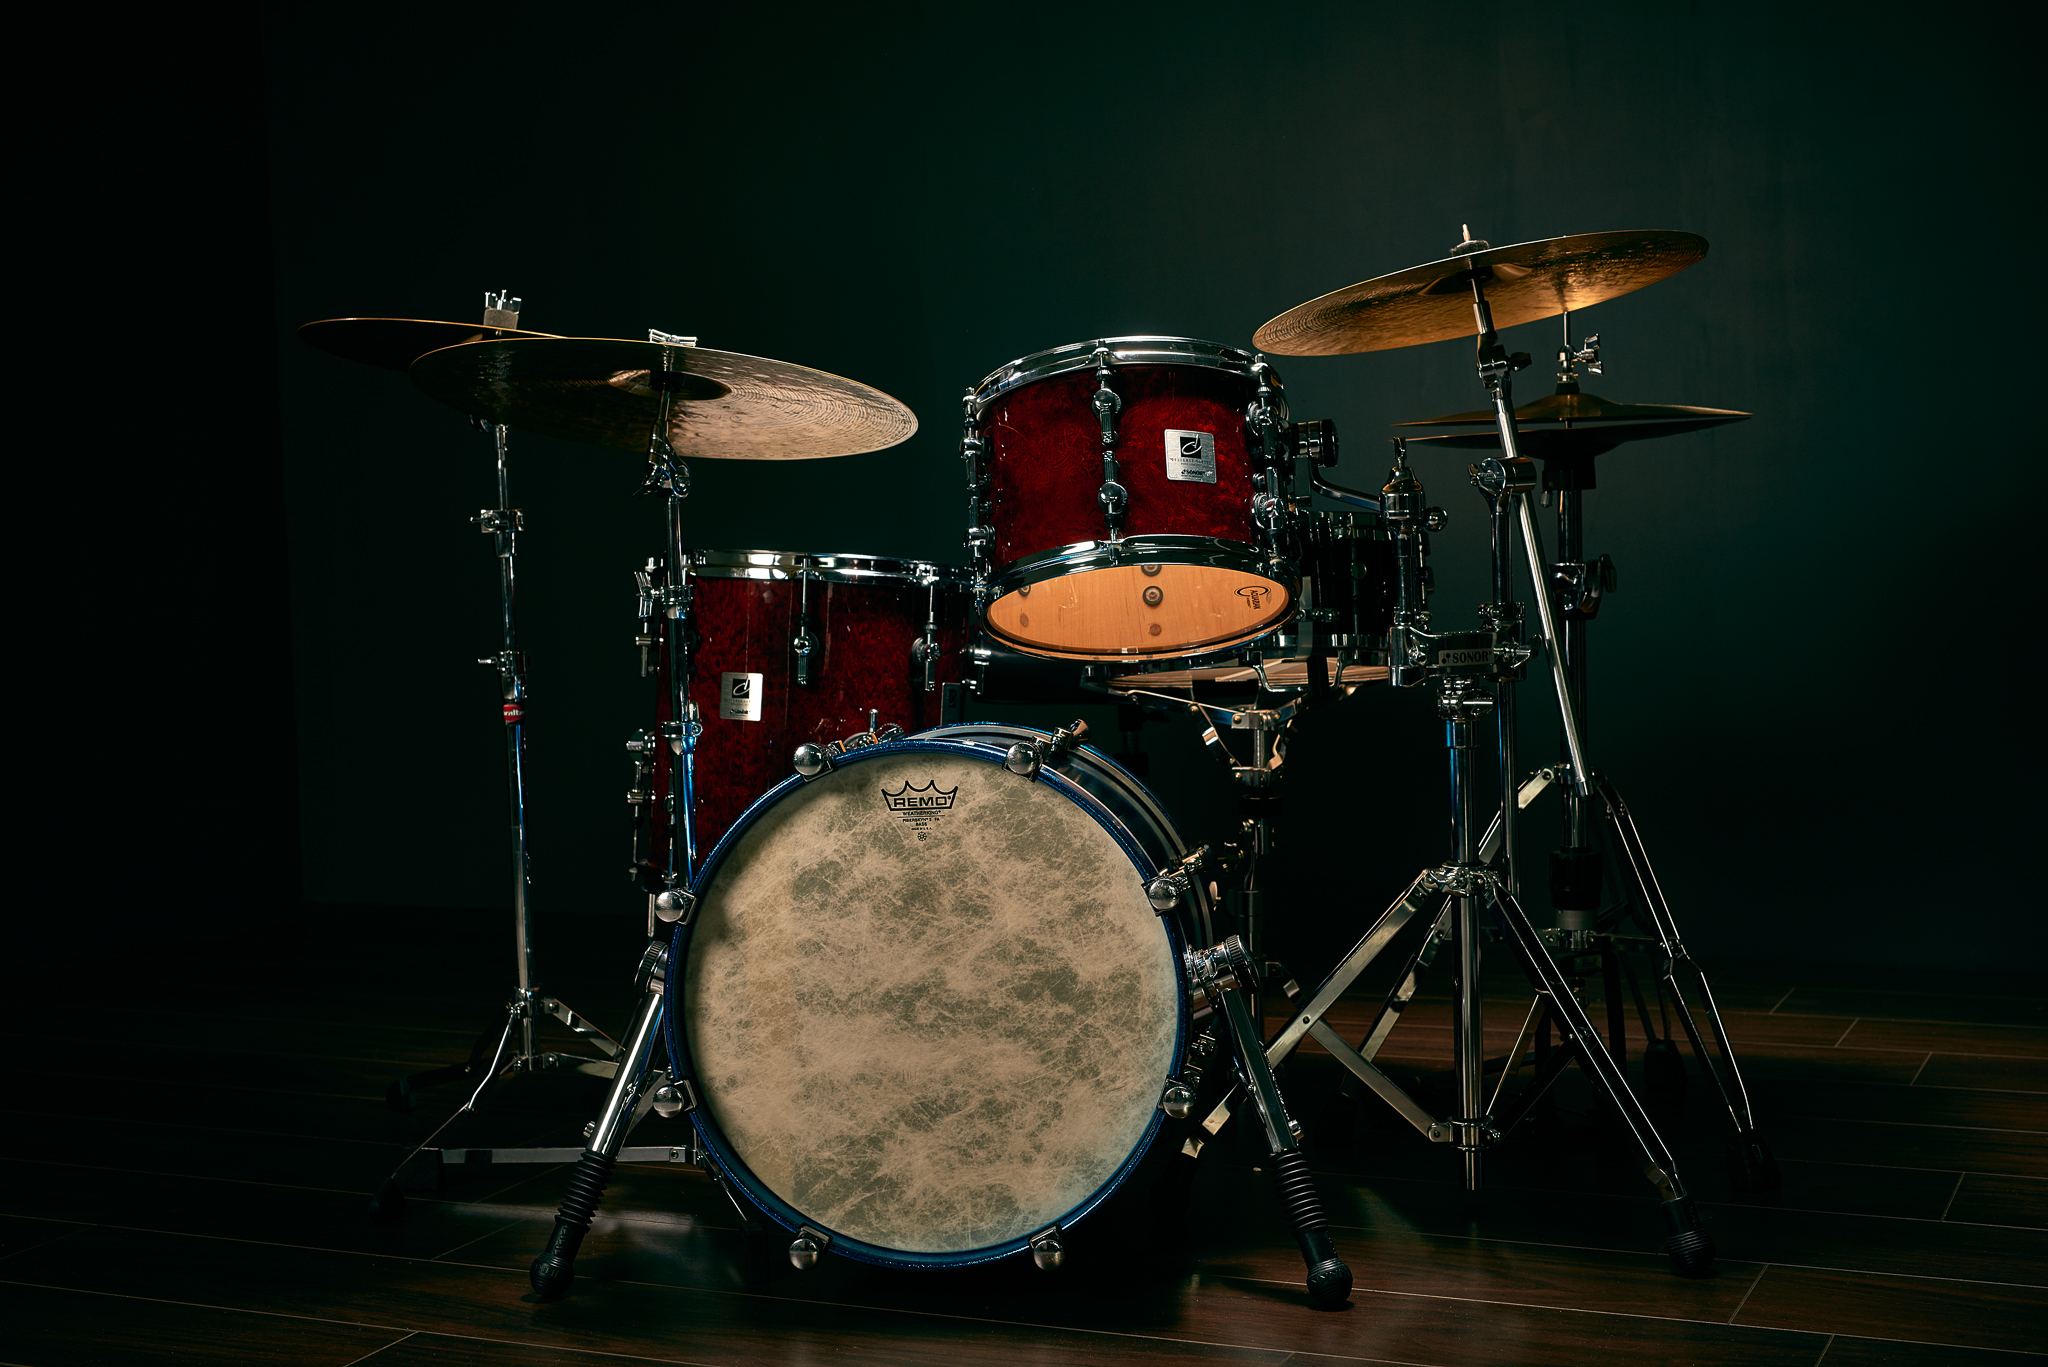
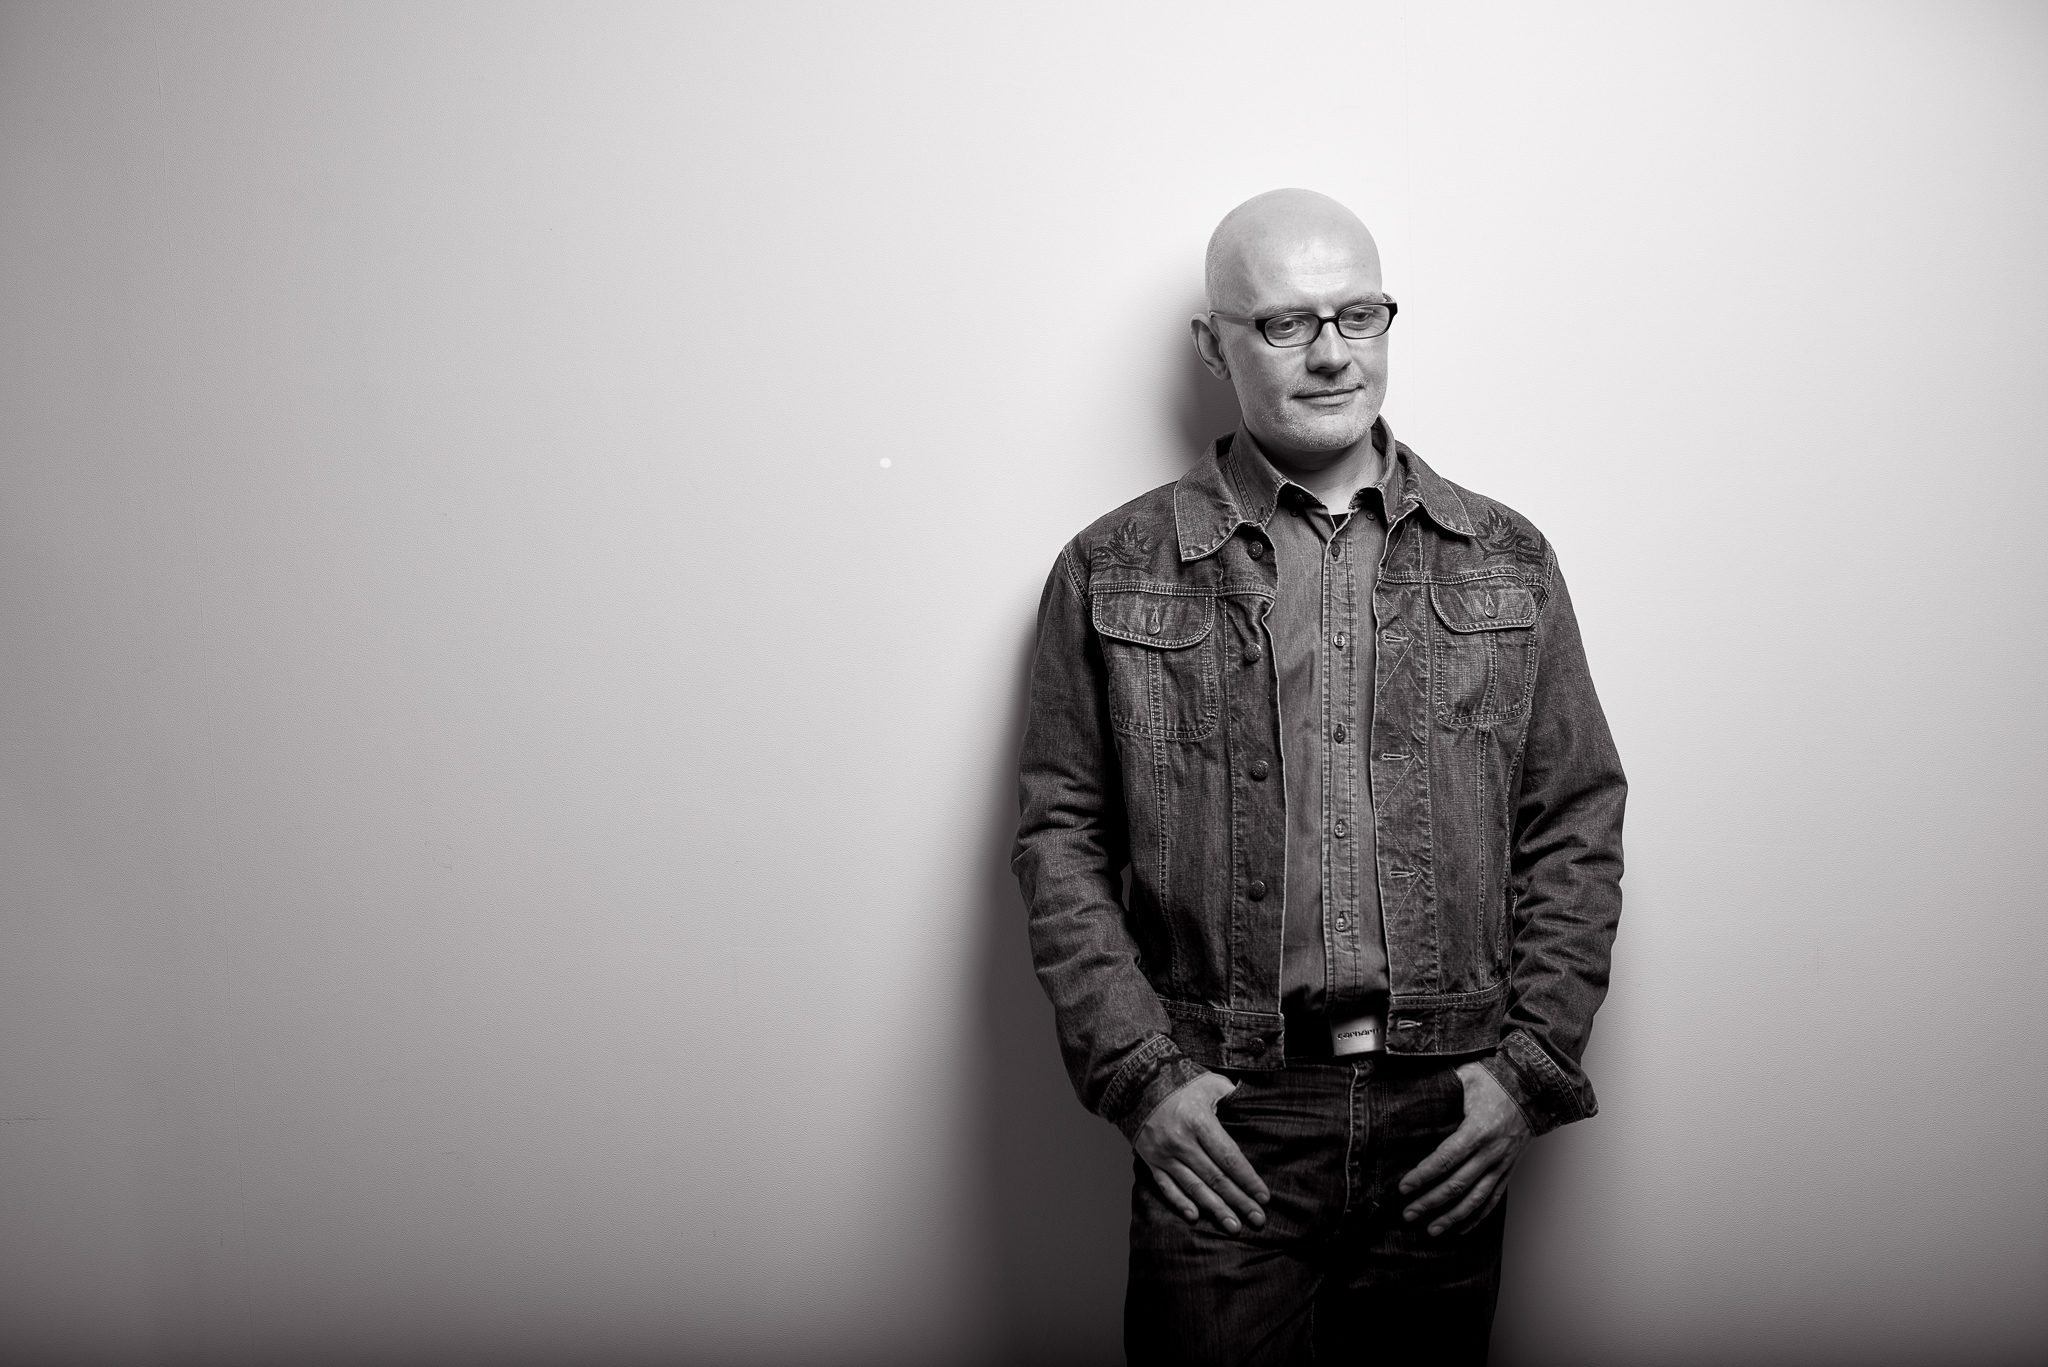
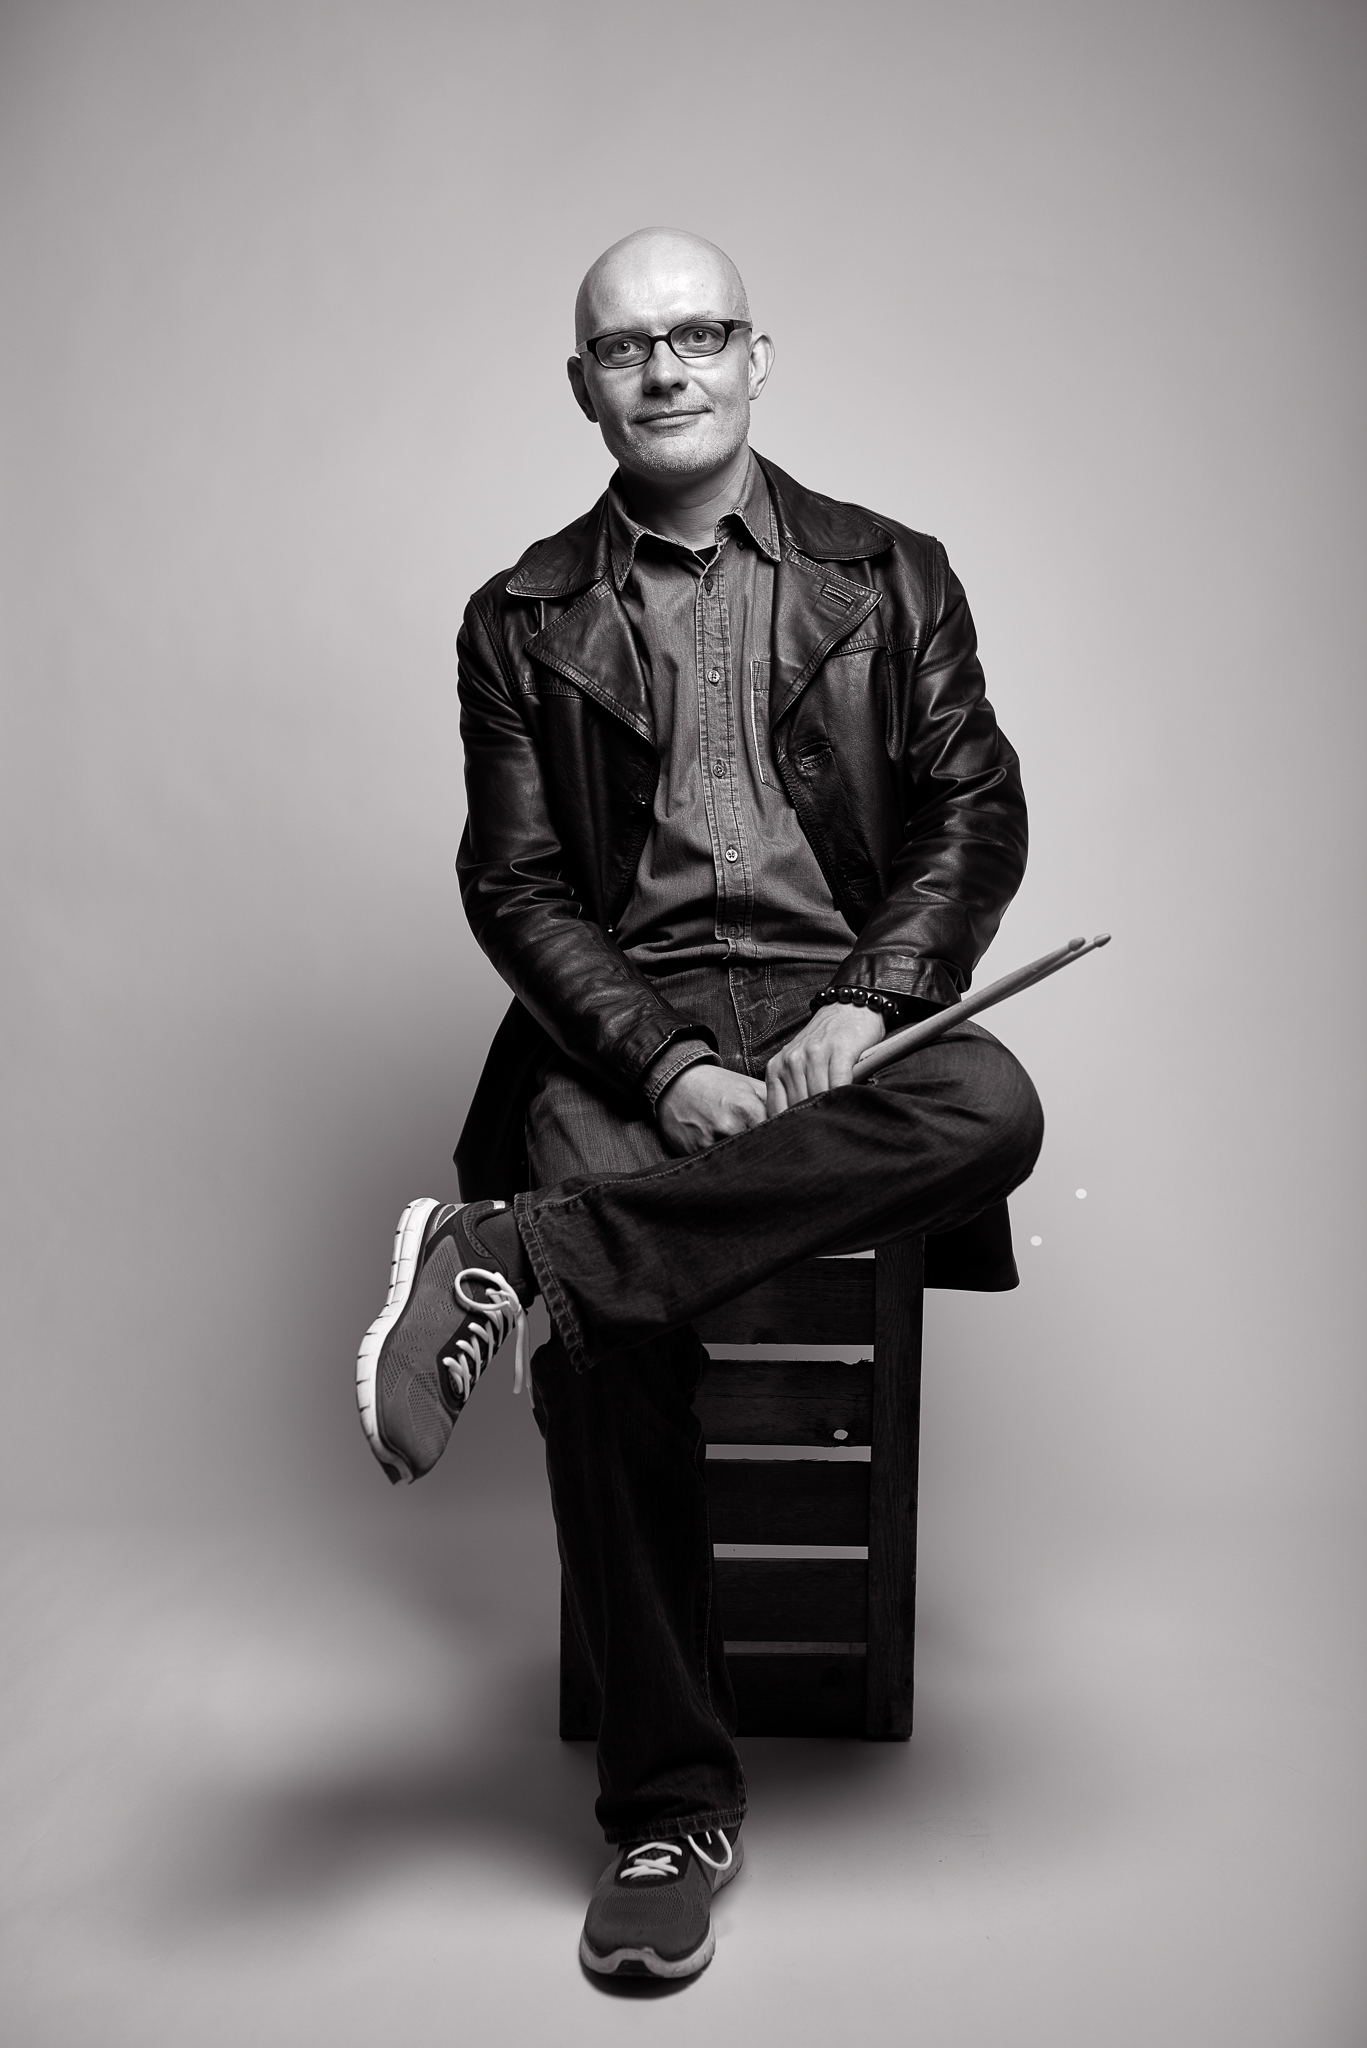
Yesterday I shot a package of new promoshots for drummer Armand van Middendorp in My studio. It is always nice to get full trust and be able to try some different set-ups. I also to love small sets in the studio. We started with some simple black and white portraits and the build some small sets. And also got back using the white seamless for some last shots. Here are the results and a behind the scenes shot.
Balletschool Attitude: Sound of Ballet
In august I was asked to shoot the photo's for the new performance from Balletschool Attitude. Last week I had the honor to also design (my first) the poster/flyer for the performance! So here it is!
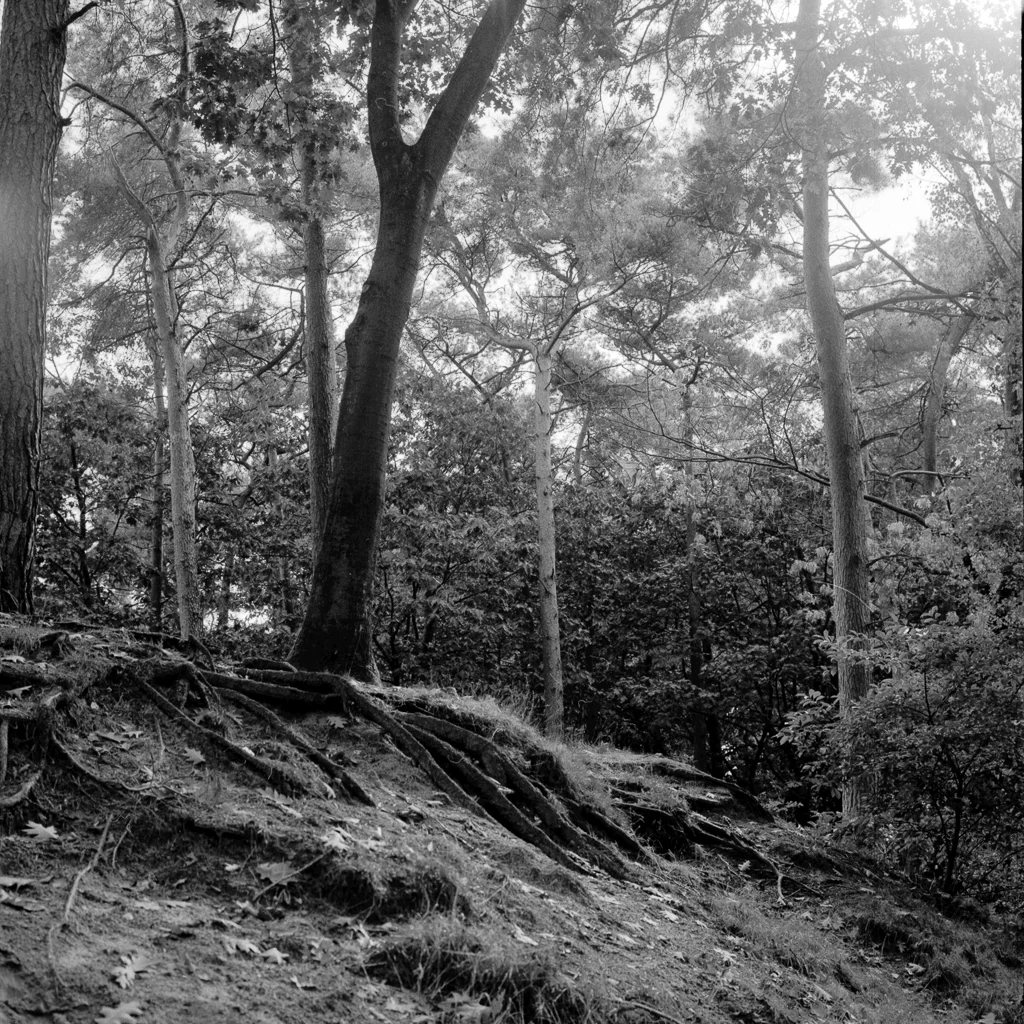
Hasselblad 500c/m Nature shots
During a trip to holiday park 't Wolfsen in Mierlo I had some spare time to take the Hasselblad 500c/m out for some nature shots. I used some Ilford HP5 400 film. Saturday I could pick up the processed film from the lab and today I could scan them. Here are a few photo's I likes the most


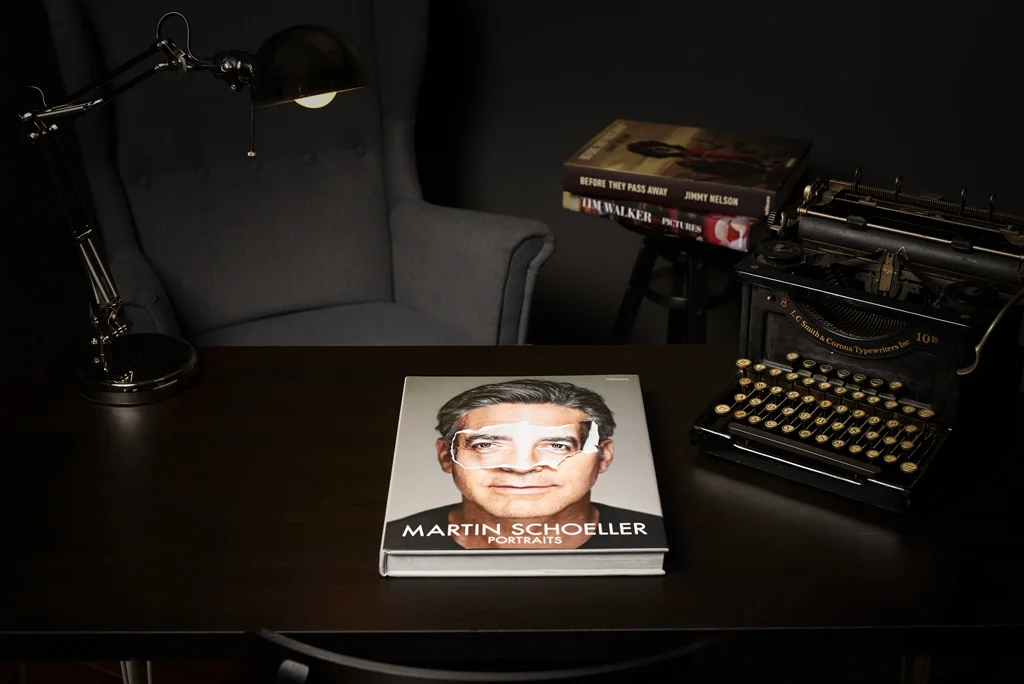
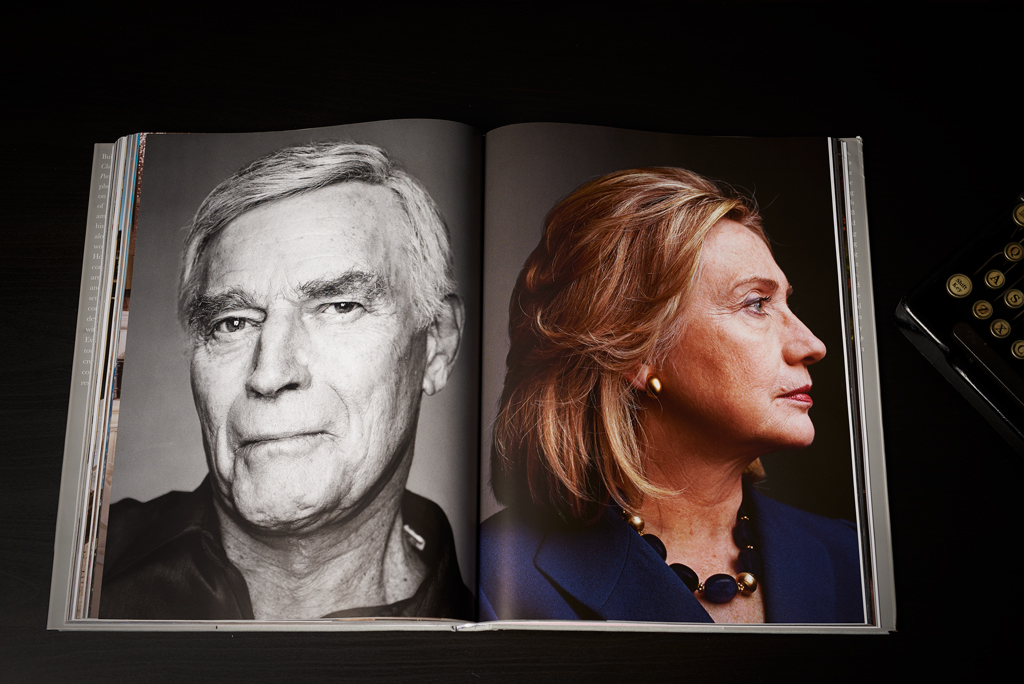
Book review: Portraits by Martin Schoeller
Hi All,
Here is another short book review. This time about Portraits of Wouter Schoeller.
As a portrait photographer I must say this is really an inspiring book. I love his style. The great thing is that the book not only has his basis two strip light style but also a whole variety of different types of portraits and editorial/commercial work. The book is really a nice overview of the work Martin Schoeller has created in the past decades.
I can really recommend this book to every portrait and editorial photographer to use as a source of inspiration!
Video's
Below I have added a few nice videos with Martin telling about his way of work and the book
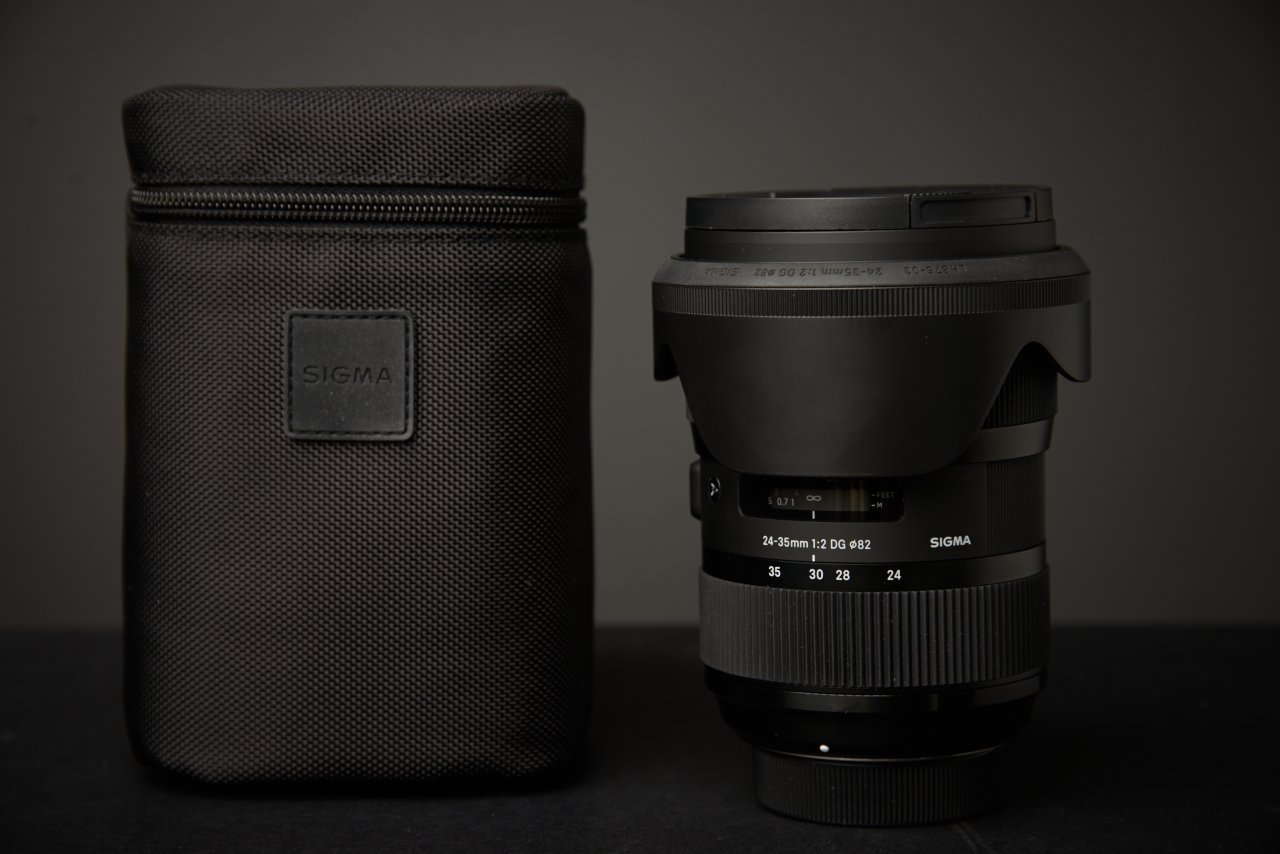
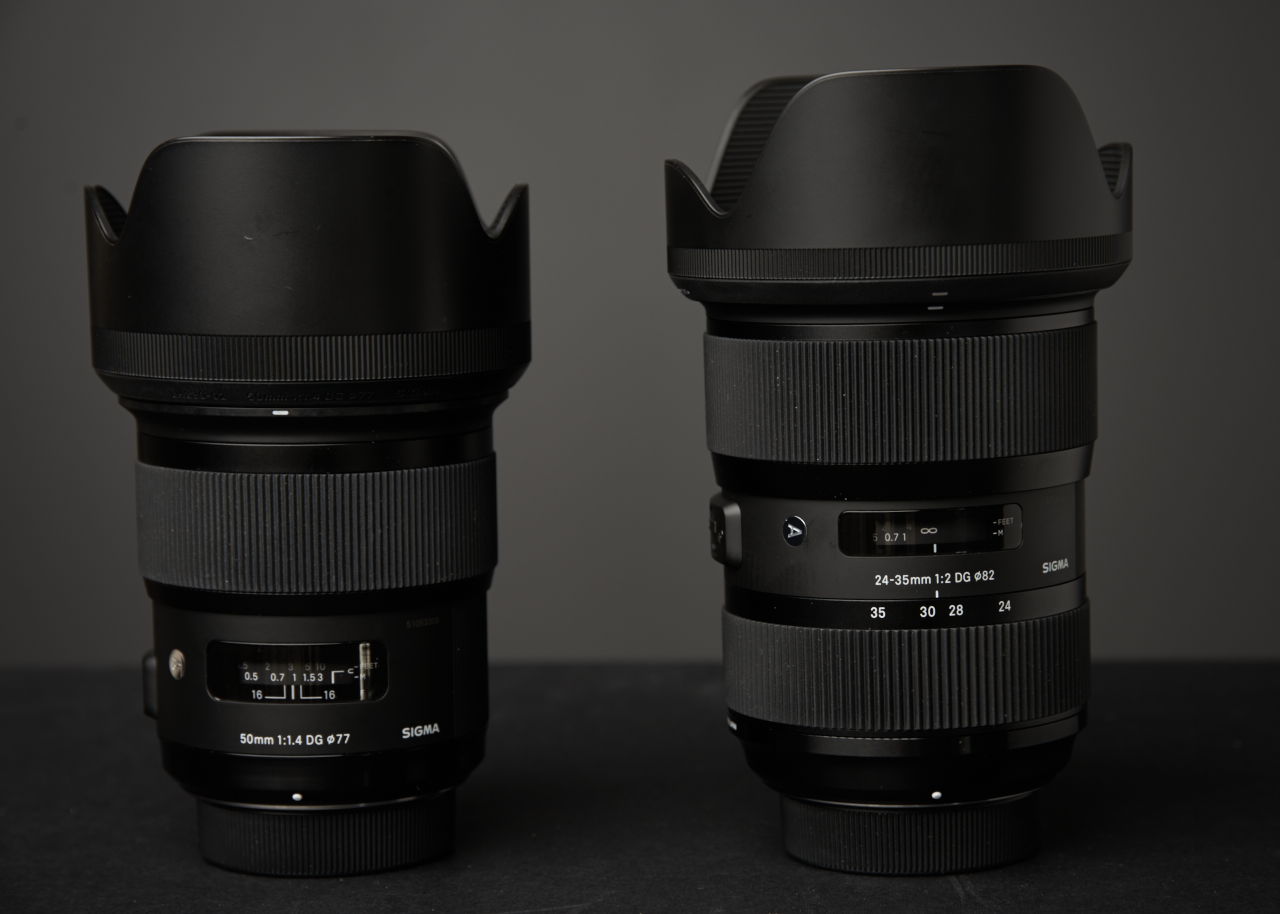
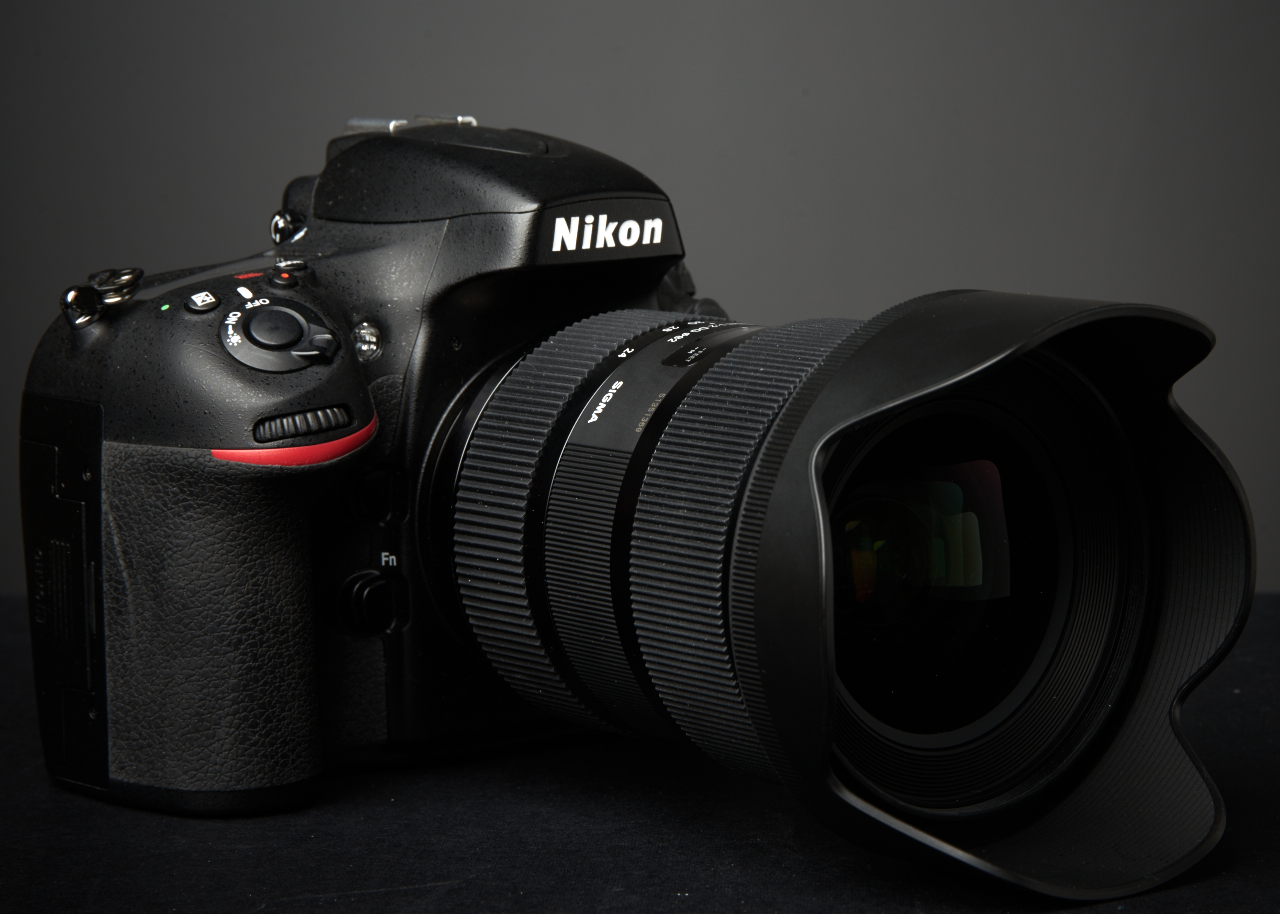
Review: Sigma 24-35mm f2 Art Nikon

For the last week I had the new Sigma 24-35 f2 Art lens for Nikon. I used it during a commercial shoot and on some portrait work. And I must say, I am a little puzzled about this lens. How and why I will tell you further up in this review.
First things first. As you might know. I am not a pixel peeping lab testing reviewblogger. I like to test camera's and lenses in the field and give my opinion based on my experience working with the gear.
The quality of the Sigma 24-35 f2 Art lens
Let's start with the easiest part of the review, the quality of the lens. This is simply excellent. Like all other Sigma Art lenses the Sigma 24-35 f2 Art lens is build really well. It feels nice in you hands, focusses smoothly, feels like a high quality lens and performance as a high quality lens. I must say the lens is large. It is even bigger then my Sigma 50mm f1.4 Art lens. I can't find anything quality wise to say anything bad about the Sigma 24-35 f2 Art lens!
Where to place the Sigma 24-35 f4 Art lens
So now the hard part. Where should I place the Sigma 24-35 f2 Art lens in my current range of lenses, what will it add. While working, a lot of time I was just using my Sigma 24-105 f4. And I forget I had the Sigma 24-35 f2 Art lens in my bag. So later I switched to the Sigma 24-35 f2 Art because I had it and could try it.
While working with it, the Sigma 24-35 f2 Art lens performed greatly. The zoom range was convenient. When I thought it was a little to wide at 24mm I could zoom in or a little to tight at 35mm I could zoom out. In dark places the f2 was handy, and due the focal length a lot was even in focus at f2. But I could also get a small depth-of-field when getting close to the subject. And you could focus it nice and closely.

A storyteller lens
Working with the lens and thinking about where to place it I slowly was figuring it out. This lens is not build for studio and portrait work but for people in the field and story tellers. If I was a wedding photographer or journalist photographer I would buy this lens. I love the 35mm range. But sometimes it is just a little bit to narrow to tell the story or when you are shooting in small rooms. A 24mm lens is a great lens to get everything in, but a lot of time it is just to wide. When there is to much information and noise in the image. Also the f2 aperture makes it great for working indoors. I could see myself shooting weddings with a 85 1.4 or 70-200 2.8 on one camera and the Sigma 24-35 f2 Art lens on the other and shooting all day without having to swap lenses.
The conclusion
The Sigma 24-35 f2 Art lens is a very high quality lens! And I can recommend it highly to every wedding-, travel- or landscape photographer. Or everybody who doesn't own a basic high quality zoom lens. But for me I don't think it will add enough to my current range of lenses. The Sigma 24-105 f4 Art lens covers the whole range from me, from wide to tele.
I hardly ever use the 24mm, so I am thinking about adding the 35mm art. I love the 35mm range my Fuji X100 and on the Leica M (Monochrome) (check the review for the Leica M type 240 HERE and the the M Monochrome HERE). But sadly the 24-35 f2 properly won't get back in my bag again. Although it is a great lens, it is not my lens.
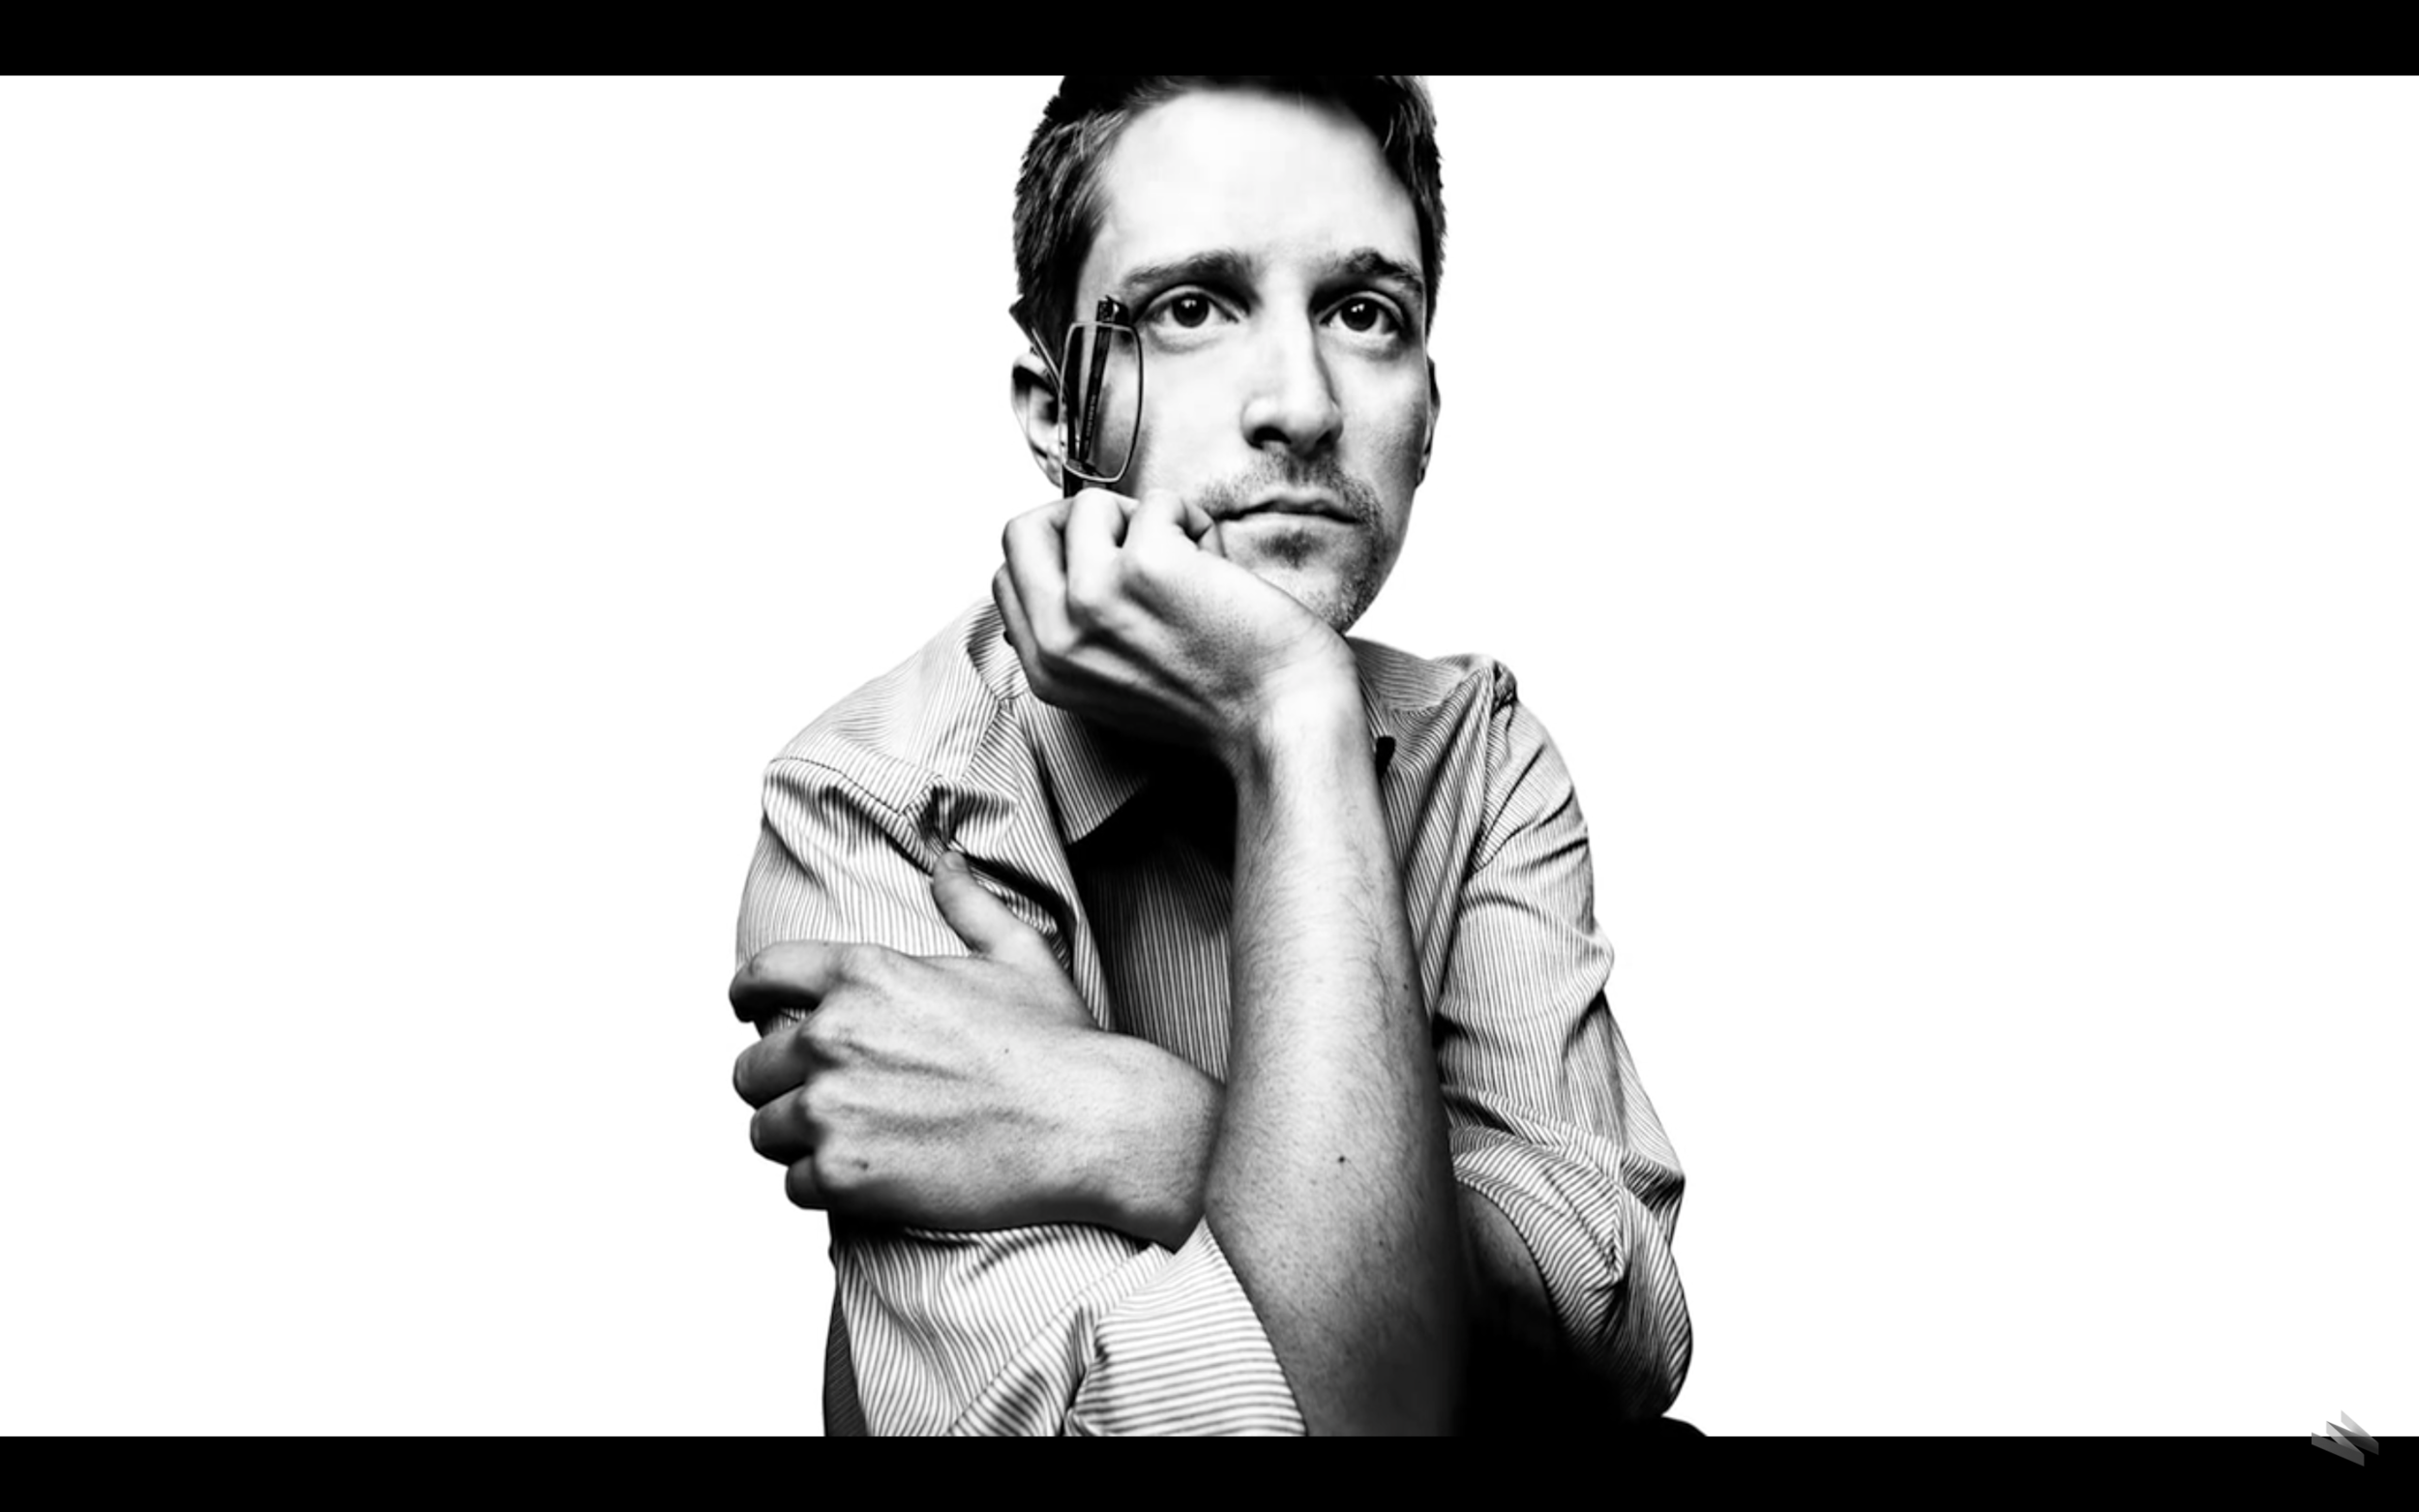
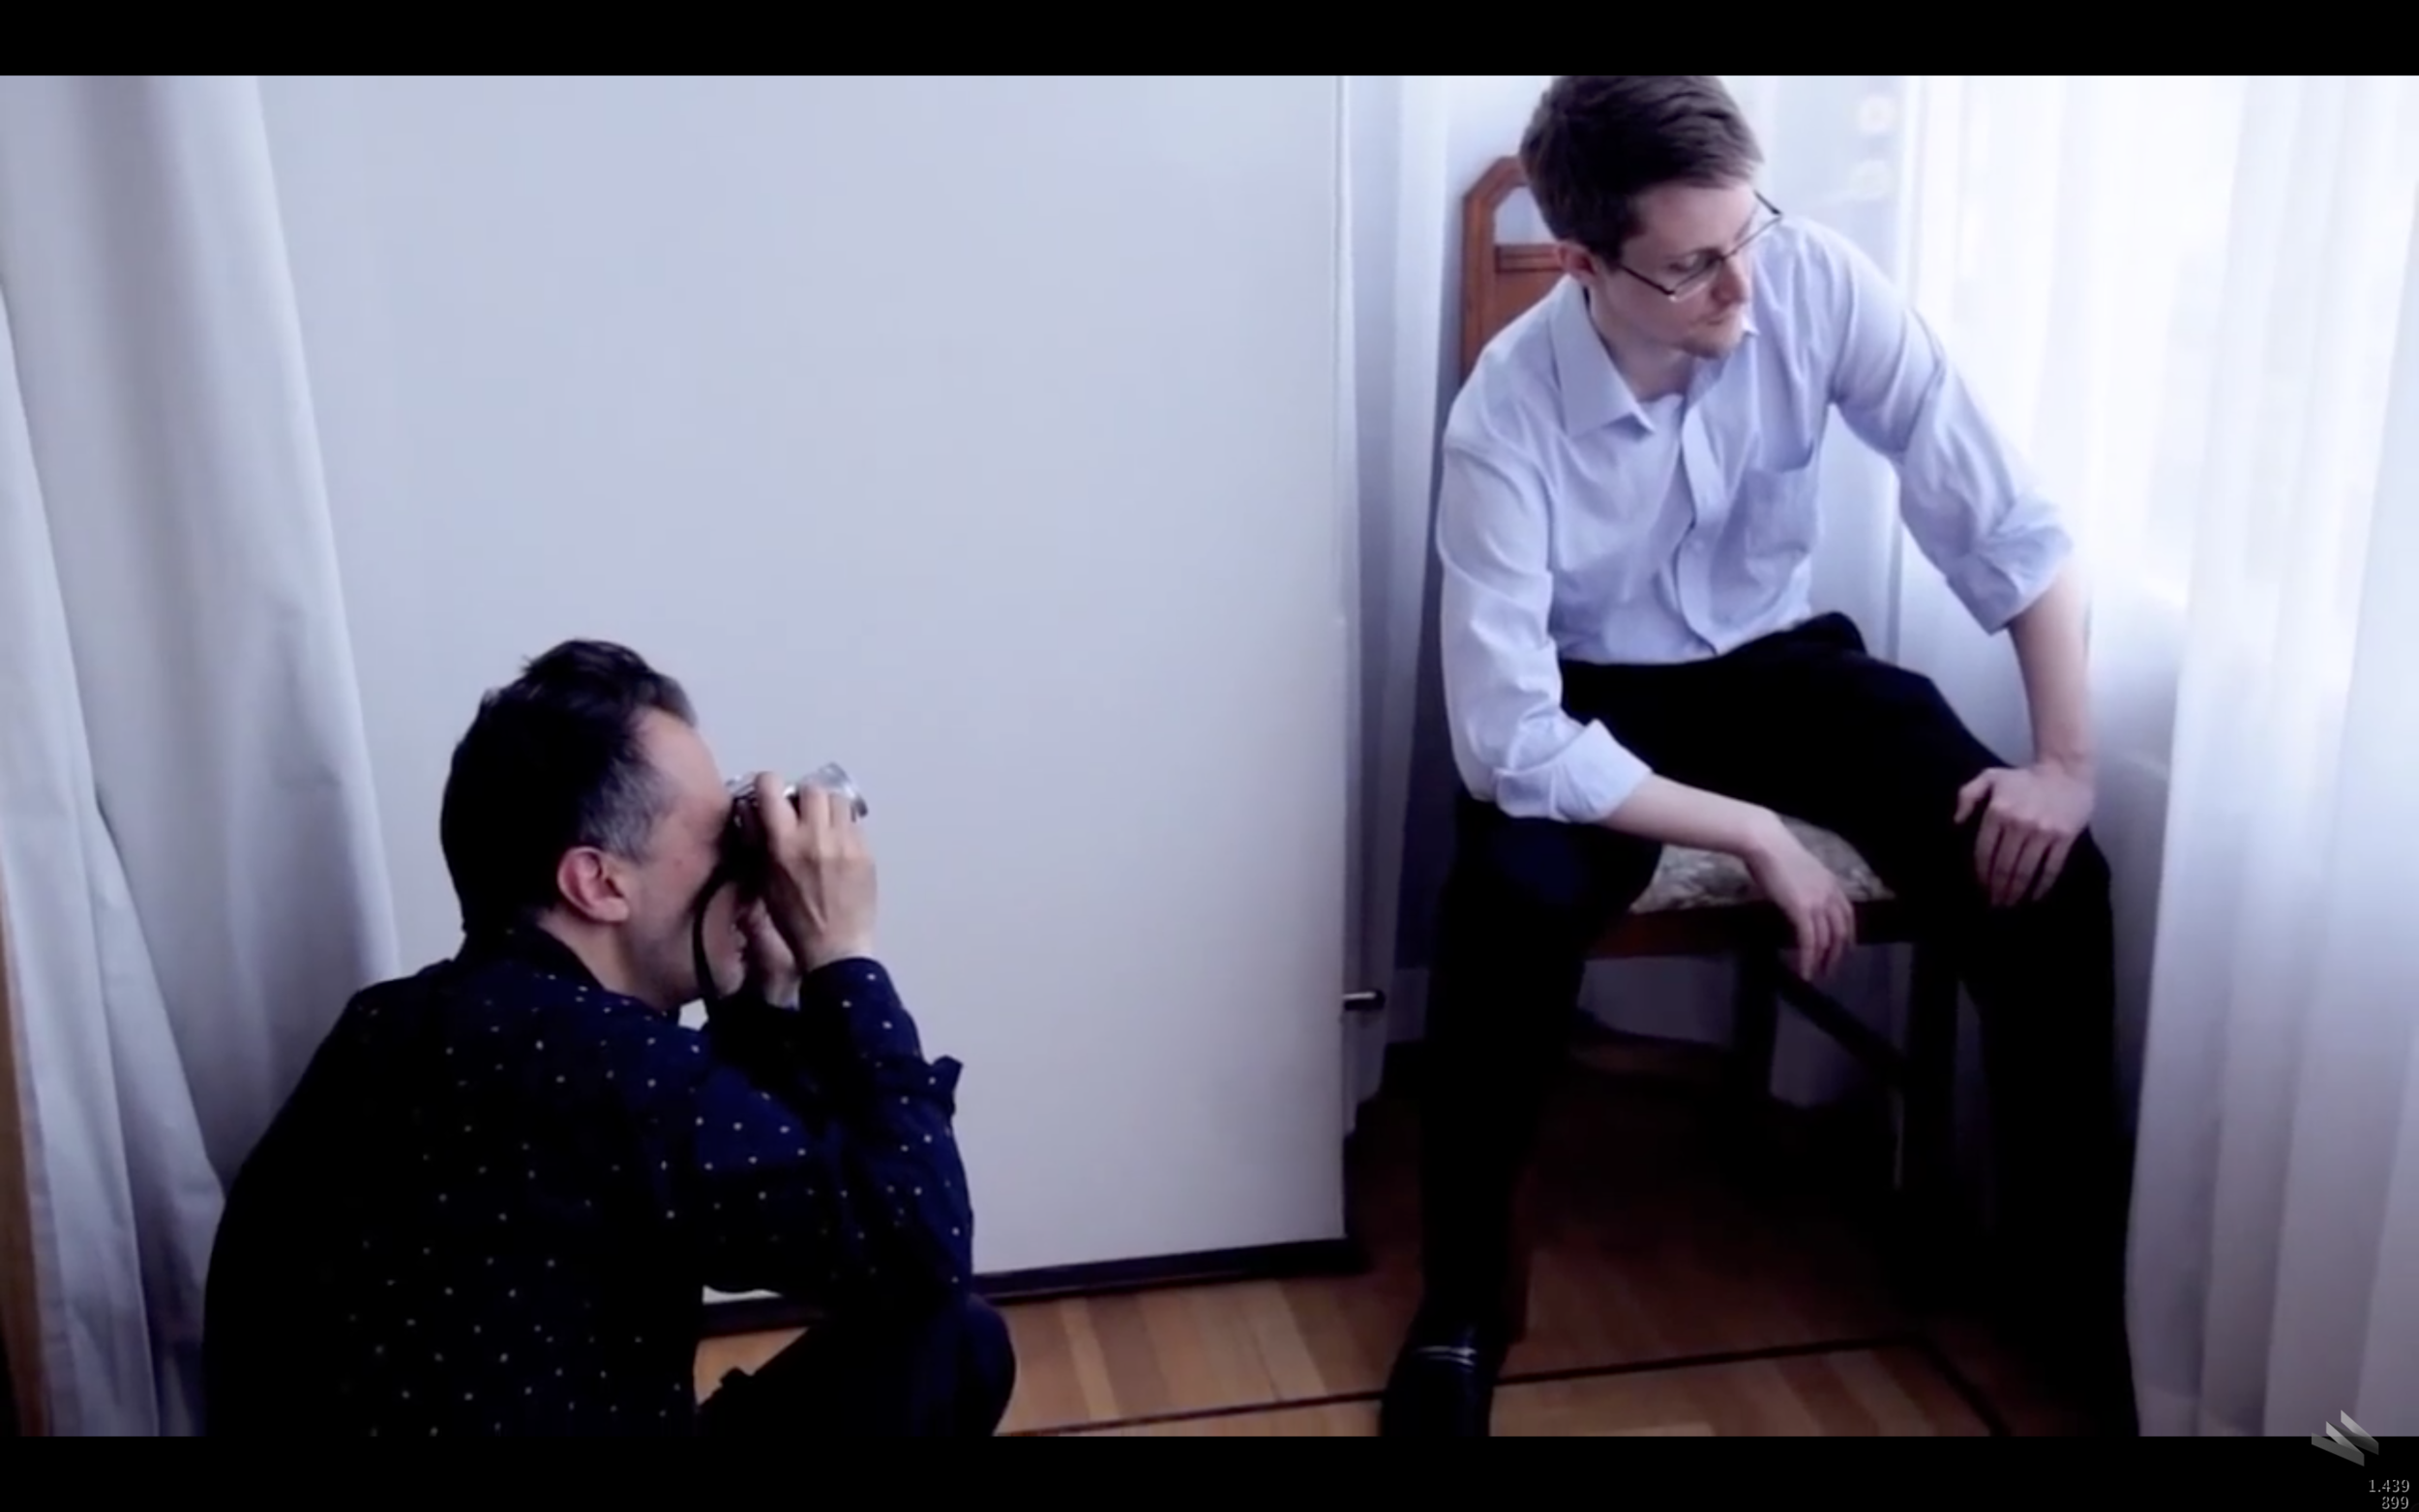
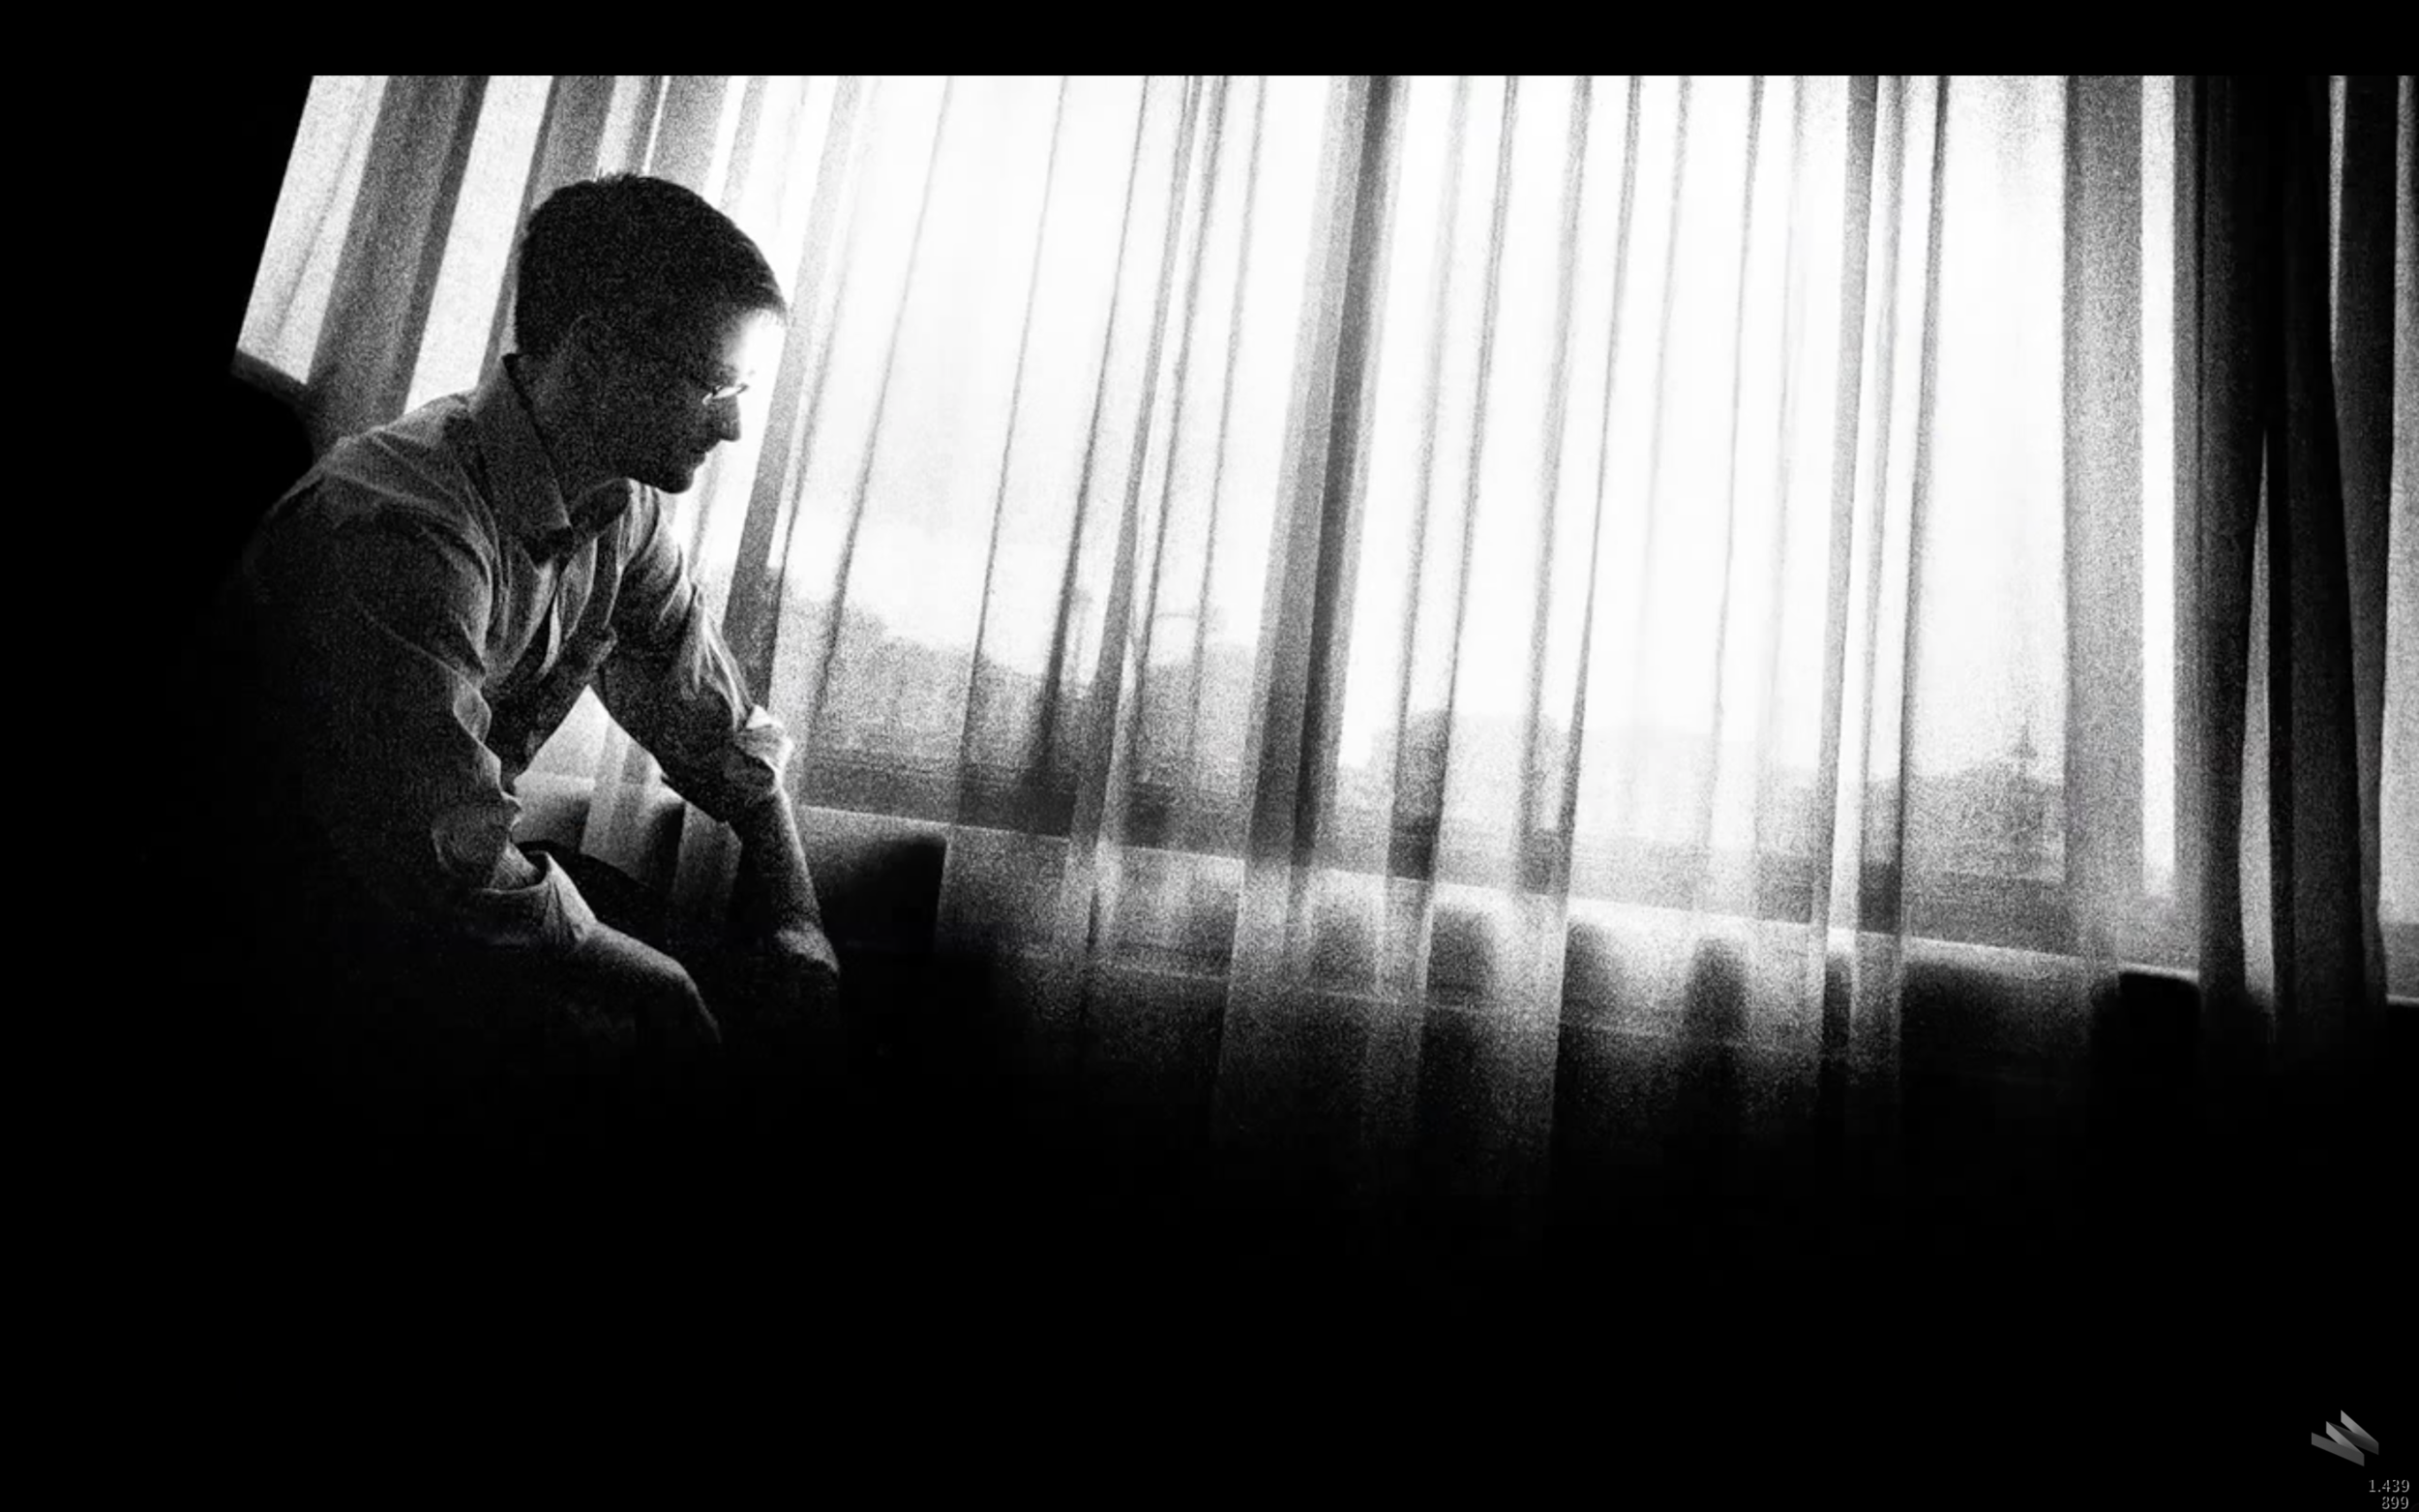
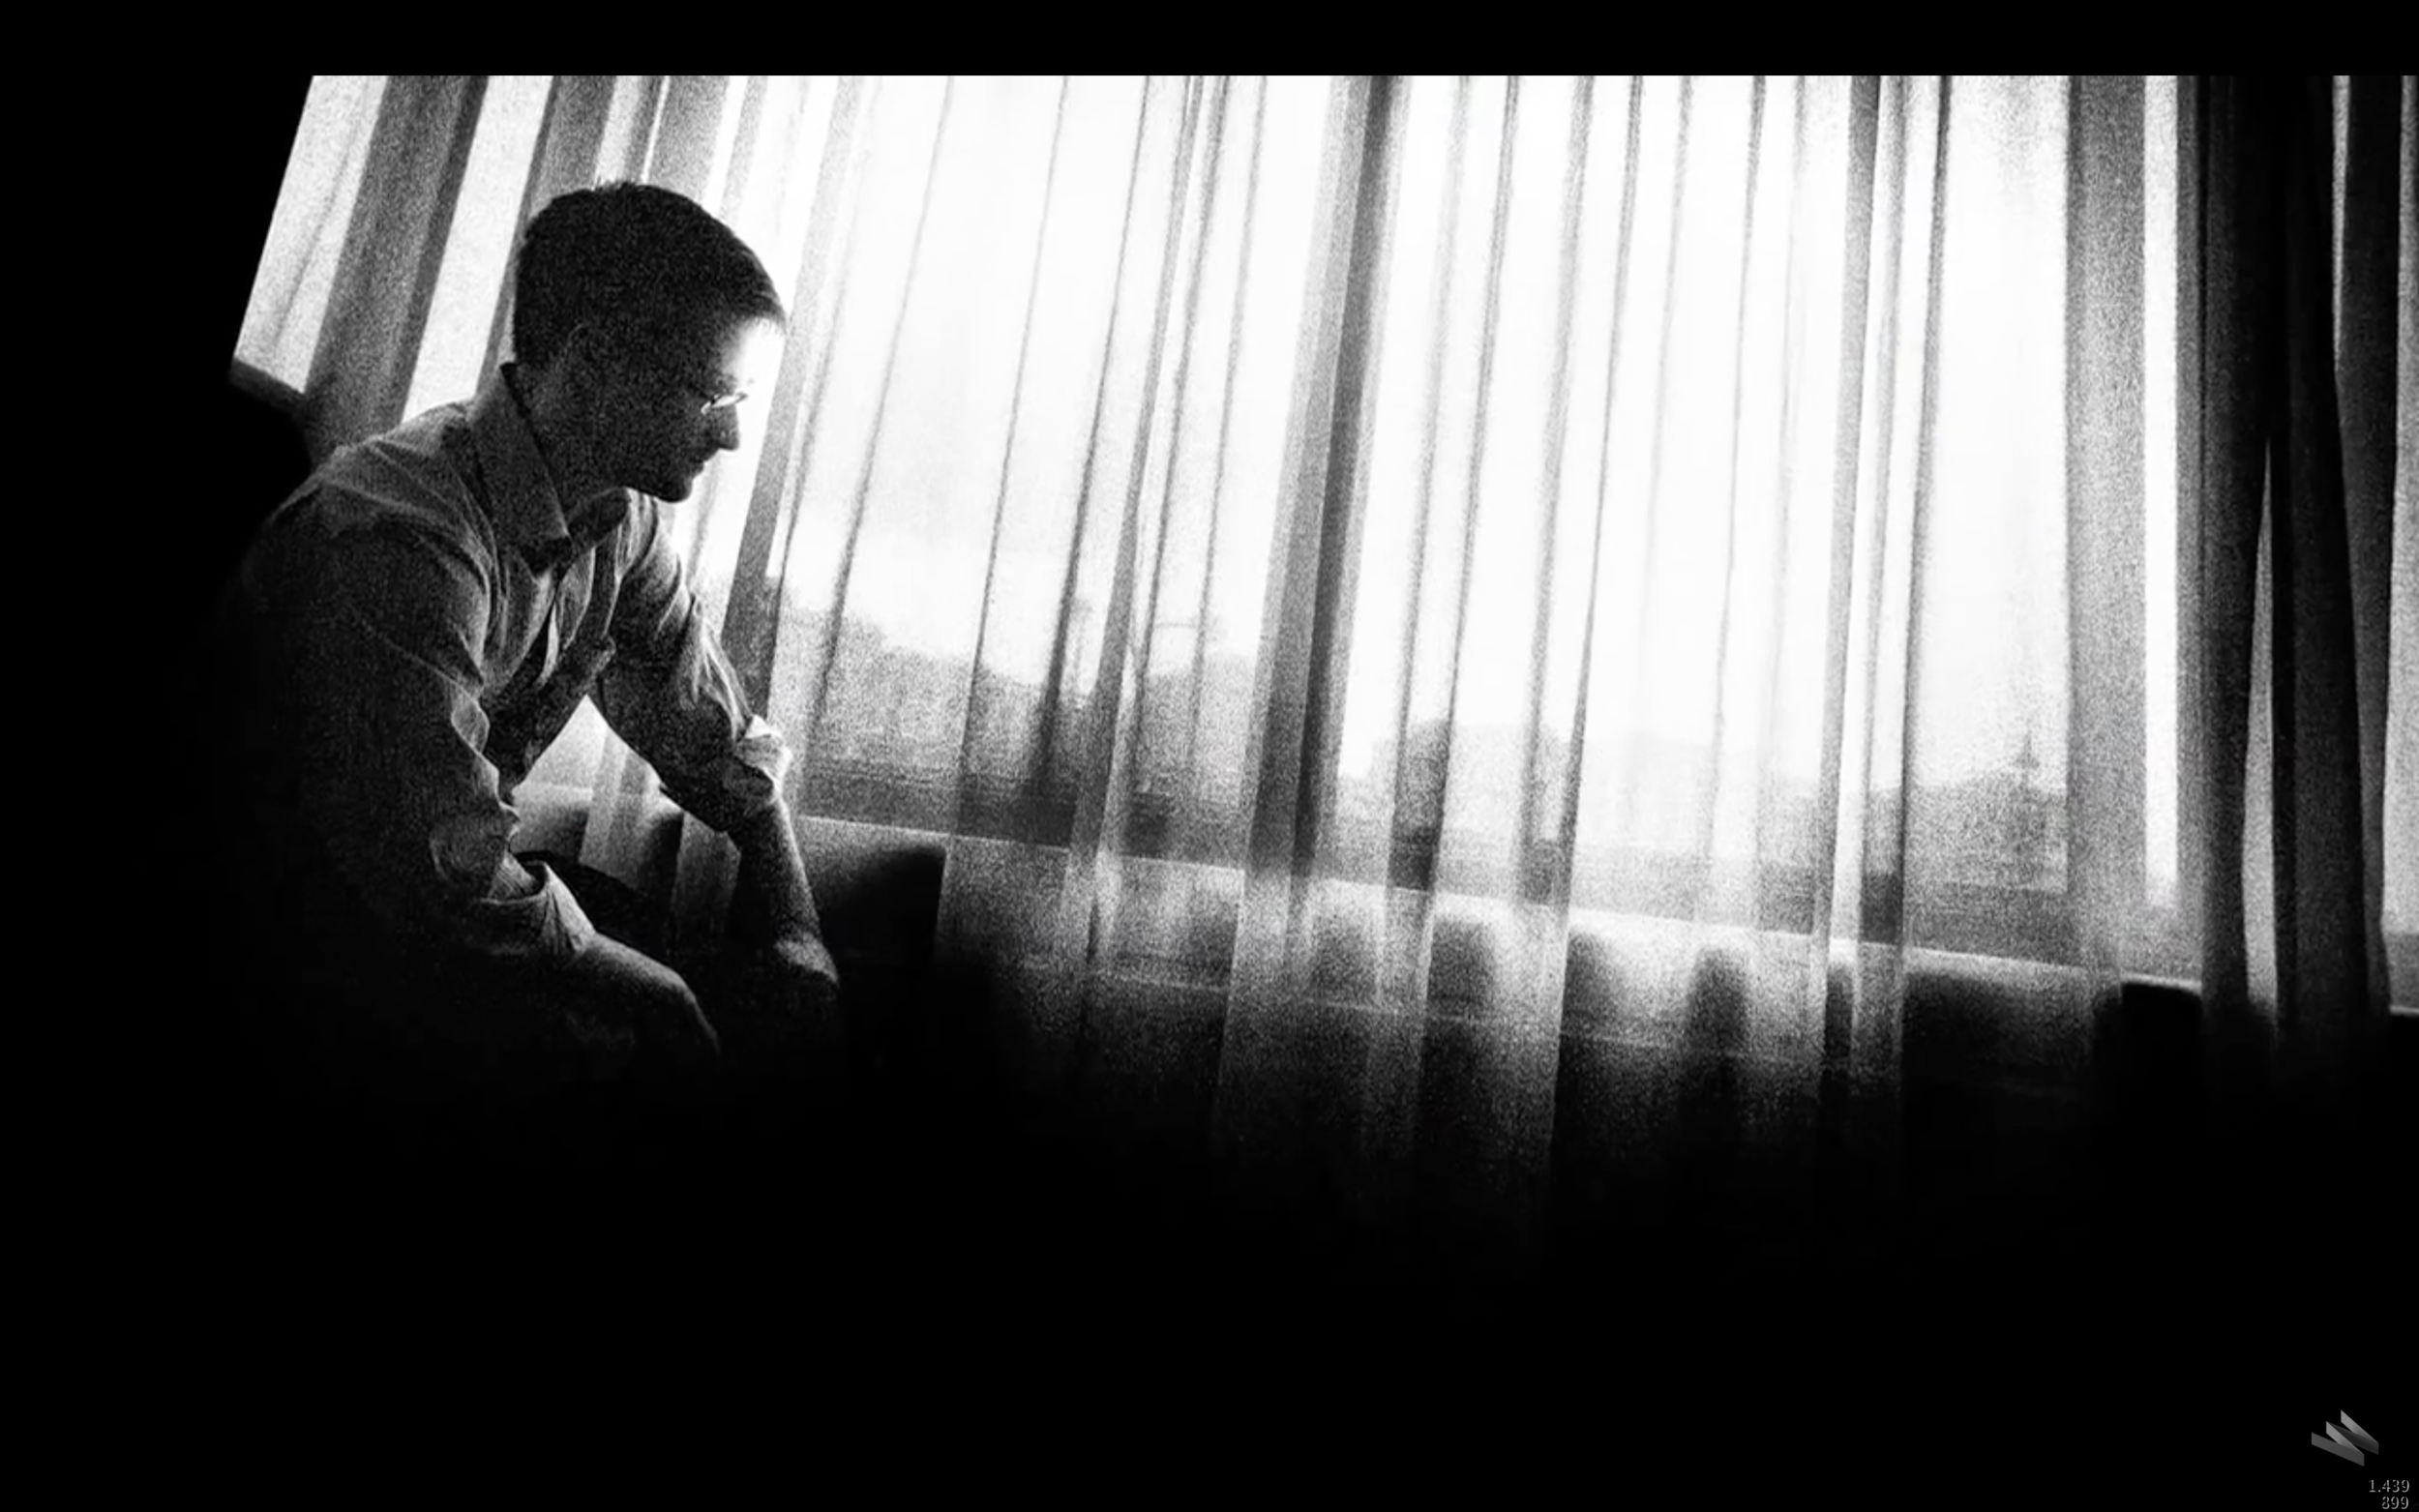
Platon shooting Snowden
I have been following the work of Platon for a while now. I really love his simplicity but powerful style of portraits. Last week I found this video of Platon photographing Edward Snowden. And I think it is really inspiring. The way they did everything in what looks like a hotel room. The lighting with just an single shoot through umbrella or the window light.
Below are som screenshots of the set-up and some photo's


Hasselblad Live in Zwijdrecht
Saturday I was at the Hasselblad Live event at American Lifestyle in Zwijdrecht (Be). It was a nice event to visit and to be reunited with the Hasselblad CFV-50c again. I already have posted a review a couple of weeks a go. You can read the review blog of the Hasselblad CVF-50c HERE.
Here are some of the pictures I took this weekend. A lot of them where made handheld at ISO 1600. Which was a challenge, shooting hand held with the 500C/M at 2.8 or 4. Don't forget that the depth-of-field of medium format camera's is a lot smaller then with full frame of crop sensor camera's! And the 50 megapixel resolution is very unforgiving, every mistake you make you will get back! So to be honest it isn't my best work. I rather shoot in the studio or a more controlled environment, but the Hasselblad CFV-50c did a great job!
oh, did I by the wat told you all already about the major price drop? The Hasselblad CFV-50c is now available for €7.900 (excl. VAT)!
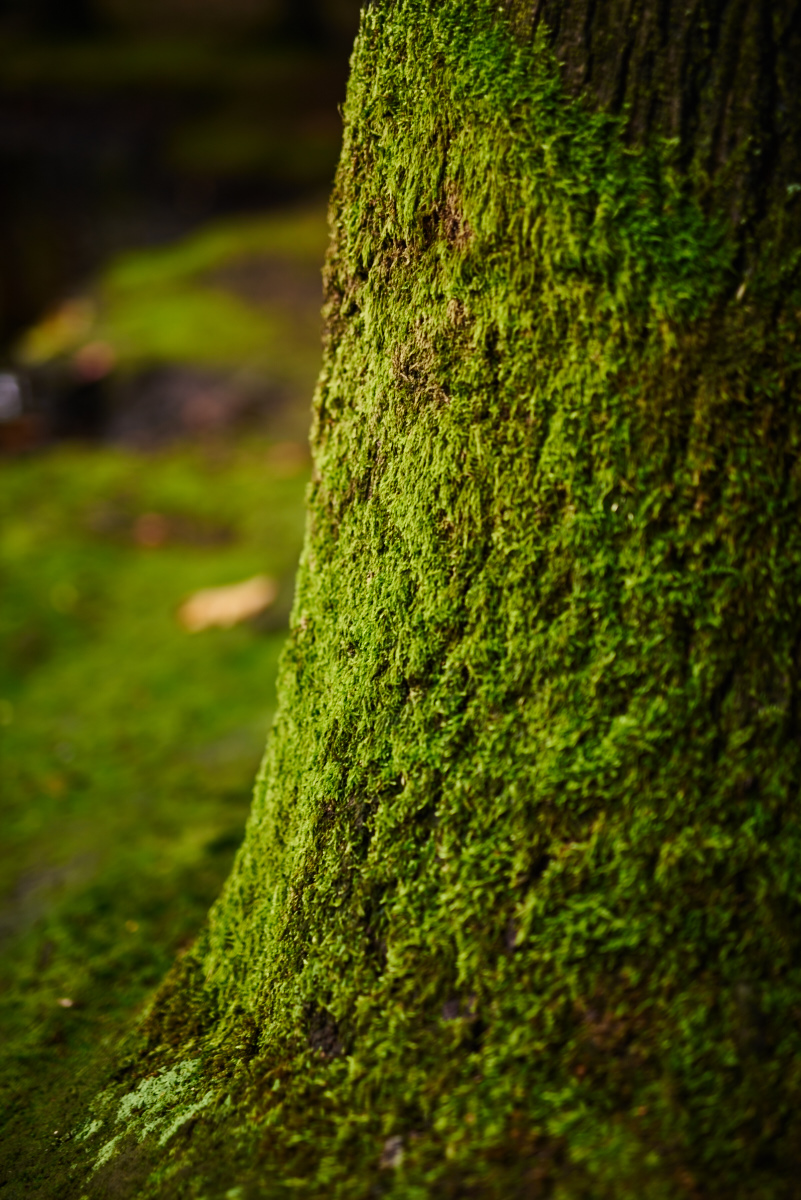
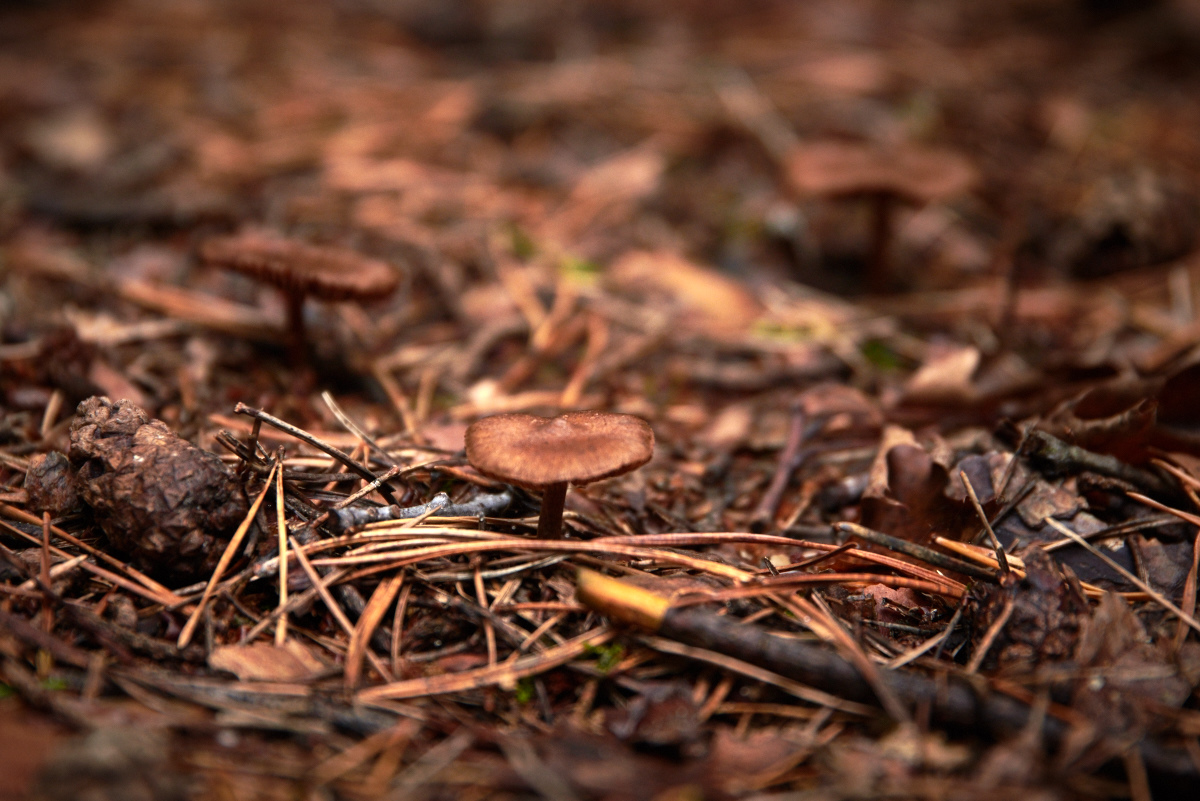
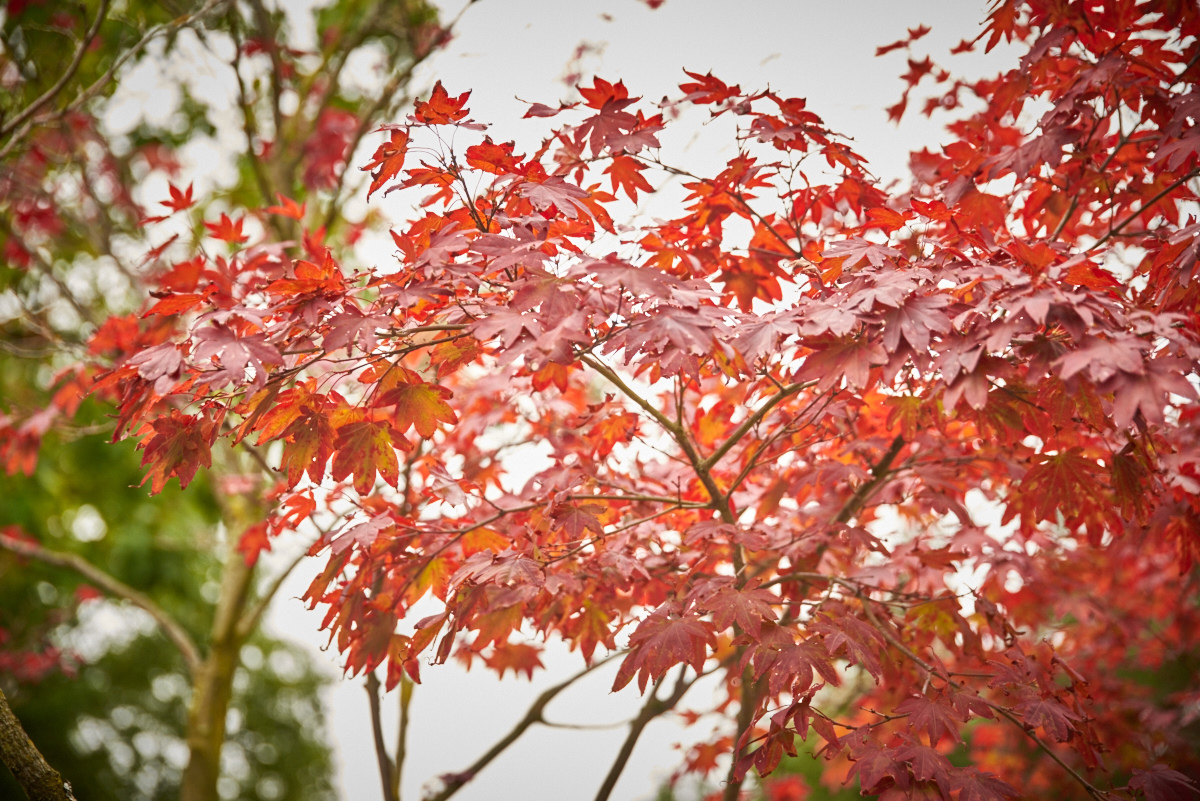
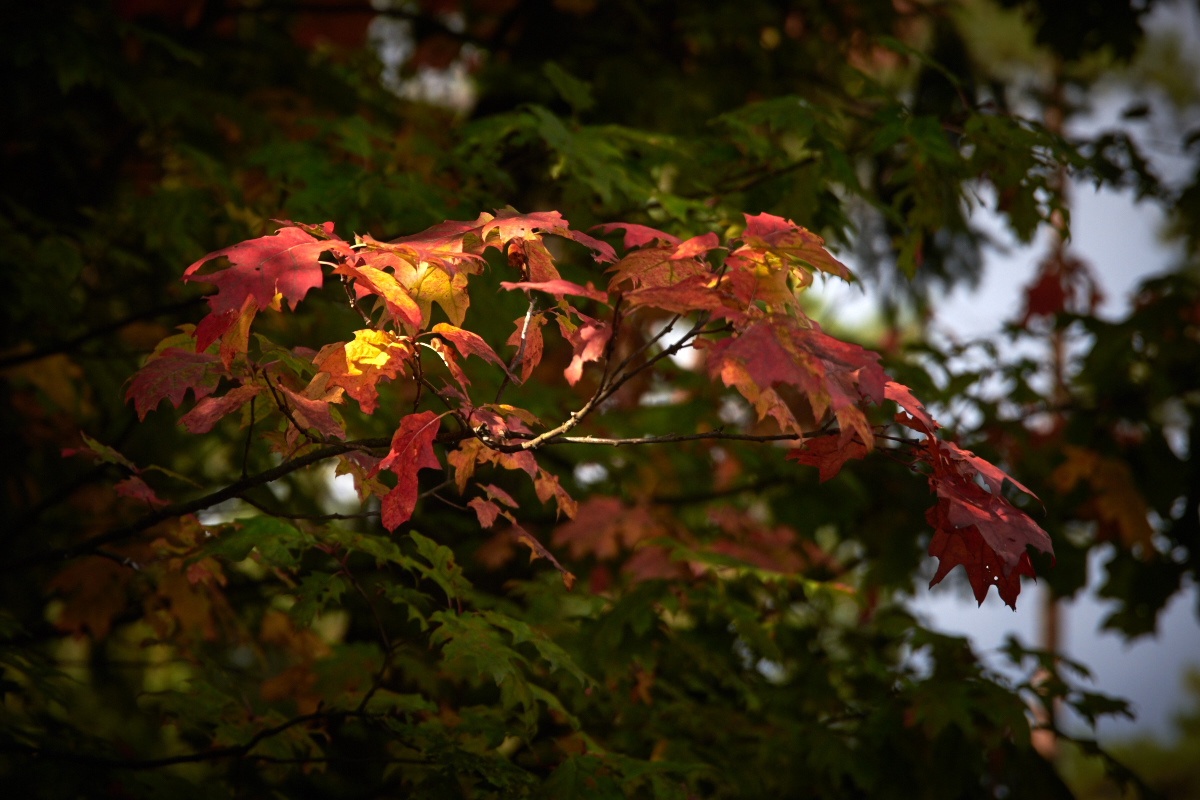
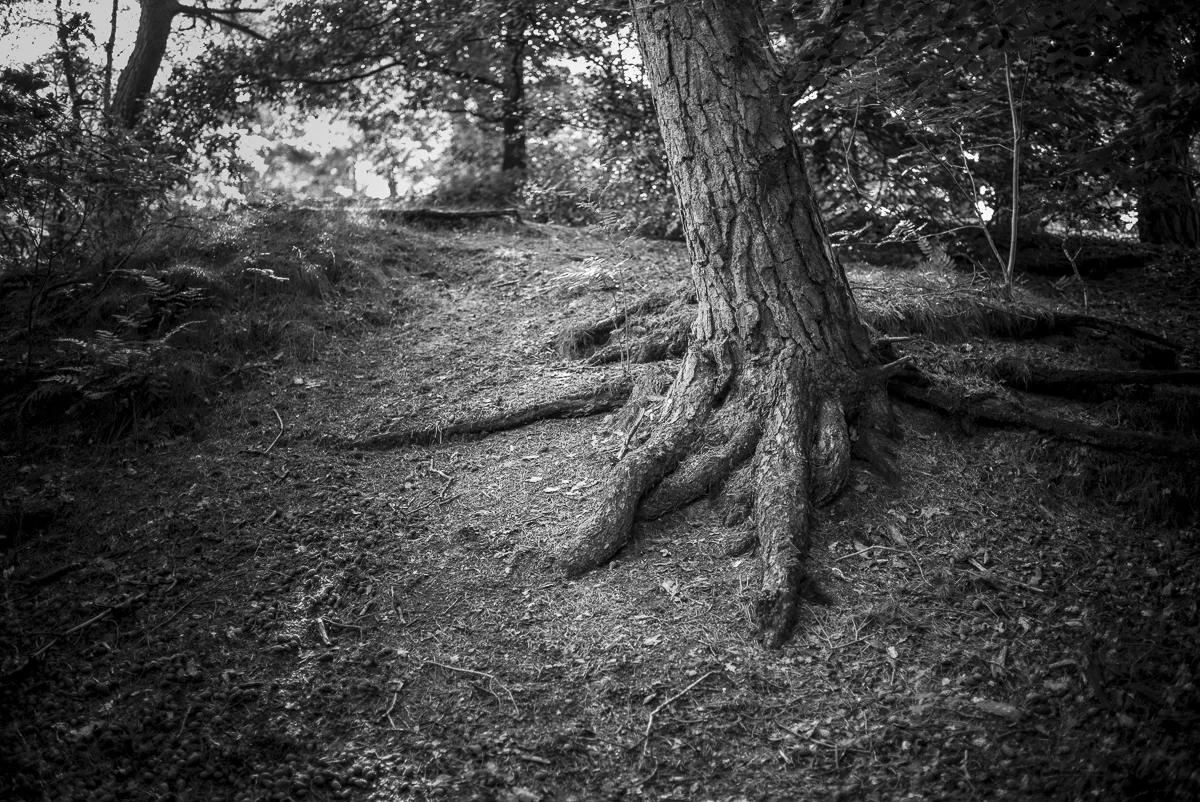
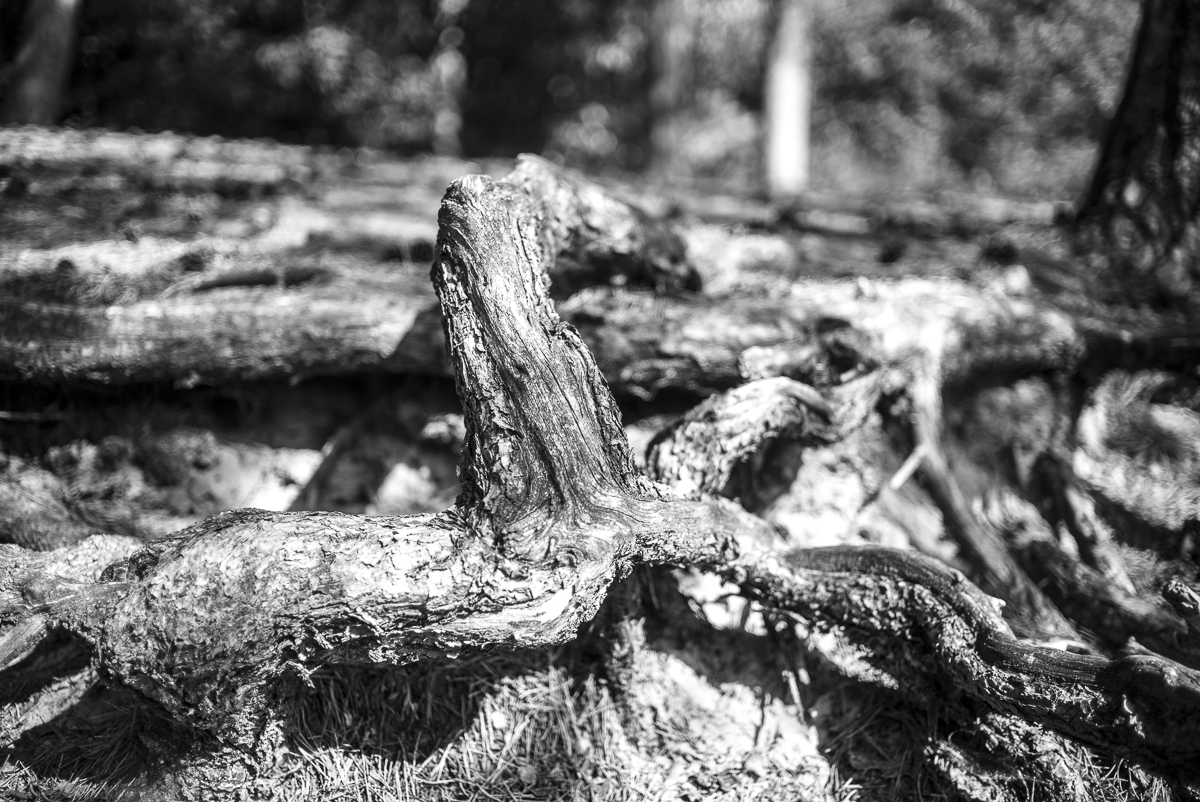
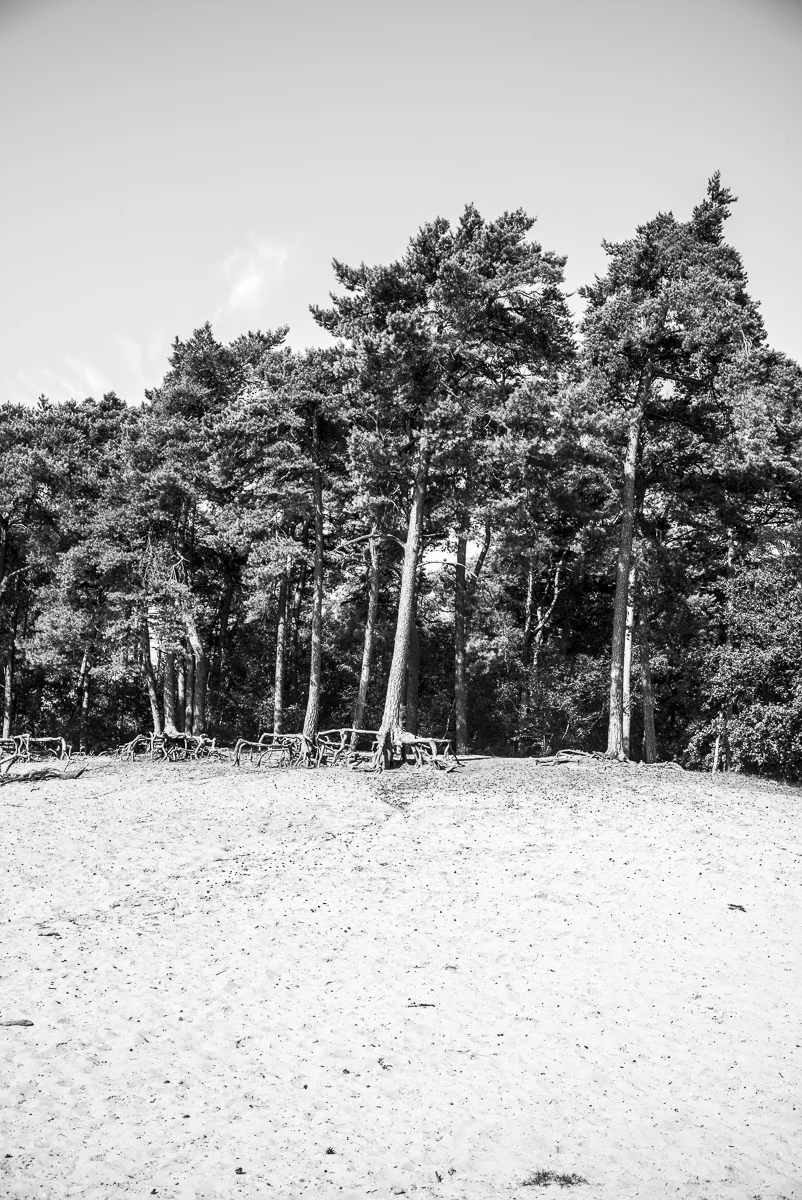
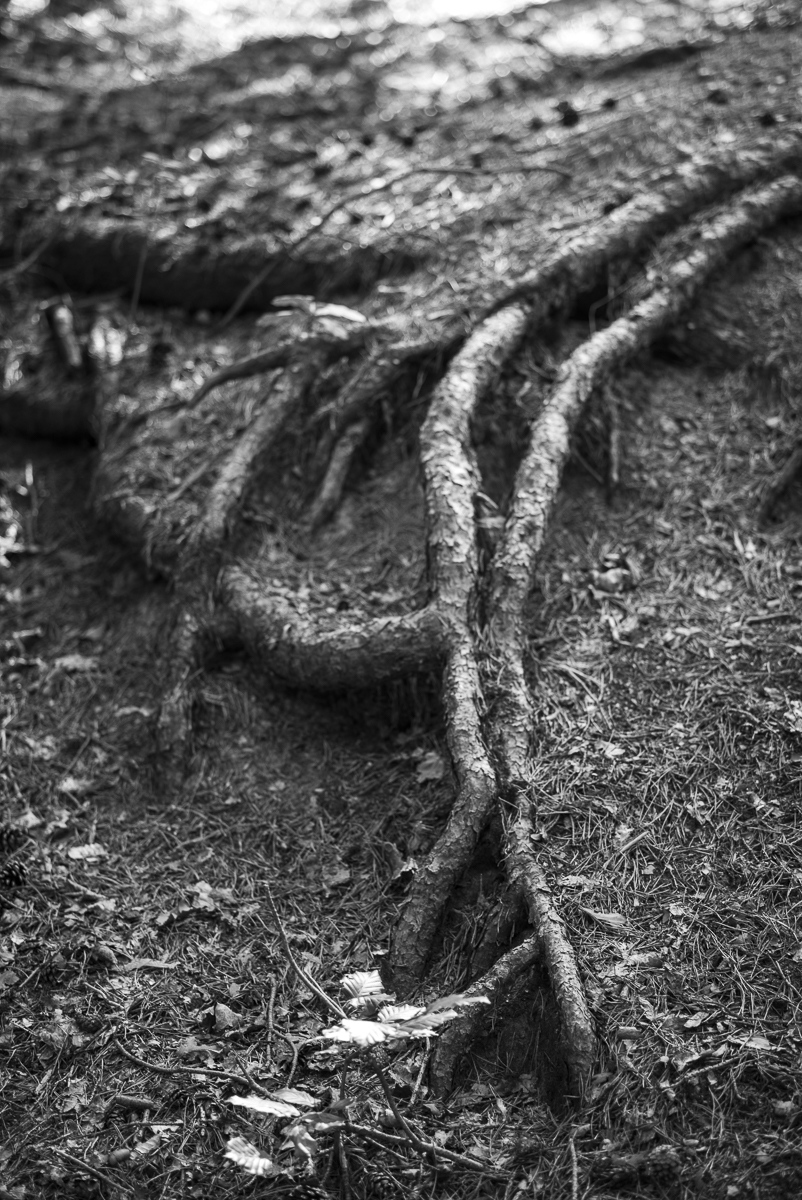
Autumn Leaves
Hi All,
As you might have noticed, it is autumn! The time of year to go out in to the forrest and shoot some beautiful peaces of nature. As you might know I recently discovered the pleasure of nature photography. And NO I will not be a fulltime nature photographer, but I just love it as a way of relaxation and getting out of the studio and shoot without any pressure!
Here are some shots I made last week. All are shot with the Sigma 24-105 f4 Art and the Nikon D610. And for anybody who think they need 2.0 or wider apertures for a small depth of field, take a look at these! It was hard getting the things in focus, so i even went to f5.6 and 8!


Ariadne at Home on the vtwonen&design exhibition
Next week it is time again for the vtwonen&design exhibition. For Ariadne at Home I have made this teaser video!
Before they pass away the Book
introduction
For the people who missed out on this project let's give em a small introduction Before they pass away is a project by (ex-)commercial photographer Jimmy Nelson. When the big budget jobs got smaller and smaller, he got the idea for this personal project. He went to all corners off the globe shooting portraits of some of the last real old tribes which still live like they do for centuries.
Last week I finally got my own copy of the book. It toke me a while before deciding if I would buy it or not. Because it is a little bit expensive at a price of €128,-.
The Book

The book is a really nice thick book. The print quality is beautiful. Every chapter starts with a introduction to the tribe, where they live and what makes them special. After that there is a series off really stunning portraits.
Take also in mind the most of the pictures are taken with an old 8x10 camera. Which has the biggest advantage that it always works also without any power. All tough also keep in mind he also used a Nikon D3.
Behind the scenes
Here are a shot documentary about the shoot with one of the tribes
And here is a nice video of Jimmy talking about the project:
The verdict
Before they pass away is a must have for every photographer and house hold. Yes, it is a bit expensive. But it is one of the most beautiful photobooks I have on my shelf. You can read about all the tribes or just enjoy the photographs.
I have also been to the exhibition in the Leidse Museum voor Volkenkunde, and I can also recommend to visit the exhibition if it is in a town near you!
West-Friesland Plat promoshoot
For the people who don't know, beside a photographer and interactive content creator I also play in a small comedy group called West-Friesland plat. With West-Friesland plat we gig in Noord-holland with humor and songs in the local dialect.
Wednesday I shot the new promotional photo's in the studio. And also had to get on the photo myself, I must say, it was a strange experience being on the other side of the camera. But also one I can recommend to every other photographer to do!

For the tech-guys All photo's where taken with the Nikon D610 and Sigma 24-105 Art lens. For lighting I used one Elinchrom ELC with the Rotalux 150 Indirect deep octa and a big piece of styrofoam as a fill board
Workshop
If you also want to learn how to make great portraits, 19 December I will be giving another workshop Basis studio portrait photography. Click here for more information
IBC 2015
Today I visited the IBC in the RAI Amsterdam. For the people who don;t know what the IBC is, it is International Broadcasting Conference. So you can gat everything from cables to camera's to software to satellite trucks and everything you nee for video or starting your own TV network!
Every 2 year I like to visit the exhibition. And to be honest there wasn't a lot of NEW stuff I was exited about for the things I do. There where a lot of Chinees manufacturers with really sad looking people in their stands looking at there smart phone. On the whole 13 hall exhibition received a total of three goof mornings/good days! So exhibition people, if you want to sell, speak to people and at least try to look friendly/open!
My Headlines:
For me there where a few things I want to talk about:
Atomos
Atomos had a great booth. But that was not the greatest thing. Because that was the MASSIVE price drop they announced. The Atoms Ninja Blade wil drop form around €1000,- to €495 excl. VAT. And that is something great. I always liked the idea of the Atoms gear but is was just a little bit to expensive for the amount of video work I do. But at this price point it is justifiable to buy one! So I just have to wait a little until the price in the retails stores a dropped and then I will order one!
For your information. Almost all prices dropped, so also of their the products.
Pipeline reporter kit
This was also a product which caught my eye. The Pipeline reporter kit. It is a small kit of two 30cm continuos light strips. The great thing i that it isn't LED but Phosphor based light. It gives a great soft light and comes with different temparatures of light. The kit is designed for reporters and vloggers to use as lighting. But I also really want to try it out for portrait and product photography. So I spoken to the sales guys and I am getting a test kit so later I will be back with a review blog!
Click here to go the the website
That where my highlights of the IBC show. Off course if you are totally in to video and visited the IBC you will have seen way more new stuff. But for me these where the things that where my favorites to mention about!
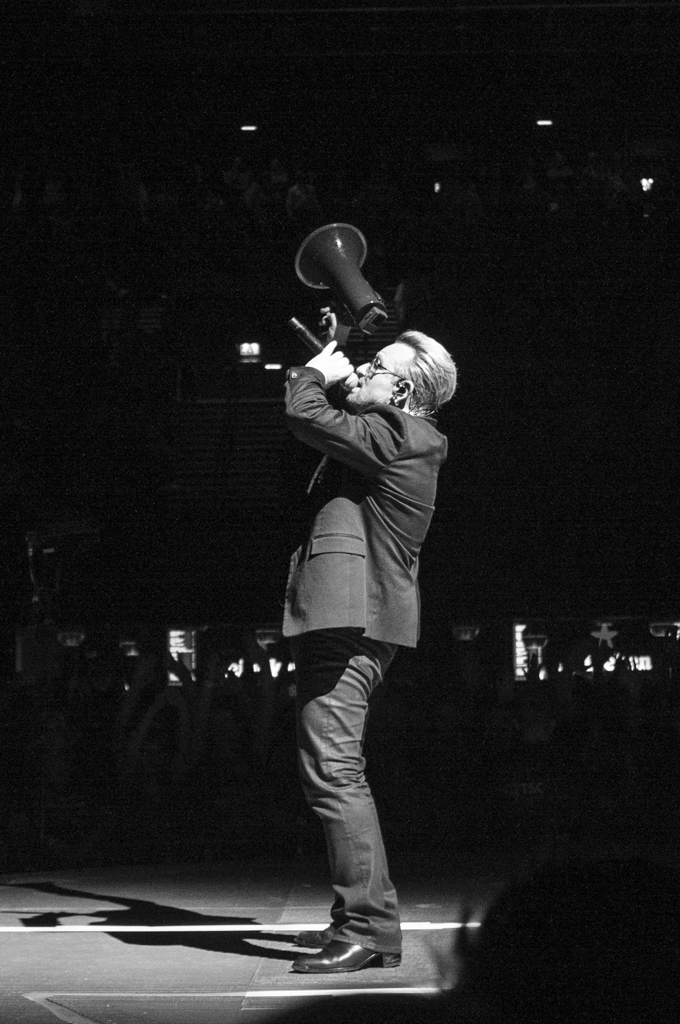
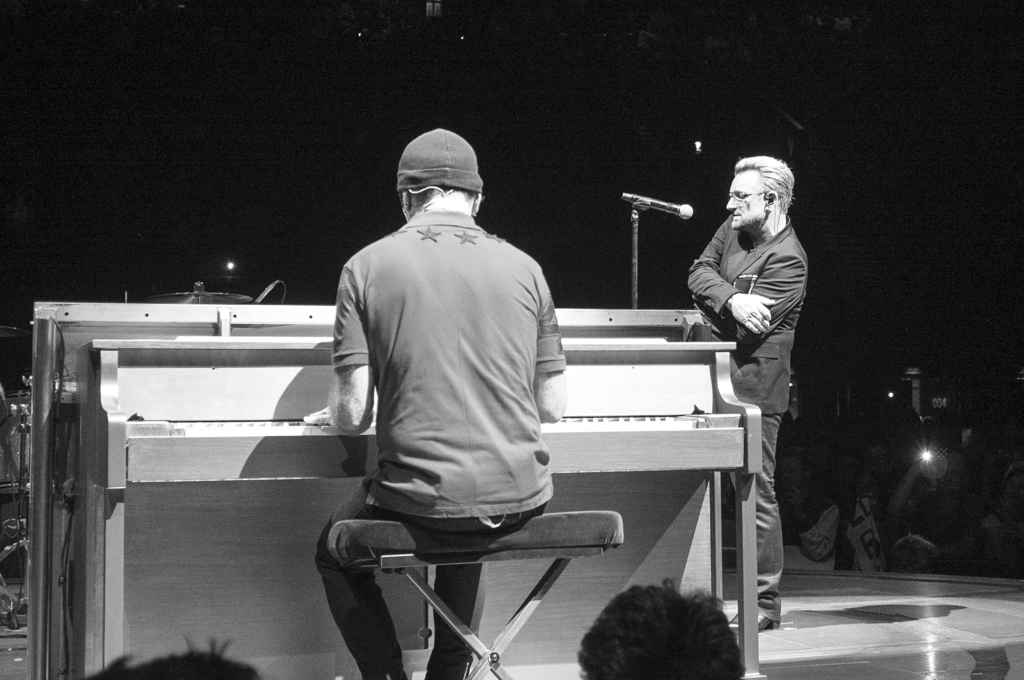
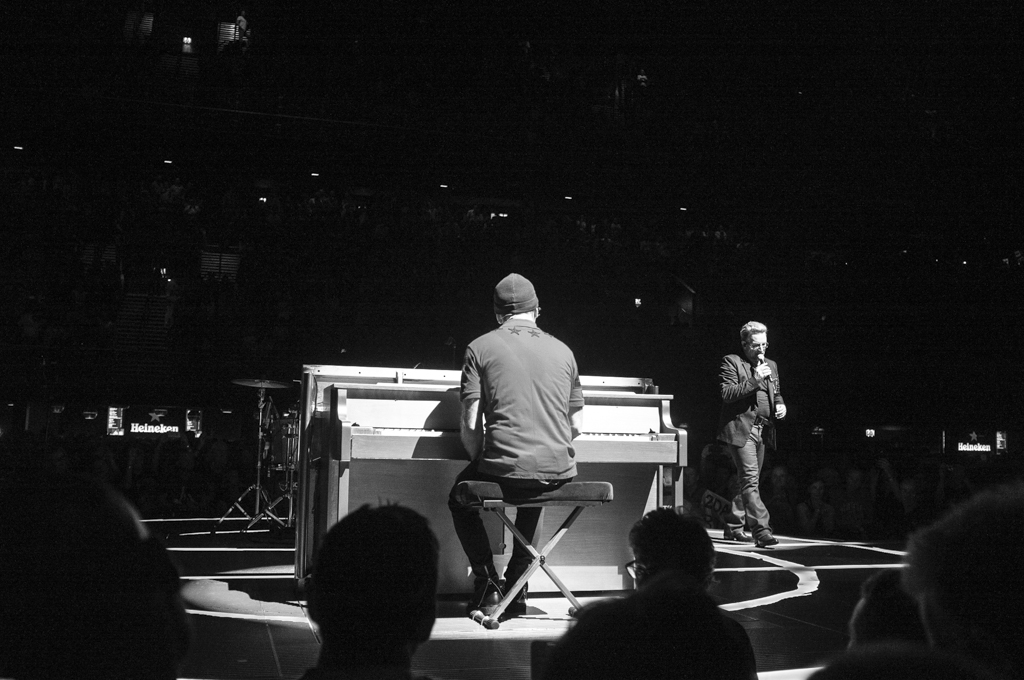
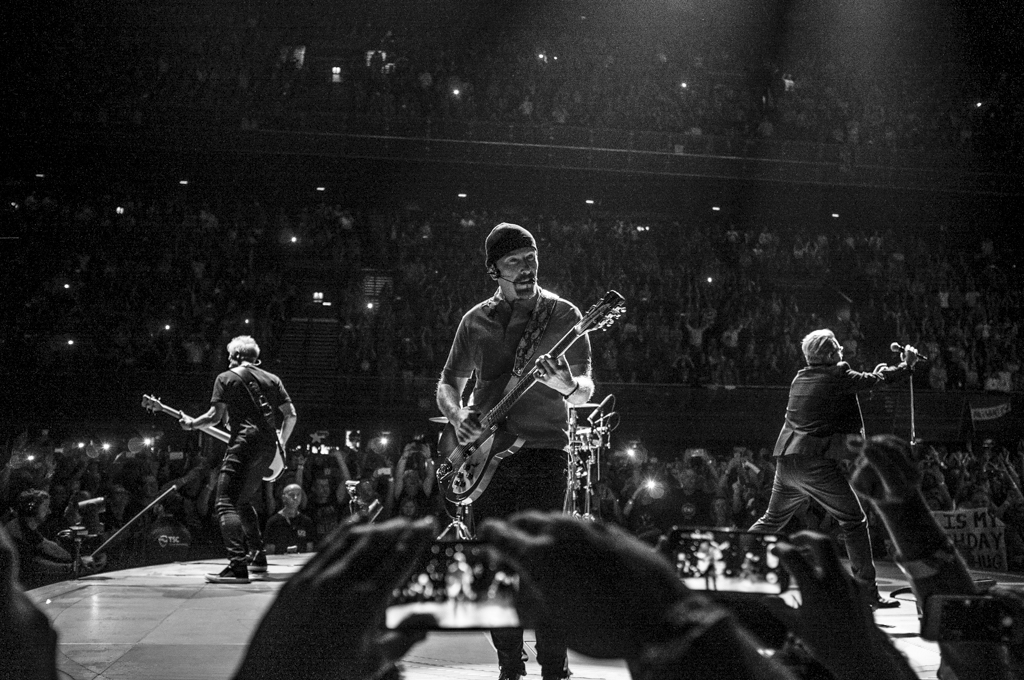
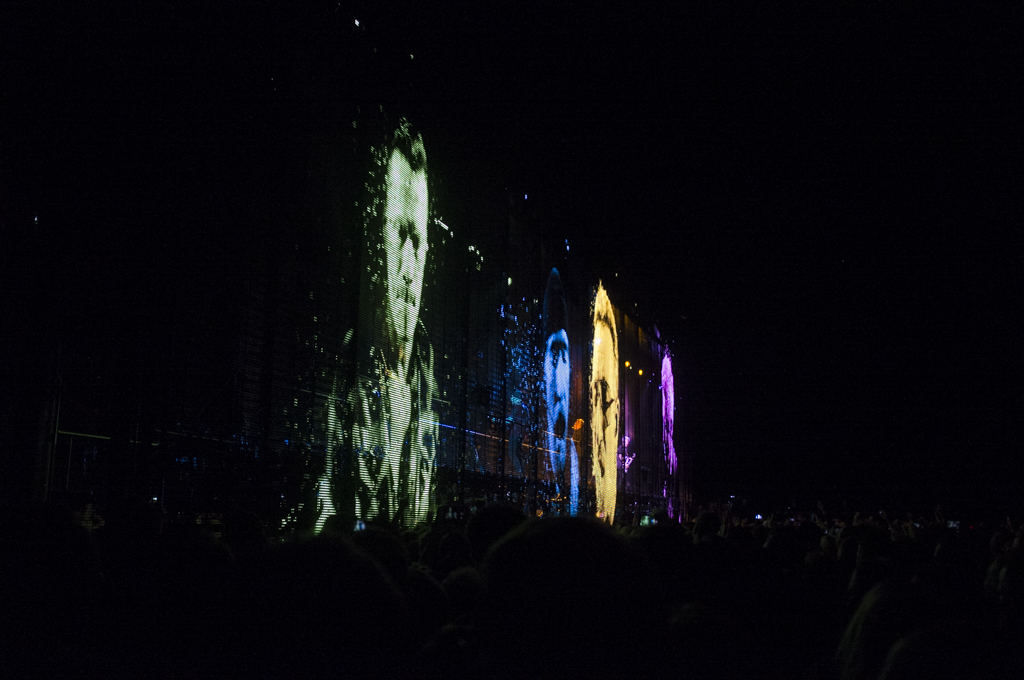
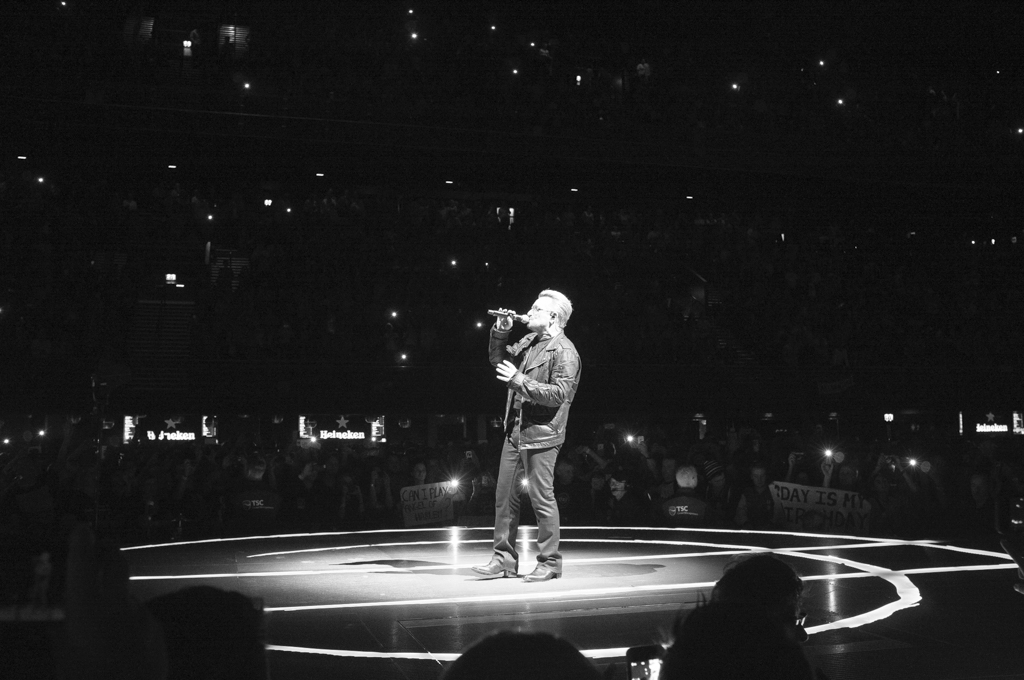
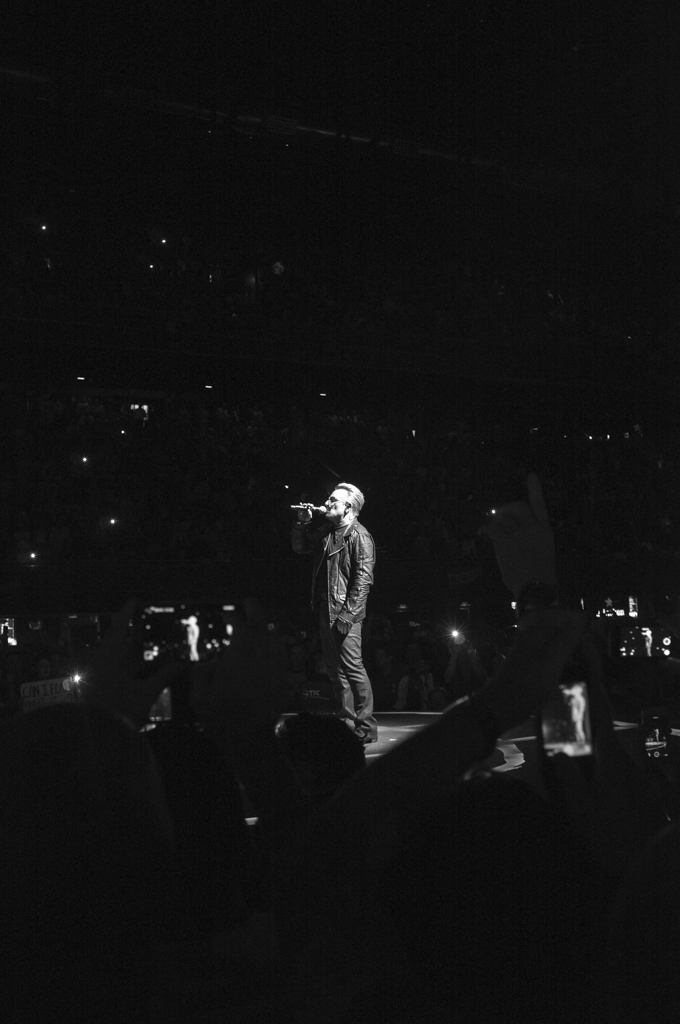
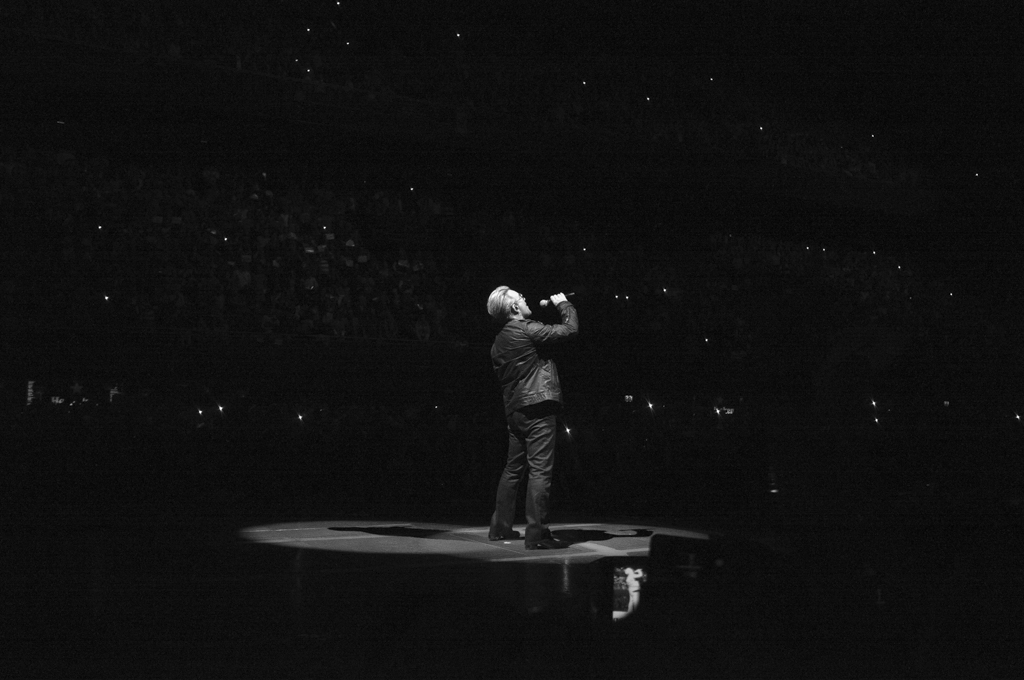
Shooting U2 Without DSLR
I have been to the U2 concert in the Ziggo Dome last Tuesday. Since I had no accreditation I couldn't breng a DSLR or big camera, So I took my small and trusty Fuji X100. And I must say that little monster performed really well! I had a nice spot near the B-stage with only a 2 or 3 (large)people in front of my, So it was holding up the camera and hope for the best. And I must say it was almost a better spot then the spot that was for the press photographers.
I always work in manual mode during concerts. This because of the chancing light and the dark clothing. If I set it manual I know exactly how to set the exposure.

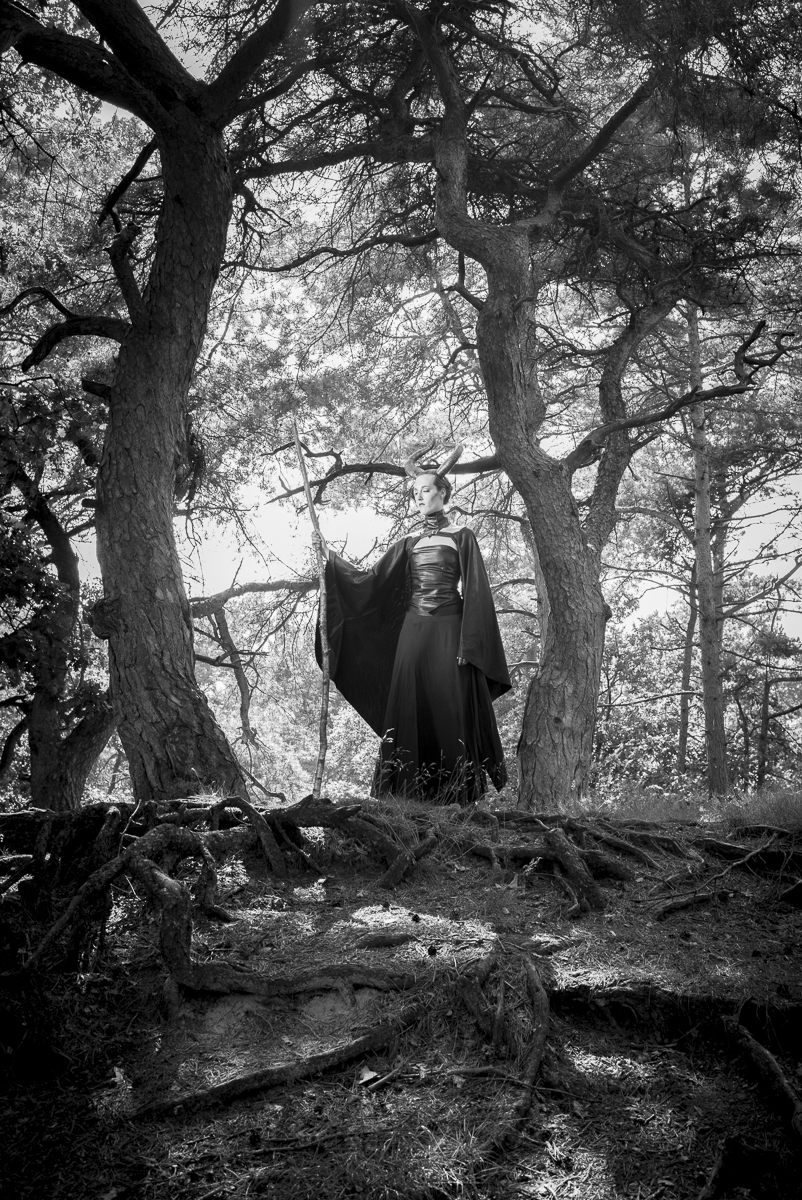
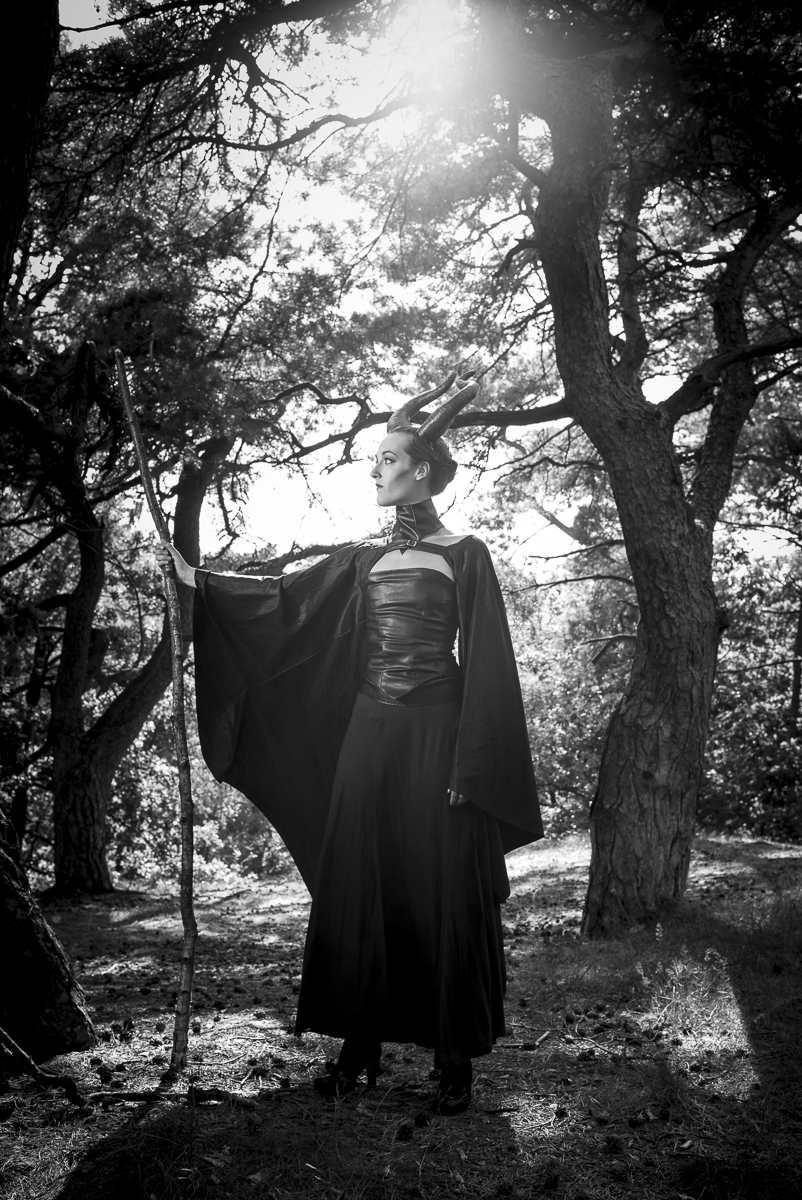
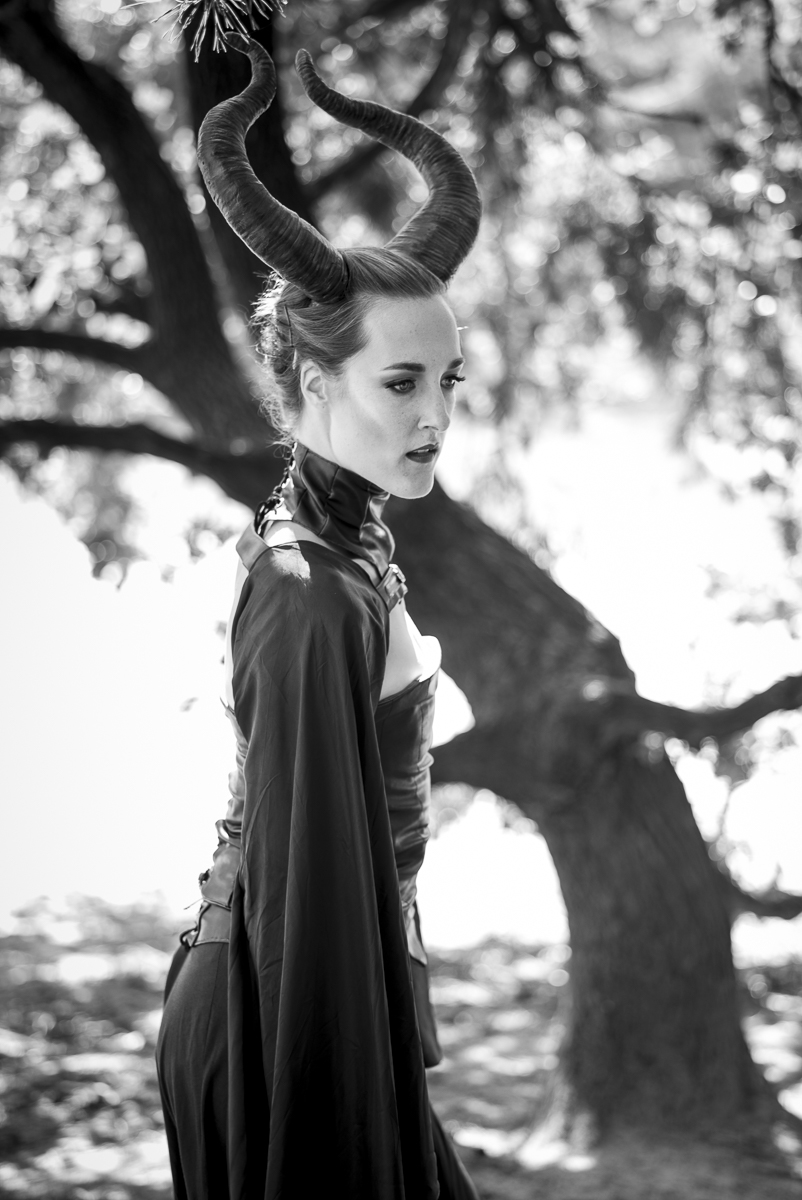
Busy!
Hi,
I am so Sorry, I didn't had time for the monday blog! I was at the recording studio all day rehearsing songs for the new theater season. But today I had time to finish the final photo's from the Photo Fun Day! Here is the colour version of the Maleficent shot. Shot with the Nikon D800 and Sigma 50mm 1.4 Art with a 3 stop ND-FIlter.

For the people who missed it, I now have a store where you can but exclusive art prints from my work. All work will be printed by me and signed! Click here for more information
There are also new workshops planned. Click here for more information
Friday there will be another blog again!
Belle shoot
Hi all,
Currently I am working on a series of personal work called "Ferry Tales". I am going to shoot a couple of friends as there favorite fairy tale person. And not only Disney related!
As a start I did a Belle shoot a couple of months a go. Here is the Behind the scenes timelapse of the whole shoot.
As you can see, the lighting is really simple. Mainly just one big Elinchrom Rotalux 150 indirect deep octa. Sometimes I added the strip with a grid for an accent light.

You can but a limited edition art print in the shop now, click here for more information.
The Dark side of the reflector
Hi all,

Because I noticed I have a lot of international visitors to my blogs I am going back to full english on the blogs! This week I want to show a little tip on using a 5-in-1 reflector while working with natural Light.
Last week I was working with the Leica M Monochrom on a shoot. It was around 5 o'clock and the sun was still harsh. I was photographing a model in a three, but I had some hard lighting to work with. The dynamic range was a challenge. The models face was in the shade of the leaves but on the back of the model I had some very hard sunlight. Resulting in an underexposed model or overexposed accents on the back of the model. To even out the dynamic range I tried two approaches

Leica M Monochrom met Leica Summarit 75mm 2.4. Iso 320 / f4,0 / 1/500 (un-editted)
Silver reflector

The first thing I tried was to bounce back light in the front of the model with a silver reflector. With bouncing back light the dynamic range was getting smaller. This way I could keep a little more detail in he background. But because the reflector couldn’t catch enough light, I still couldn’t close down the gap in the dynamic rang enough for my taste.

Leica M Monochrom met Leica Summarit 75mm 2.4. Iso 320 / f3,4 / 1/350 (un-editted)
The Black side of the reflector

To really close down the gap in the dynamic range I decided to put the reflector on the other side. And with the blackside facing the model blocking the sun. This way no direct sunlight was hitting the model. Resulting in an even lighting of the model. The background was blowing out a little bit now, but not to much that is was distracting. It even helped focussing more in the model.

Leica M Monochrom, Summarit 75mm 2.4 op 1/125 / f4.8 / iso 320
Working with the Leica M Monochrom.
Last weekend I had the opportunity to work with the Leica M Monochrom together with the Summilux 35mm 1.4 asph and Summarit 75mm 2.4. Last year I tested the Leica M (type 240) with the Leica Summicron 35 and 50mm f2., you can read this blog here. Now it was time to test the slightly more expensive black and white only version.
Look and feel
The look and feel of the camera is like all Leica M models. Sleek, sturdy and robust, The Leica M camera’s are build like a tank! Although they don’t look ergonomically, they are really easy to hold and work with. All the buttons you need are on it and nothing you don’t. The Leica M camera’s are pretty bold. But the things they do are great and working is easy!


The packaging
This time I also got the whole packaging experience with the camera. The Packaging of the Leica M Monochrome is what packaging for an expensive camera should be! Although it starts with a simple thin cardboard grey box, it is like a Russian Matroeska. In the great box is another silver grey box, which folds open really nicely. In that box is the real packaging. The top part has a box holding the camera and under that is a door withs gives acces to two small drawers with one holding the manual and warranty papers and the other all the cables, charger and battery.


Some people will say, why spend so much on packaging, better make the camera cheaper. Well, I disagree! Yes you could make it cheaper, but this will only make it roughly 50 bucks cheaper, and on the amount you spend on this camera you want an experience! And this gives you the feel that what you payed is worth it. If you buy a Mercedes you also don’t want the dealer just give you the keys and please leave asap. You want the whole sha-bang!
The use of the camera
In use the Leica M camera’s are (as said before) really easy. The Leica M Monochrom is no exception on this. The body has only a few buttons. Let’s start on the top. The top of the Leica M Monochrome had the on/of switch with the shutter button in the middle of it and the shutter speed dial. With the on/off switch you can choose between, S(ingle), C(ontinuos) and timer mode. Also on the top is a small silver-gray button with the M beside it for movie mode.
On the back is the LCD-screen and on the left the button for: Live view, Playback, Delete, ISO, Menu and Set. And on the right side the D-Pad with the info button. Beside the thumb grip is a small wheel for the exposure compensation and use in the menu.
All in all: just all you need.
For the people new with the Leica M system, you set the aperture with the ring on the lens and the focus is manual!
In the menu are all the things you can set. It also has 3 different black and white toning! Sepia, Selenium and Blue as an extra option!
Working with the camera
Working with this camera was a pleasure. I really loved it. It gave me the feel/love for photography like I had starting with the Fuji X100, but without the quirkiness!
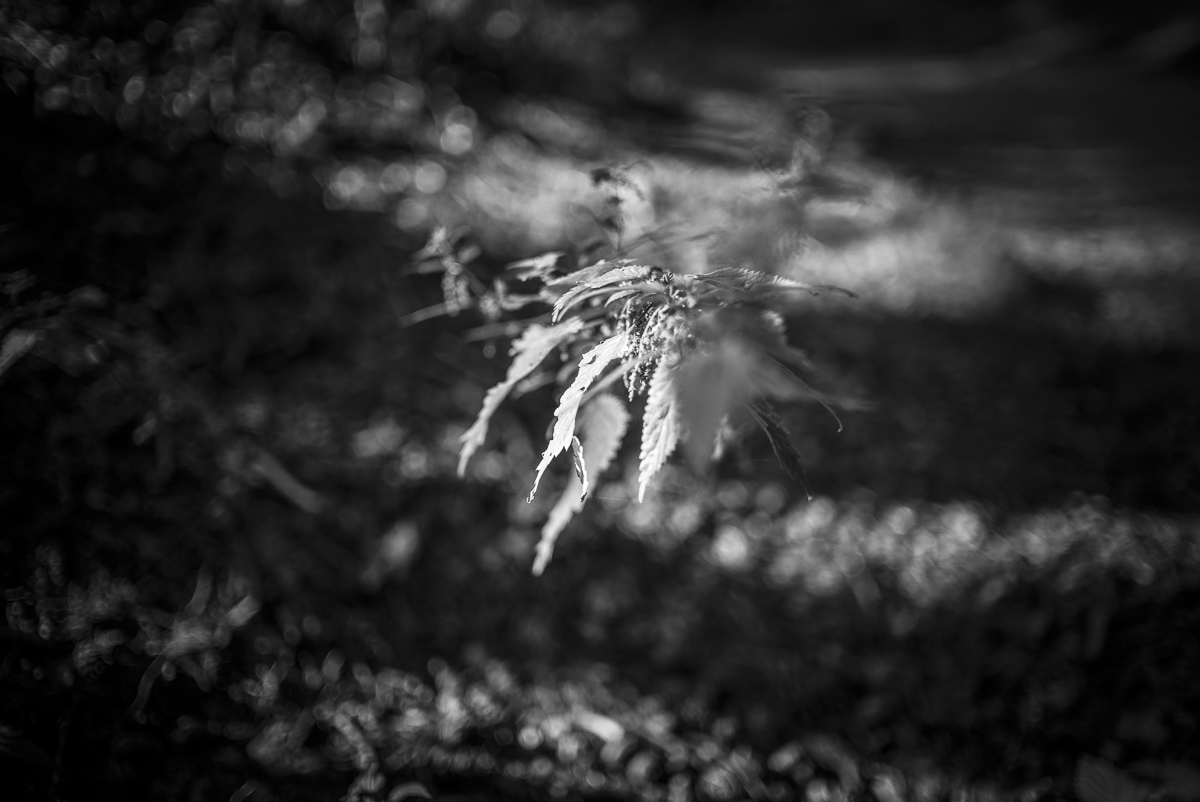
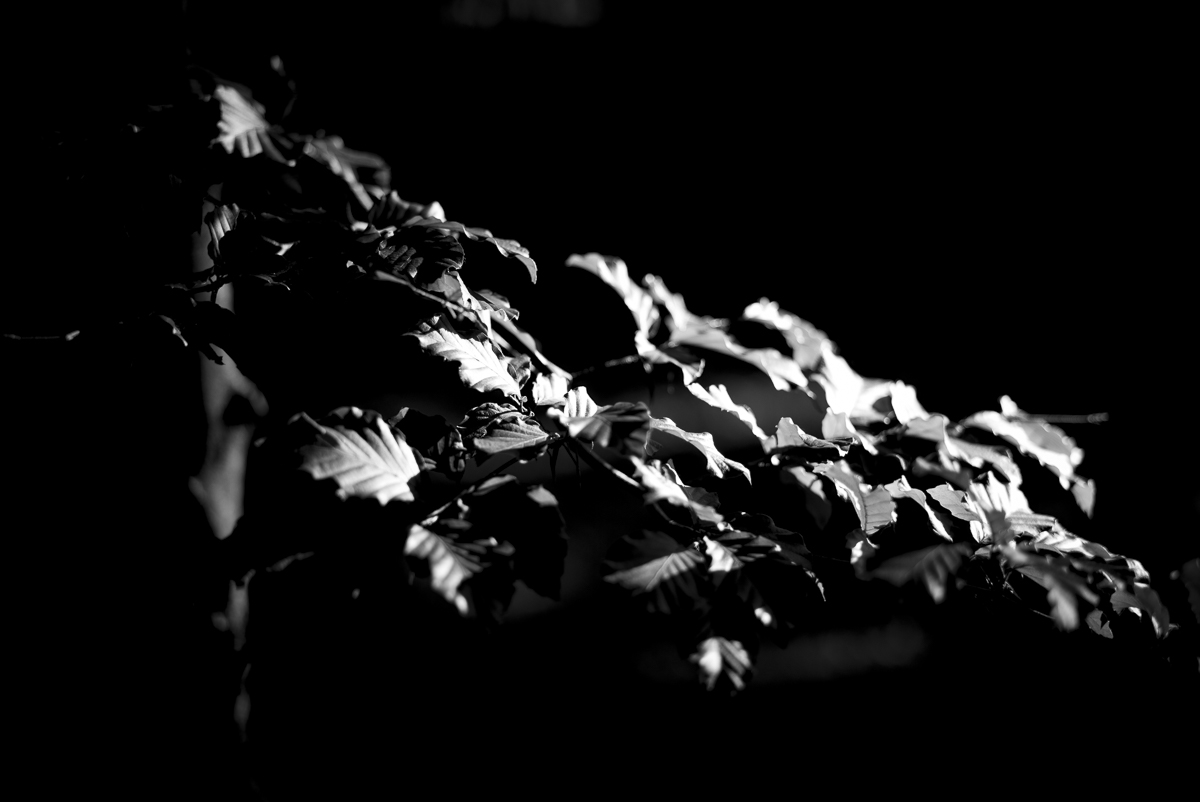
For working with a black and white only camera you need a different mindset! Because with the absence off colour, other things get more important. Now it is about subjet, structure, light, contrast and focus. This camera made me enjoy shooting nature, something I never had done before. Just walking through the forest with some music in my ears searching for structure and little pools of light was almost a zen like experience!
Speaking of focus, the Leica M lenses and focus system are a joy to work with. Even with wider aperture it was easy to get sharp images. The light meter was also easy to use. But mainly I work in Aperture priority mode by setting the speed dial on A.


The Shoot
This weekend I organized the Photo Fun Day with a couple of friends (photographers, MUA and models). The target for the day was shooting nice pictures and have fun with each other. Just a relaxed day to shoot some nice work and no pressure
I loved the camera during the day. It was great for the behind the scenes shots because of the quietness, people don’t notice you a lot working with the camera. And during the production it worked great! We did some shots with flash near the house just using the wall as a background.
For light we used the Elinchrom ELB and LiteMotiv 120 sofbox.
The only thing I don’t like about the Leica M Monochrom for studio use is that you can’t go below ISO320. This means you always have to use small aperture values. This means that you can’t work easily with smaller depth of fields using flash and balancing natural light. Also during the shots in the forrest this gave some issues and challenges.


Later during the shoots I switched back to using natural light only and the camera was killing it! This camera is really build for use with natural light. Or in the studio with studio light only.


Another dislike is the writing speed to the card. It took a while for the camera to write from the buffer to the card. Especially when shooting with small burst. But once you know this you can keep it in mind. It isn’t a camera build for speed.
(Post edit: I got the advice from that faster 90mb/s cards can help)
If you look at the Histogram keep in mind that it shows the histogram of the RAW DNG file and not the preview jpeg. So if you blow out your highlight, it is gone!


The Summilux 35mm 1.4 asph
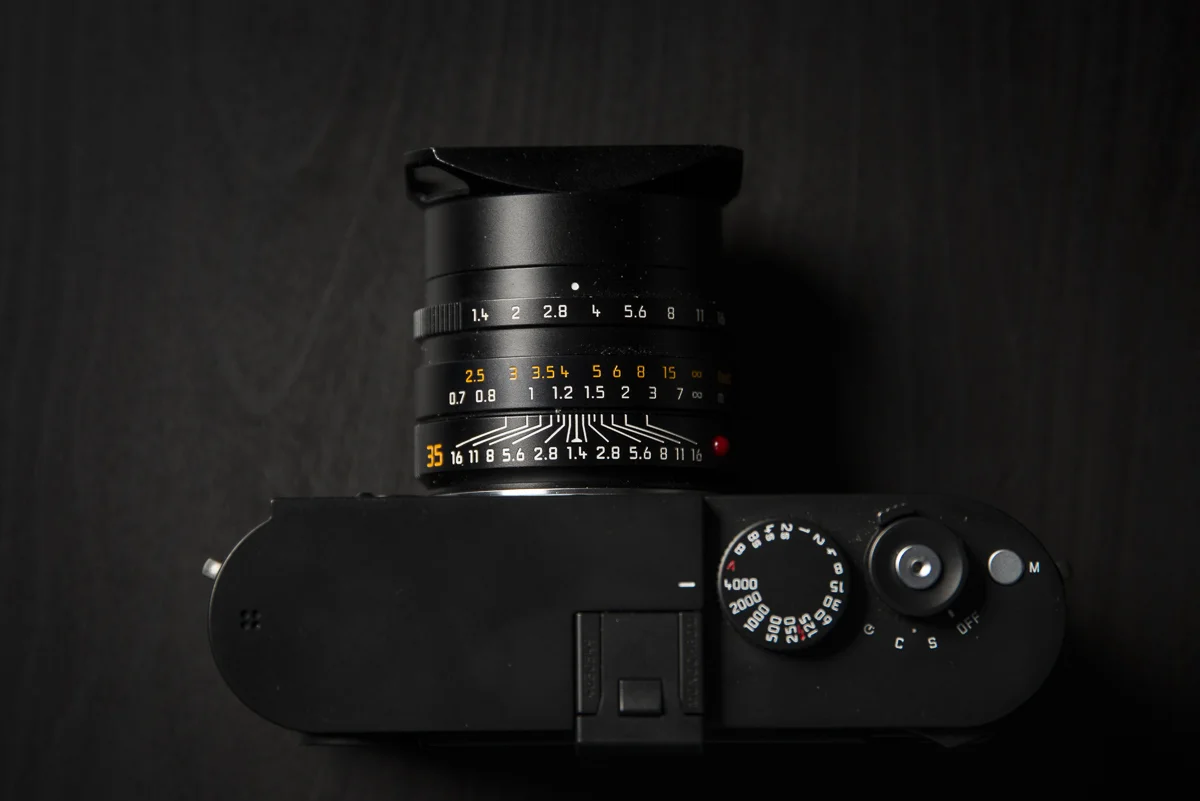
The Leica Summilux 35mm 1.4 asph is THE lens for the Leica M system that everybody should buy or start with! I already loved and got used with the 35mm field of view with my Fuji X100. It is for me thefield of view for allround shooting. You can shoot with on the street, landscapes, portraits, wedding, reportage, fashion and everything else. And the Leica Summilux 35mm 1.4 asph is IMHO the lens for this job. It is wide enough to capture a scene, but close enough to not get to much in the scene you don’t want. Low on distortion.
The bokeh is the best I have ever seen! The details are sharp, the transition is butter smooth and the look is killer. Don’t know anything else to say beside I love this lens!!!


The Summarit 75mm 2.4
The Summarit 75mm 2.4 lens was the surprise lens for me. It is a new lens in the Leica range and is targeted as the “Budget” portrait lens. To be honest, I was a little bit skeptical with it. It has a 2.4 aperture and the 75mm focal length. But I was very pleasantly surprised with it. It was sharp, great bokeh, smooth focussing, nice depth-of-field and had a nice compression!


Although it has a 2,4 aperture it has a small enough depth of field for portraits to create a nice out of focus background and large enough to keep the important thing in focus. Especially while focussing manually. Take in mind also that in the studio I hardly never photograph below f5.6. So a really wide aperture isn’t needed.


It think that if you start with Leica and you want a portrait lens, this is the go-to lens and it is definitely on my list!
Working in post
After the shoot I imported everything in Lightroom CC. I first tried Capture One Pro 8 but I noticed it had problems reading some of the DNG files.
In Lightroom the images look a bit flat. But Rob from Transcontinental warned me for this. The DNG shows you the whole dynamic range. So you need to adjust it in LR. But with a few simple tweaks with the blacks, whites, shadows, highlights and clarity sliders the images turned into great contrastfull black and white images.
Even being digital they have a great analog feel, especially when printed. The prints from the Leica M Monochrom could easily been made years a go. But with all the advantages of working digital!
High ISO
Because the days where sunny I didn’t had a lot of chance to shoot en test the camera on high ISO. But the few I shot with it on higher ISO’s where great. No noise, just nice fine grain!

The Conclusion.
The Leica M Monochrom is one of the best camera’s I ever used! Together with the lenses they create some of the nicest photo’s I made this year! It also brought back some joy in photography and let me explore new kinds of photography. Many of this has nothing to do with the technical aspects of the Leica M Monochrom. This camera gave me a new way of thinking and working. It pushes you to higher levels with your photography. Because the camera doesn’t correct all your mistakes with auto-focus, IS, d-lighting and other tricks the only one to blame for bad pictures is yourself. And because the camera gives really detailed photo’s you get those mistakes back, hard a little bit like when I was using the Hasselblad CFV-50c (read more about this here)
Off course there are a few things I would like to improve! The ability to shoot ISO100 natively would be great for really sunny days and studio work. The writing speed to the cards would also help. But beside that I don’t know.
For the people wandering which to get the Leica M of M Monochrom, this is the question to ask: Do you need colour? Personally I would love the Leica M Monochrom, but starting with Leica I would pick the Leica M (type240) to start, because I also do a lot of colour portraits for clients. If I would shoot black and white 95% of the time go straight to the Leica M Monochrom. For the clients who want colour, say you only work black and white. And they will only book you voor black and white anyway because you won’t post any colour work anymore in a long time after buying the Leica M monochrom.
For the people who think it is a way to expensive camera….. yes it is, but a handmade Rollce Royce is also a way to expensive compared to an cheaply mass made asian made car!
If you have any feedback or questions, please post them in de comment section below!


Print for sale
An exclusive selection of pictures are now on sale in the store in limited edition. Click here for more information
Guess the light: 2 Light Selfie
Hier is dan de uitleg van de foto! Tevens wordt dit een hoofdstuk voor in het boek, ben benieuwd naar jullie feedback! Mochten jullie wensen hebben om dingen uitgelegd te krijgen let me know dan neem ik het mee!
2 light selfie
introductie
Je kunt alles lezen over fotografie wat je wil, alle video’s kijken die je wil, maar je leert pas echt fotograferen en belichten in de praktijk en door te oefenen. Vaak vraag ik met workshops wel eens of mensen oefenen, en vaak hoor ik dan “nee” en “Ik heb niemand om op te oefenen”. Nou, mede voor deze mensen het volgende stukje, want je hebt altijd je zelf nog!
Het licht
Het maken van een zelf portret is altijd een uitdaging. Voor deze foto heb ik onder andere een statief gebruikt en handmatig focus. Om te zorgen dat ik steeds op het zelfde punt zat heb ik een stoel gebruikt als basis. Om te focussen had ik eerst een tas op de stoel gezet als focus punt opde plek waar ik ging zitten.
Voor de belichting wilde ik een type belichting gebruiken die je momenteel veel in advertenties en magazines ziet. Bestaande uit een hoofdlicht en een vul-/accentlicht van achter.
Als start begin ik altijd met een foto zonder flits om te kijken wat het aanwezige licht doet:

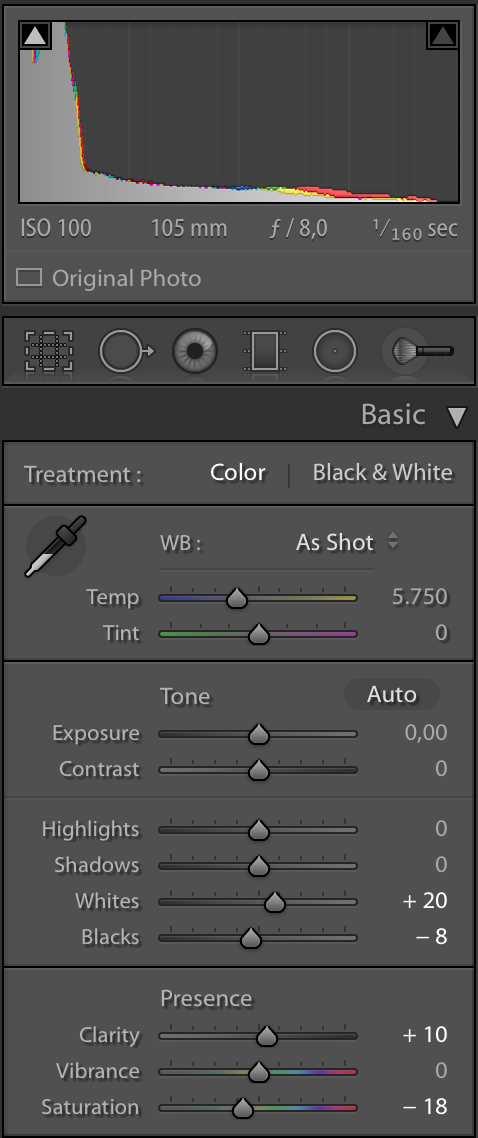
Camera instelling:
Camera: Nikon D610
Lens: Sigma 24-105 f4 art
Diafragma: f8
Sluitertijd: 1/160
Iso: 100
Brandpunt: 105mm
Witbalans: Bewolkt
Vervolgens heb ik het hoofdlicht geplaatst. Hiervoor heb ik gekozen voor een kleine softbox redelijk dicht bij mij zelf om zo zacht mogelijk licht te krijgen. De reden dat ik voor de softbox gekozen heb, is dat ik mijn hoofdlicht zoveel mogelijk wil sturen en niet gelijk te veel licht op de achtergrond wil.

De softbox staat vlak buiten het kader. De belichtingsstijl is de Rembrand-methode te herkennen aan het driehoekje licht onder het oog aan de donkere zijde.
Na het hoofdlicht geplaatst te hebben heb ik het accentlicht toegevoegd. Hiervoor heb ik de doorschijnende paraplu gekozen. Deze stond in een hoek van ongeveer 45 graden op mij gericht.

De reden dat ik voor de doorschijnende praraplu gegaan ben, is omdat ik de paraplu ook weer redelijk dicht op mij gericht wilde hebben. De paraplu geeft ook de achtergrond wat meer licht.
Let er op op met het accentlicht dat je deze niet te fel aanzet. Dit is een veelgemaakte fout waardoor het accentlicht het hoofdlicht gaat overnemen. Onthoud dat het oog altijd het eerste getrokken wordt naar het lichtste gedeelte in de foto. Dit moet het gezicht van de persoon zijn en niet zijn nek. Ik heb daarom het accentlicht ongeveer 1/3e stop onder het hoofdlicht uitgemeten.

Nabewerking
De nabewerking heb ik zo simpel mogelijk gehouden.
Stap 1:
Als eerste heb ik iets meer contrast toegevoegd door met de “Whites" en “Blacks” te schuiven. Dit heb ik op het oog gedaan naar een punt dat het voor mijn gevoel goed was. Persoonlijk let ik bijna nooit op histogrammen. Ik werk op een Eizo scherm en pas als ik ga printen kijk ik als laatste naar de Histogram om het laatste beetje contrast toe te voegen om het contrast goed te krijgen uit de printer vandaan.
Stap 2:
Om de foto iets meer character te geven heb ik een beetje “Clarity” toegevoegd. Let op met Clarity, voeg dit nooit te veel toe, zeker niet met vrouwen, het is namelijk desastreus voor de huid. Ook gaat je foto er snel onnatuurlijk en bijna HDR uit ziet. Dit kan voor een speciaal effect leuk zijn, maar pas hier verder mee op.
Tevens heb ik de “Saturation” schuif iets omlaag gehaald voor net dat beetje extra sfeer.
Stap 3:
Om de foto af te maken heb ik een licht vignette toegevoegd met de “Radial Filter” functie in Lightroom.

Stap 4:
Het viel me op dat er een naad in de muur liep, deze heb ik in fotoshop met de Healing-brush verwijderd.


Omdat helaas maar twee mensen hun antwoorden hebben gezet onder de blog laat ik ze toch alle twee winnen! Surya en Jeroen gefeliciteerd ik neem contact met jullie op voor een leuke prijs!
Mocht je deze blog en les leuk vinden hoor ik het graag! Dan ga ik op deze weg verder voor het boek!
Wil je al eerder dan het boek klaar is leren hoe je nog veel meer kunt doen met simpele belichtingen voor portretfotografie, schijfje dan nu in voor de workshop: Basis studio portret fotografie op 10 oktober.